A Titanic inspired wedding

Few things brighten our day as much as hearing that our paper has been featured in a blog {or magazine} that we absolutely adore. It's a moment of sheer childish giddiness and we want to put it on the metaphorical refrigerator for all to see!! Apparently, this blog is our refrigerator... It was such a joy working with some of our favorite DC based vendors on this Titanic inspired shoot that was recently featured on Elizabeth Anne Designs. Hop over and see the rest of this vintage gorgeousness! :)

CE_1.jpg
CE_2.jpg

*Photos courtesy of Laura Ashbrook Photography

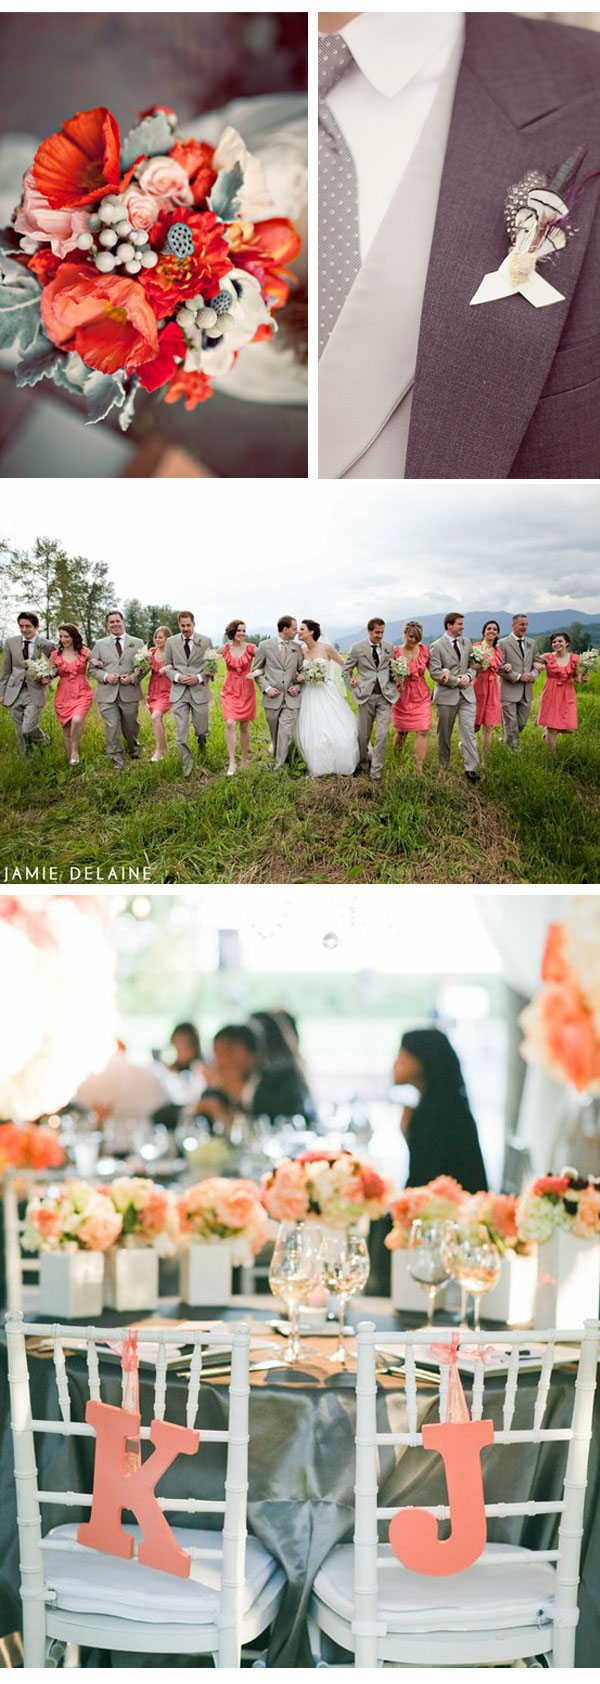
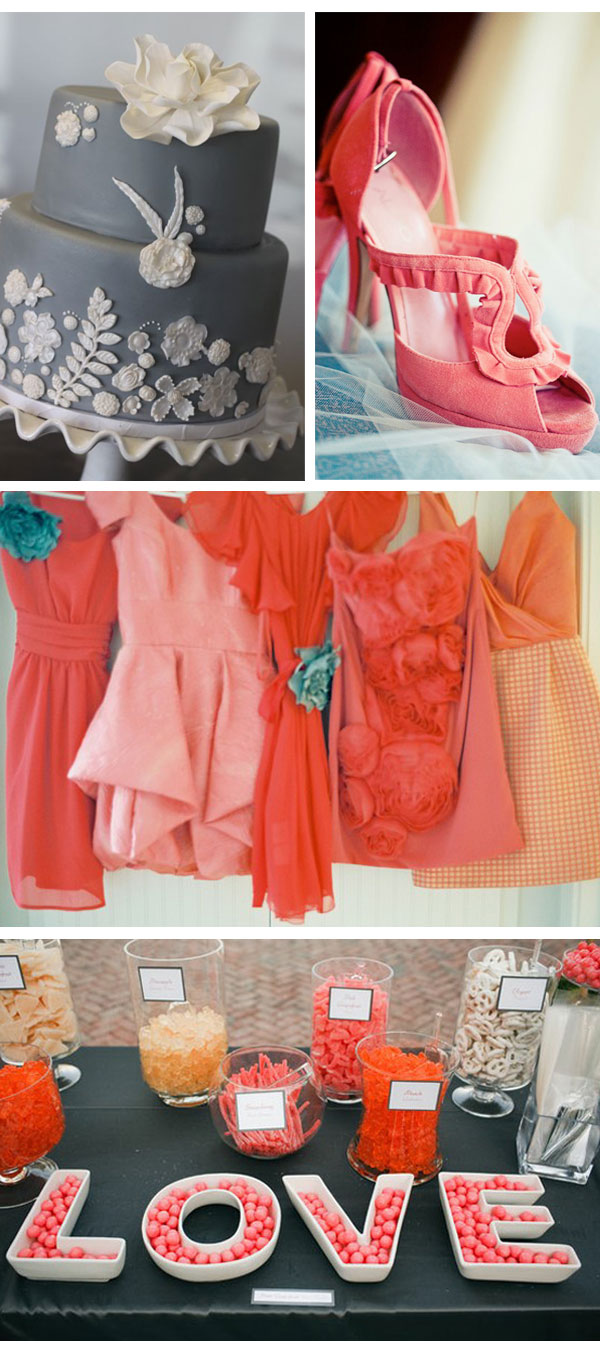
Coral & Smoky gray: the perfect palette between summer & fall

I'm ecstatic to share that we {Paper Moss} just mailed off a gorgeous, elegant & modern smoky gray and coral invitation suite to a beaming bride and her fiancé. Yes, that beaming bride happens to be my {Anna's} soon-to-be sister in law and that fiancé of hers happens to be one of the greatest older brothers to walk this earth. :) I'm biased & completely blessed!! Take a gander at the color palette for their September day... a perfect combination to transition out of summer & into fall! undefined

{Photo credits clockwise from top: Brent Van Auken Photography; The Wedding Chicks;

Jamie Delaine Photography; Style Me Pretty}

undefined{Photo credits clockwise from top: Sweet and Saucy Shop; Style Me Pretty;

Pink Lemonade Design; Style Me Pretty}

You better believe that we'll be sharing photos of the invites {once they're sent out, of course} and photos of the wedding. :) Happy Wedding Wednesday!

A Monday mission

Hello there! On a Monday such as today, we felt it appropriate to share something so simple that is sure to inspire and lift your spirits. May you not only power through the week, but make a difference while doing so...

{via}

Hopefully your weekend was delightful, eventful & restful! Happy Monday!

xo

DIY: {to die for} Envelope liners!

You are in for an adventure today, my pretties! The sweet & incredibly talented Michelle Peterson is our guest today to share this adorable and easy D.I.Y!! I don't know about you, but envelope liners make my heart skip a beat!! We couldn't be more excited, so here it is from the woman herself: Michelle: As an avid follower of Pearls for Paper, I love all things paper, ribbon, and hand-written. Living in Wisconsin, we were too far away to attend and celebrate our dear friend's son's very special first birthday in Washington. So, when she asked me if I would help with the party planning and make his invitations, I jumped at the chance! We decided on a Mustache Bash.  How silly and adorable for a one year old, right? After several failed attempts at getting just the right pattern to print for the background, I bagged it and grabbed what I had around - an old fairy tale book.

I used these delightful book pages as the background for the invite, and then went one step further to line the envelopes to match. Want to try it?

Here's what you'll need:

- Book pages

- Double sided tape and/or glue

- Paper trimmer

- Envelopes

- A pen

Here are the steps:

1. Tear some book pages.

I used an old damaged copy of Hans Christian Anderson Fairy Tales. You can find some great old books at thrift stores.

2. Measure the book page to your envelope.

I look to make sure the page will be tucked behind the sides of the envelope, but not as wide as the envelope itself.

3. Trim your book page.

Think about cutting off the outside margin, as well as trimming down to the right width. Don't worry about trimming the torn edge, since you'll be tucking that into the envelope. It makes for a cute hand-made surprise if someone looks into the envelope.

undefined

4. Insert the page into the envelope.

Make sure the top ends up just below the glue line and eyeball it to be centered between the two sides.

5. Fold the page with the crease of the envelope.

6. Open the envelope to see the top side of your book page. Apply double stick tape and/or glue.

7. Press and done!

These are soooo cute, right? Thank you, Michelle for being a guest on Pearls for Paper and inspiring our weekend project!

*Photos courtesy of Michelle Peterson

Wedding inspiration: Soft blue & rich red

A red, white & blue wedding? Yes... it IS possible to embrace this color palette without feeling like Uncle Sam might pop out of the cake. :) Feast your eyes on this inspiration board- filled with a vintage flair & laced with touches of modern elegance. By taking a soft blue and rich red tones, we succeeded in dodging a patriotic feeling! What do you guys think about the combo? Would you ever have a red, white & blue wedding?

{Clockwise from top: Utah Bride Blog; Staircase; Martha Stewart; Lucida Photography}

{Clockwise from top: Paper Moss; Pen & Paper Flowers; Paper Moss; Erin Reynolds Photography}

And after a day full of patriotic flair, what better way to end than with a gigantic, loud & sparkly BOOM...?!

{via}

Wave those banners!

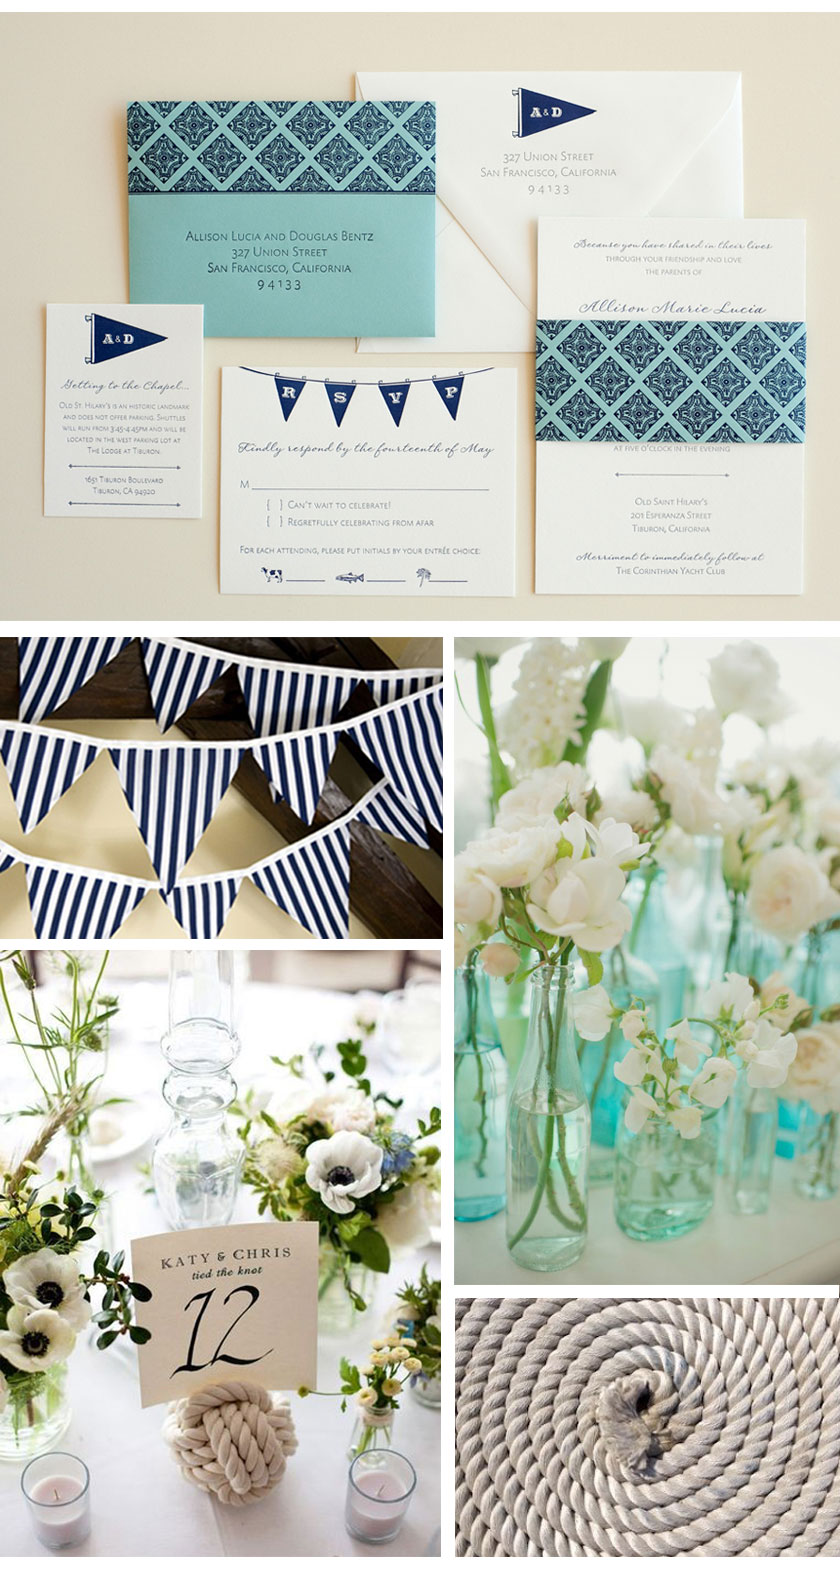
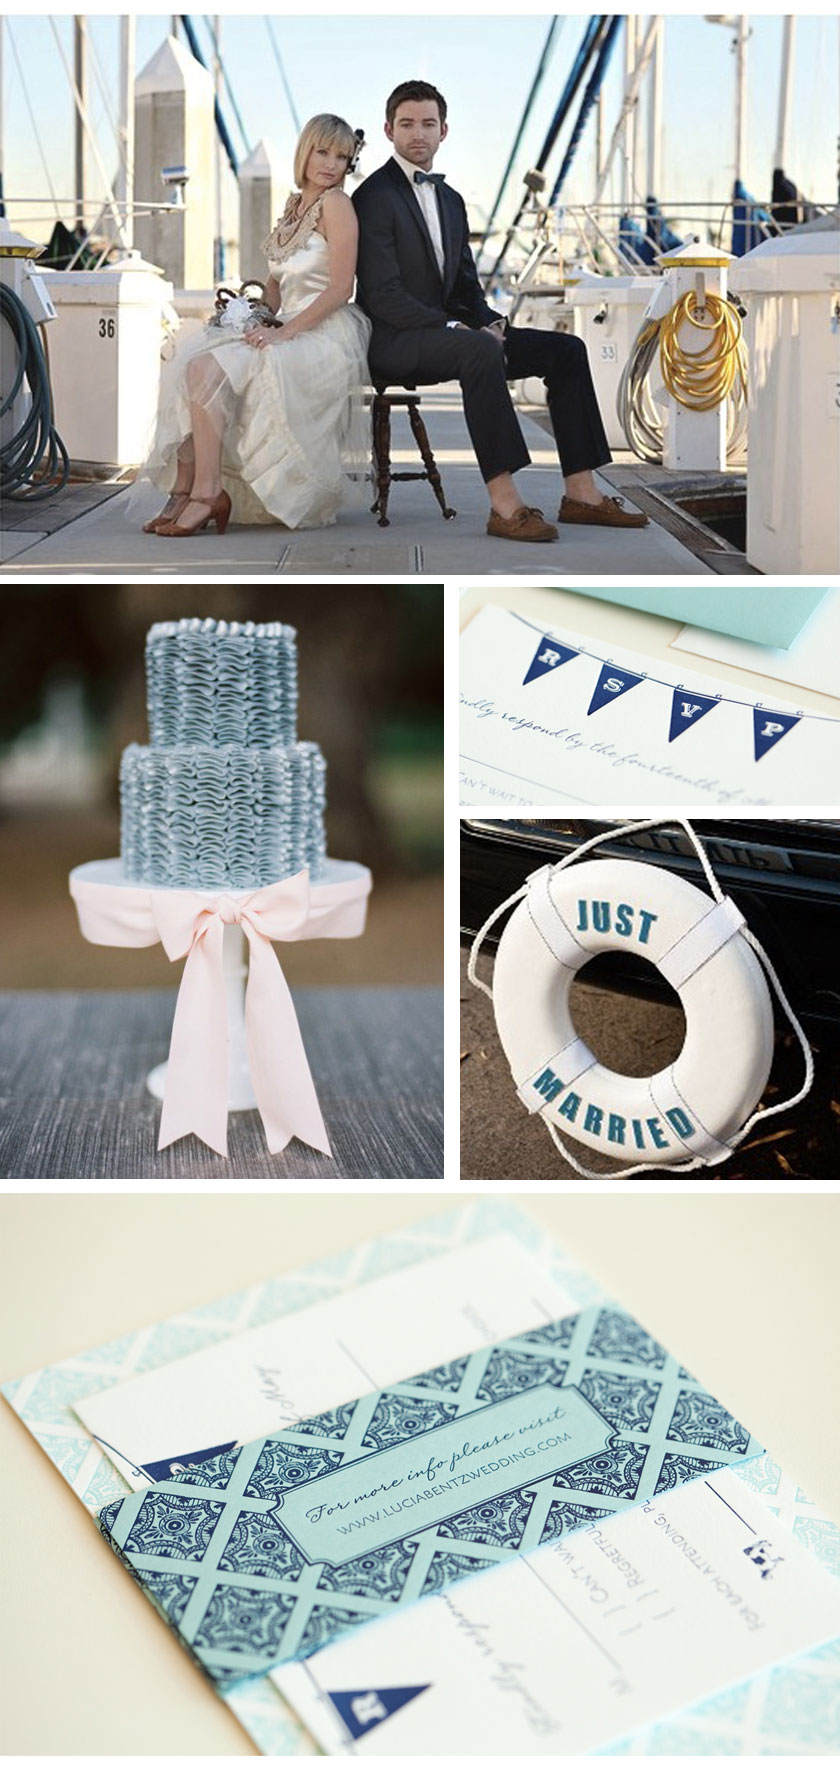
Letterpress, the color blue & all things nautical... these are a few of our favorite things. We were thrilled that while working with Allison and Doug, their custom design process led us to this crisp and classic invitation suite. Their wedding is actually this weekend and we couldn't resist putting together this little inspiration board in their honor!! undefined

{clockwise from top: Paper Moss; Style Me Pretty; Rope; Ritzy Bee; Betty and Barclay}undefined

{clockwise from top: Jasmine Star Photography; Paper Moss; Style Me Pretty; Paper MossWedding Whimsy}

A huge congratulations to the happy couple as their festivities begin!

*Paper Moss photos courtesy of Laura Ashbrook Photography

Monday, Monday!

How was your weekend?? We want to officially welcome you to Monday with some gentle words of wisdom that have been sitting with us for a while now. undefined

Yes, these words ring true especially on a Monday- the day of all days that is loaded with left over sleepies from the weekend, extra to-dos on the list and the nervous hope for a good week. If things get stressful this week, pause and remember that even the smallest things can make a huge difference.

undefined

Happy Monday, lovelies!!

xo


*Photos courtesy of Everything FabLily Lemontree

More chevron, please!

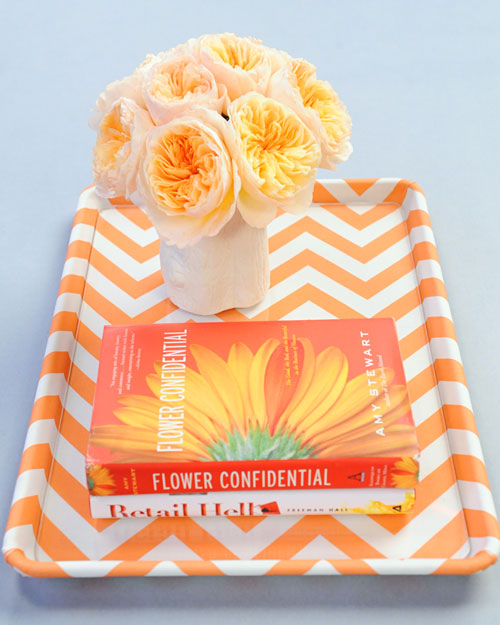
You may have caught on that we are obsessing over the Chevron pattern lately. Who'd have thought that after all those years of staring at the Chevron gas station sign, it would materialize into something so pretty?! In the spirit of spring cleaning, moving & getting organized, this saucy little chevron printed tray started calling our names...

So naturally, we must obey and attempt to D.I.O.S {Do It Our Self}... and if you'd like to D.I.Y, here is the how to:

You'll need:

1 yard decorative fabric

Aluminum rimmed baking sheet {yes, a COOKIE SHEET!}

Spray adhesive

Scissors

Fabric glue

Synthetic felt

1/4-inch-thick acrylic sheet cut to fit inside of tray, with corners rounded

{the hardest part might be choosing the fabric!}

"How to":

1. Cut fabric large enough to cover the front and wrap around the back of the baking tray. Cover the front of the tray with spray adhesive.

2. Place fabric on tray so pattern is aligned, leaving enough room to wrap fabric around all sides to the back. Smooth fabric onto tray, pressing out any bubbles.

3. Pull any extra material into corner and push around the edge. Turn tray over. Cover the back of the tray with spray adhesive.

4. Press the fabric over two edges of the tray first, then fold in on each remaining side, as if wrapping a gift. Trim any excess fabric with scissors. Use fabric glue to secure, if needed.

5. Cut a piece of felt to fit the back of the tray and conceal fabric edges. Smooth felt on the back the tray.

6. Place acrylic sheet in center of tray.

*Photos courtesy of Martha Stewart; Premier Fabrics

A little of this & s'more of that

A childhood classic... A sign of the times... A chocolatey crunchy combination with just the right amount of goo... yes, S'mores. Of all of the ideas for customizing food {or building an interactive display} at an event, we are head over heels in LOVE with the ideas of a literal S'mores Bar. Jennifer from Cookie Creatives came up with the most stellar of them all.

I mean seriously, flavored marshmallows? White chocolate? Toppings such as toasted coconut? OMG, let's try out some of these combos ASAP and have some people over!

Anyone planning a summer wedding or shower?? :)

*Photos courtesy of Cookie Creatives

Congrats Kit & Nate

Seems like yesterday Paper Moss clients Kit & Nate tied the knot! Designing their letterpress invitation suite was just so much fun-- and the color combo {one of the greatest for the season} paired with their designs was perfect! We think their invitations scream three words: happy, fun & classy... just like the couple :) Click on the photo below to view their beautiful wedding on, the one and only, Style Me Pretty!

Kit-and-Nate.jpg

Congrats to Kit & Nate! We hope that your big day was beautiful and we wish you both the best!!!

*Photos courtesy of Laura Ashbrook Photography

A 1920's Vintage Chic Wedding

Melissa and Jason tied the knot last spring- it's hard to believe it has already been a year! We adored their vintage chic invitation suite and wanted to rekindle the magic of their special day by compiling this inspiration board. Picture it: a 1920's inspired affair- complete with a stunning gown, crystal chandeliers, music and mint juleps on a warm spring afternoon. Sounds like a little piece of heaven, right?

Photos clockwise from top Paper Moss; Oh How Charming; Weddings On the French RivieraPaper MossPaper Moss; Ritzy Bee100 Layer Cake


Pretty Pink

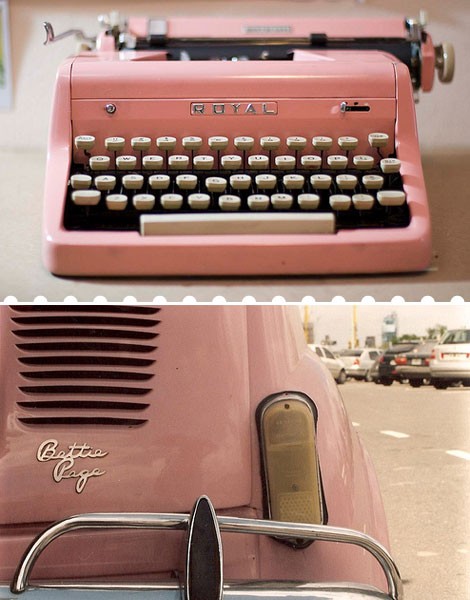
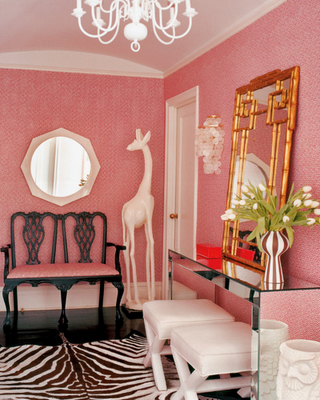
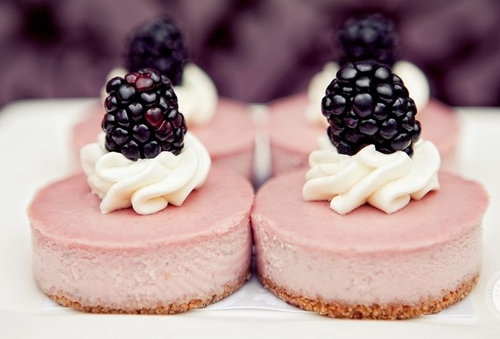
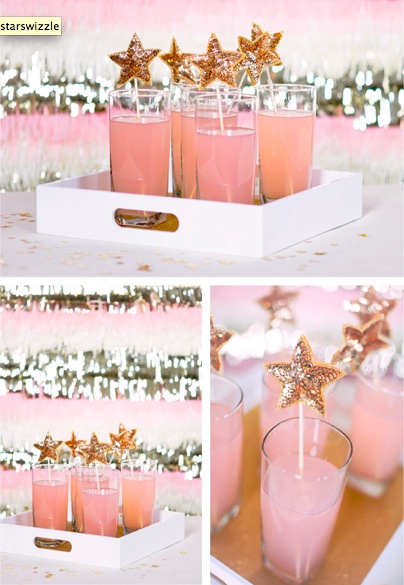
Pink. Some love it, some hate it. Right now, we are loving the color- can't get enough, in fact. Besides being cheerful, it is said to increase energy and encourage action and confidence. Why does that not come as a surprise when we think of our beloved friends who have obsessed over this color for years... they are some of the most energetic and positive people!

Be sure to check out the last {adorable} photo for a DIY!

undefined

{via}

undefined{via}

undefined

{via}

undefined

{via}

{via}

This last photo is a DIY from the Inspired Bride.... just in case you want to add some more pink in your life!!


Happy Monday!

The most inspirational Monday of the year

Happy Monday! We wanted to pass along a little inspiration to start the week off right. You see, today is Marathon Monday in Boston... the day of the legendary Boston Marathon. Of all the things in our book that are distinctly inspirational, seeing people achieve their goals takes the cake. undefined

The city has been hopping with tourists- both runners and supporters- all weekend. And a little later today, we will be there {with thousands of others} cheering on those athletes who have worked so hard to even qualify to participate in the worlds OLDEST annual marathon. A runner must have completed a qualifying marathon within the last year and a half , and they have to have one of the below qualifying times in order to be considered:

Age Men Women
18-34 3:10 3:40
35-39 3:15 3:45
40-44 3:20 3:50
45-49 3:30 4:00
50-54 3:35 4:05
55-59 3:45 4:15
60-64 4:00 4:30
65-69 4:15 4:45
70-74 4:30 5:00
75-79 4:45 5:15
80+ 5:00 5:30


Here is the route they'll be running... all 26.22 miles. So intimidating, yet SO inspiring!!

We'll be cheering at the finish line... with a latte in one hand and a tissue in the other! Happy Marathon Monday, everyone!

undefined

*Photos courtesy of Boston Athletic Association

A little Vineyard Vines touch

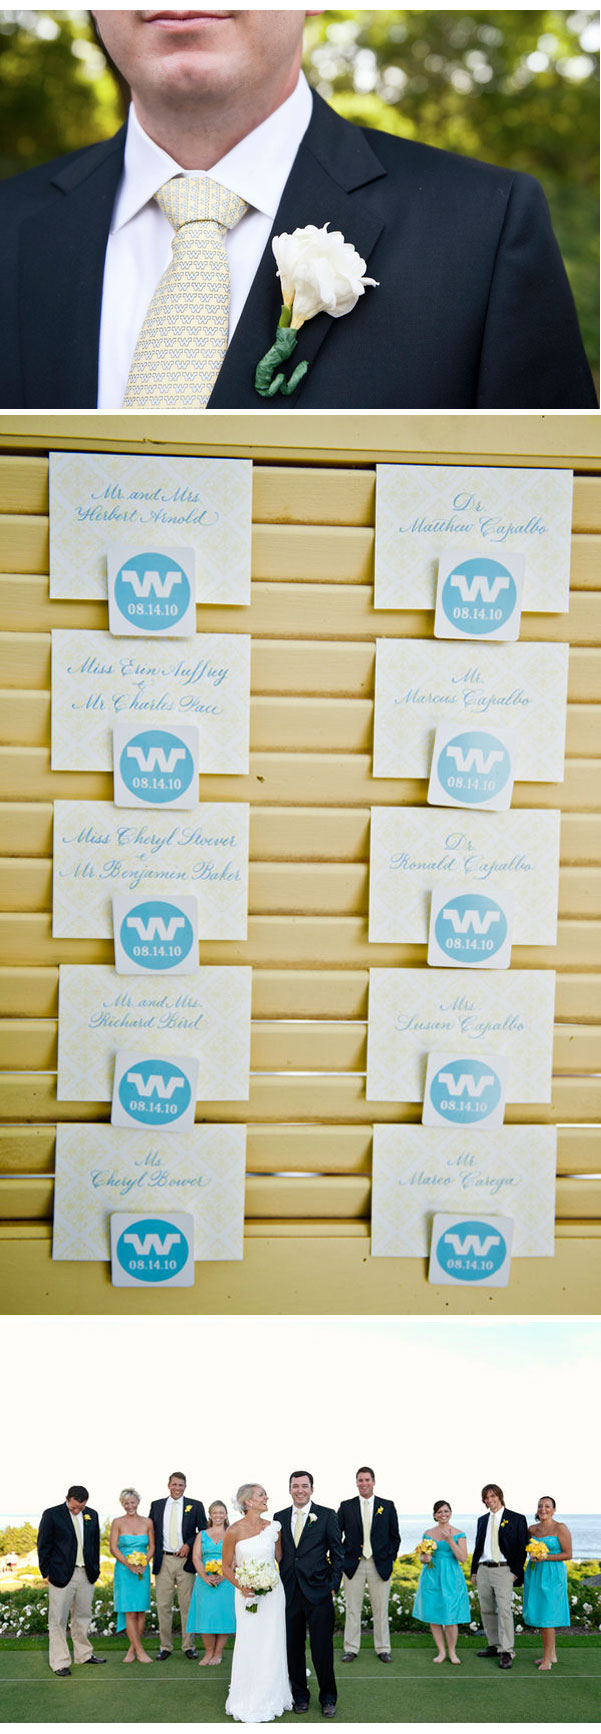
One of our favorite weddings of 2010 brought the opportunity for Paper Moss to work with a classic New England brand, Vineyard Vines. By now, you have got to know how much we thrive on customizing things. When the opportunity came about to customize ties for one of our grooms and his groomsmen, see the classic, preppy and sentimental spin it put on this idyllic wedding.

What a gorgeous group of people! To see more of Abby & Andrew's big day, check out our previous post.


Interested in having custom ties for your wedding? Don't hesitate to ask us how to make it happen!!! The possibilities are endless...


*Photos courtesy of Leila Brewster Photography ; Wedding coordinated by TRUE Event

DIY: precious place cards

There is something so satisfying about embarking on a DIY journey and knowing that the delicious outcome is in your hands. Those of you who love to have that personal touch on your events {be it a bridal shower, wedding or birthday party} you'll adore these vintage award ribbon place cards. Thank you, Laurie Cinotto and Once Wed for passing the inspiration! undefined

You'll need:
- Crepe paper (two or three colors,  any thickness in a roll or folded pack)
- Decorative Paper
- Ribbon (1/2 inch wide,  a simple, acetate florist ribbon works well for these)
- Glue gun and glue sticks
- Scissors (regular, pinking shears, or any decorative scissor)
- Stapler
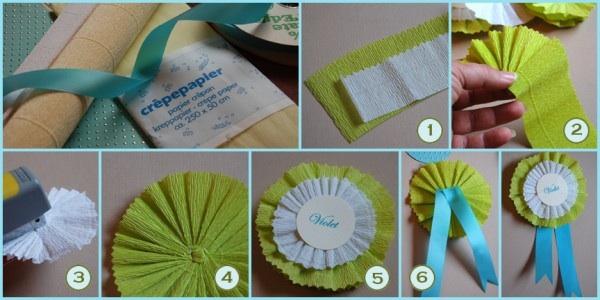
Directions:
1.  Begin by cutting a 2″ wide by 20″ long strip from your roll or folded pack of crepe paper.  You’ll want the “grain” of the paper to run the short way.    The bottom of your strip should be cut with standard scissors, but you can use any decorative scissors to cut the top edge.  (See figure one)
2.  If you are right handed, pick up the left end of your paper strip (straight edge at the bottom, ruffled edged on top) and begin folding small, angled pleats.    Keep the completed pleats pinched between your left hand thumb and index finger as you work.  Keep your pleats even.   
If you’re left handed, start from the right end.   Hold the completed pleats with your right thumb and index finger, fold with your left hand.  (See figure 2)
3.   Keep folding your angled pleats and a circle shape will naturally form.    
4.  When you have a complete circle, stop folding and trim any remaining paper.
5.  Keep holding your medallion between your index finger and thumb.  Take your plier stapler and carefully staple the center of the medallion.  Turn the medallion 45 degrees, and staple again to create a “x” in the center.   This should secure all the pleats. If, by chance, it doesn’t, it’s fine to add another staple or two.  (See figure 3 and 4)
6.  Cut another crepe paper strip  approximately 1.5 inches high and 15 inches long.  Repeat steps 2 through 5 to create a second,  slightly smaller  medallion.   You can use the same color paper as you did for the first medallion, or you can chose a coordinating color.
undefined

7.  When you have completed the second piece, put a dab of hot glue in the center of your larger medallion and place the smaller medallion on top of it.
8.  Print your guests name on a sheet of card stock and cut out a circle with the  name centered on it.  Glue the circle in the middle of the smaller medallion.   (See figure 5)
9.  Cut two 4 – 5 inch lengths of ribbon.   Snip a little triangle  from one end of each ribbon.
10.  Glue the ribbons to the center of the back side of the larger medallion. (finished ends dangling down).   Cut a circle out of your decorative paper, ( smaller than the diameter of your largest medallion)  and glue to the back.  (See figure 6)
11.  Place the ribbon medallions at each guest’s place setting, on their napkin,  or attach to the backs of their chairs.
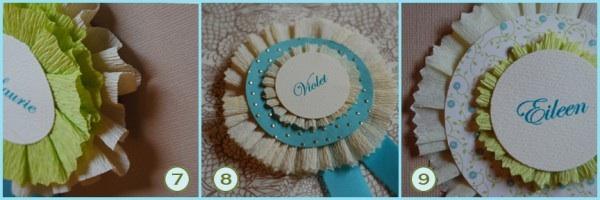
To make a more ruffly medallion, cut a extra long strip and begin making your pleats.  When your circle is complete, go around it again and make a second row of pleats and then staple the center.   (See figure 7)
Add decorative patterned papers between your medallion layers to add a little more color.  (See figure 8 and 9)


*Photos courtesy of Once Wed
 

Nice napkins!

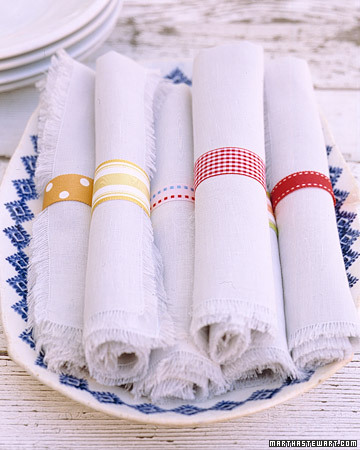
While prepping for a little get-together several weeks ago, we realized at the last minute that all details were covered - except the napkins. This may sound trite, but everything else was perfectly coordinated and in place! Of course the guests had such a fabulous time that no one noticed, but this definitely inspired us to look into some napkin options for our next soiree. undefined

Dress up plan cloth napkins with a variety of ribbon rings.... the options are endless and you can mix and match to fit the event! For each ring, fold a 6-inch length of fabric ribbon in half, right sides facing, and sew ends together with a 1/4-inch seam allowance. Turn the rings right side out, and slip them around rolled napkins.

undefined

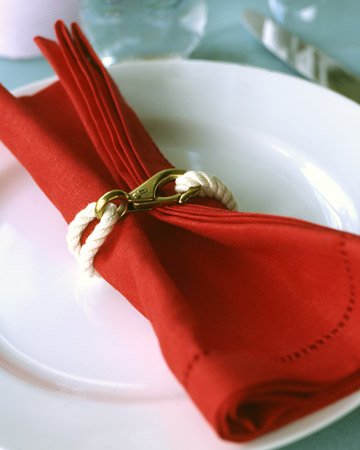
Use boat snaps (available at boating stores) and an off-white cord to make these super cute nautical napkin rings! {Make them}

undefined

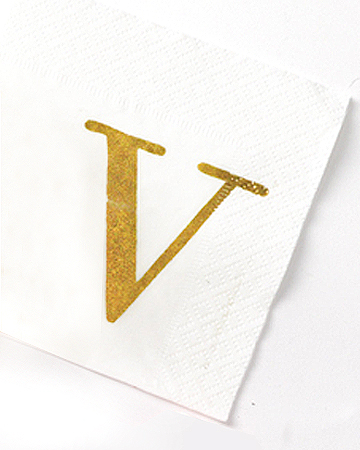
Make an instant monogram with metallic ink and rubber stamps. What a simple and chic way to spice up paper napkins!

undefined

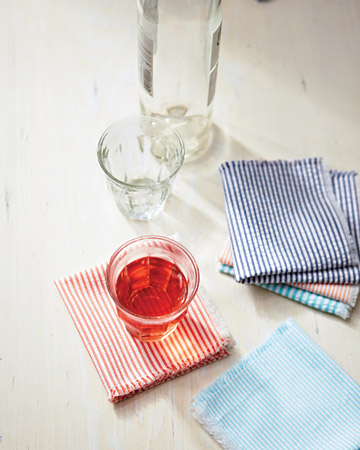
Seersucker makes us giddy. So do parties... what a perfect combination!  The classic fabric is inexpensive and available at almost any cloth store, so you can mix and match a few colors and make 'em yourself!

undefined

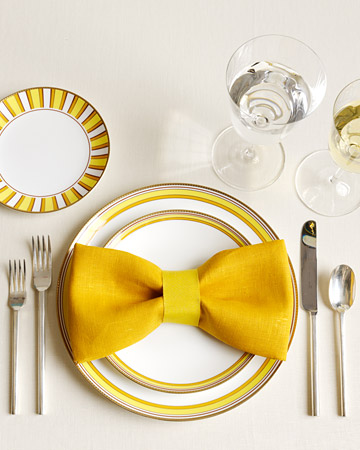
For a sit down dinner, this bow is such a fun way to class up the setting. Here's how to make it happen: spread a dinner napkin out, lying flat. Fold opposite sides in so they meet at the center. Then fold again at the center to form a narrow, ribbonlike shape. Next, fold short ends in so they meet at the center. Cinch in the middle with a ribbon in a coordinating color, and glue at back.

undefined

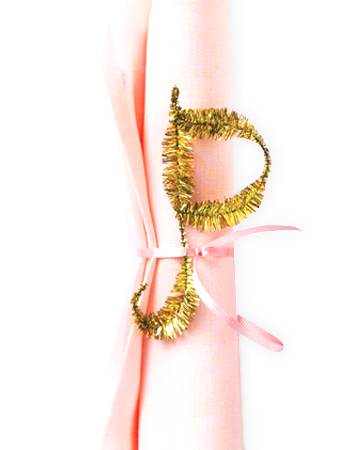
A childhood craft favorite gone classy: metallic or colorful pipe cleaners! Twist them into letters to make monogramed accessories for napkin rings. How cute are these??


Check out more of Martha's napkin ideas here.

*Photos courtesy of Martha Stewart


{Milk} Shake it up

Now that daylight savings officially happened, we are mentally heading into Spring & Summer full force! Events on warm days are some of our favorites- sundresses, warm nights, ice cream- an irresistible combination! Ami from Elizabeth Anne Designs shared this precious, flirty, ice cream sundae bar idea that is just delicious. What a fun element to add to a wedding, shower, birthday party... or even a family reunion. As shown in the photos below, there are plenty of opportunities to customize a station like this to perfectly complement a color scheme or party theme.  

Love and LOVE.

Oh, and how stinkin' cute is this couple?!?

*Photos courtesy of Kellie Kano Photography

Artists who inspire

Happy Monday to you! For those who are avid tweeters, you may be familiar with Music Mondays. While Music Monday postings won't be a regular occurrence on Pearls for Paper, we couldn't resist taking this chance to share some of the musical artists that have been inspiring us lately. But now that we're sharing, we want to know what you're rockin out to these days too! Anything that we must check out?
 

A few on the current playlist:

The Head and the Heart

One Republic

Rachel Yamagata

The Beatles {loved those American Idol covers!!! Well, most of them...}

Amos Lee


Have a lovely week! xo


*Photo courtesy of Libertad Leal Photography

Pure Bliss

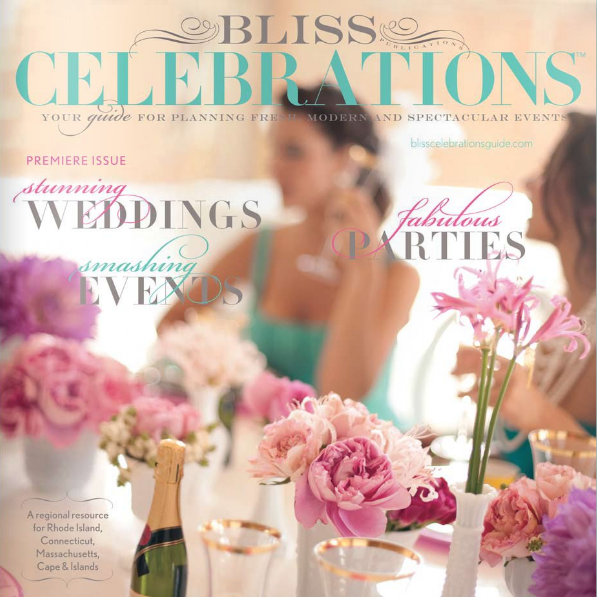
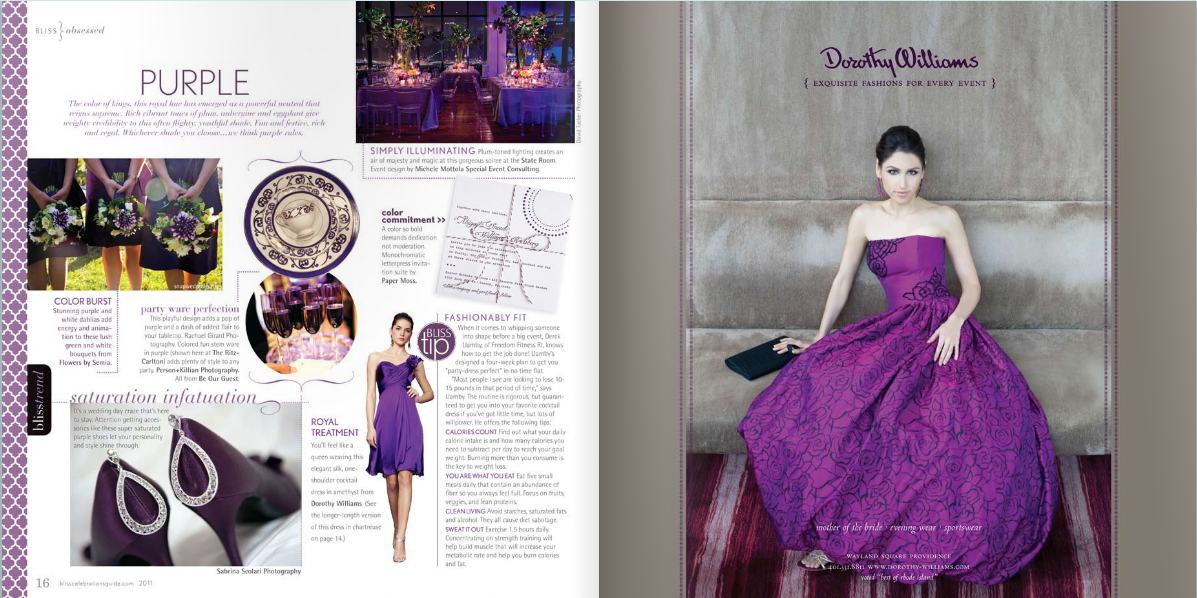
Wednesday night, we had the pleasure of partying down at the launch of the new magazine Celebrations. With so many beautifully creative minds behind these pages, we knew it couldn't be anything less than perfect, but we had NO idea just how perfect it would be! Now that we have your attention, here are a few of the reasons why we are obsessing:

1. Abby & Will's letterpress invite was a perfect fit for one of their Color Board Features, all that which provide endless inspiration. {Did we mention the advertisements from vendors happen to adorably match each feature?} Love those details!

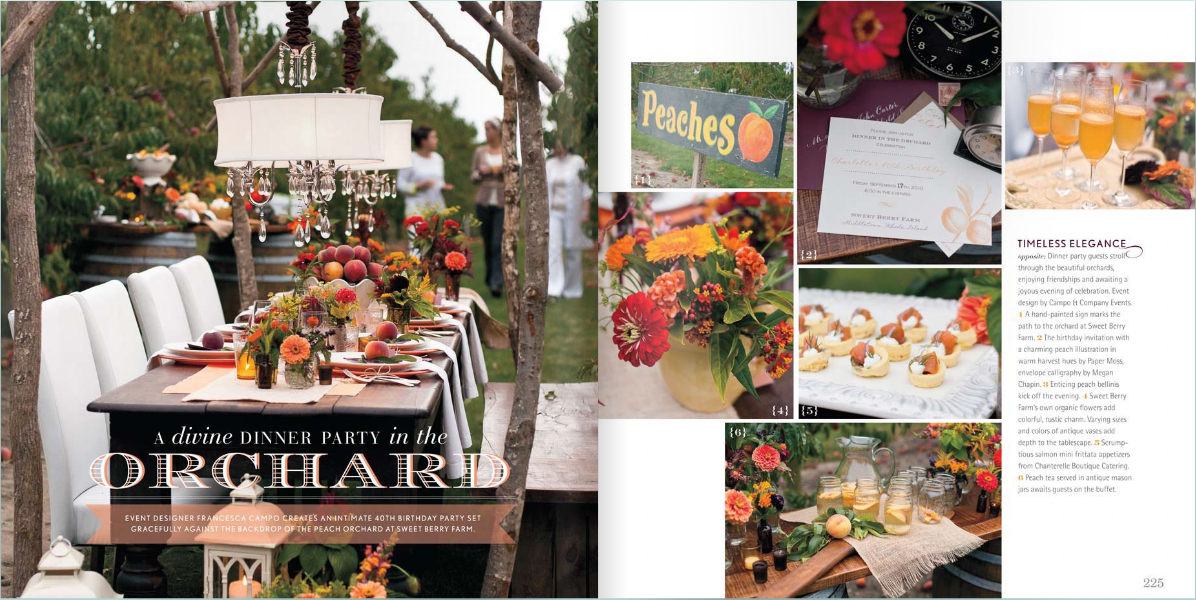
2. Inspiration shoots like THIS! Industry professionals collaborate to create breathtaking scenes filled with details that raise the bar. Whether it's a mitzvah, dinner party or wedding, there are stunning ideas flowing from page to page to page. We were thrilled to participate in this particular photo shoot at Sweet Berry Farm, alongside one of our favorite photographers Ricky from Public Image Photography.

3. REAL events + color combinations that are to die for! Abby and Andrew's feature is just one of the many that we've been drooling over. ABSOLUTELY AMAZING. We continue to ooh & ahh over her TRUE Event details & flowers by Sayles Livingston, all captured by the lovely Leila Brewster Photography.

*Photos courtesy of Celebrations