All those old books

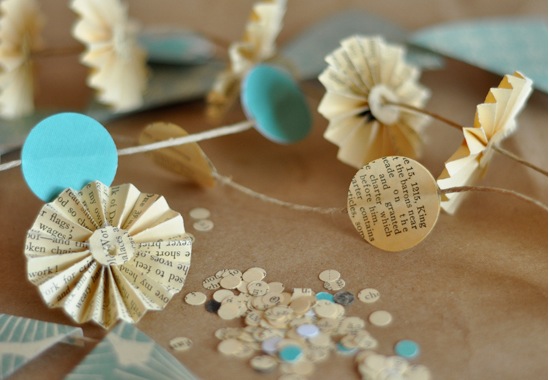
Hello and happy Monday! How was everyone's weekend? While blog hopping over the weekend, we stumbled upon this ADORABLE paper garland from Project Wedding... in fact, it kind of reminds us of the D.I.Y. Envelope Liner that we featured a few weeks ago! Anyway, wouldn't this be a perfect decoration for a rustic chic wedding or event?! It's so stinkin' cute AND {not to mention} made of pretty paper that's covered in stories- call us crazy, but there's something romantic about that. :)

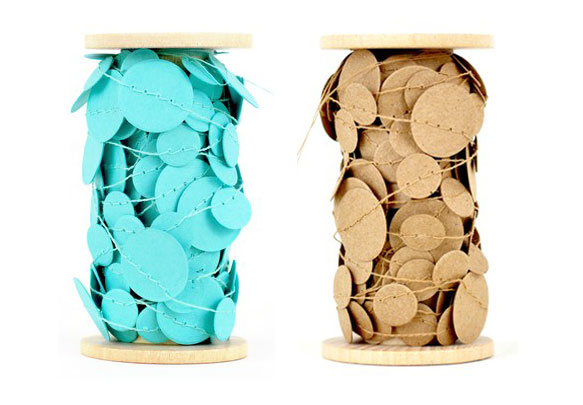
Plus, what a great way of getting rid of old books or sheet music that isn't donation worthy. Visit Project Wedding for the full tutorial. If it seems a bit daunting to make a lot of these little garlands, you can always mix them with solid ones that can be found on Etsy, such as these from Kristina Marie.

* Photos courtesy of Katherine Chong via Project WeddingKristina Marie

Getting fancy with feathers

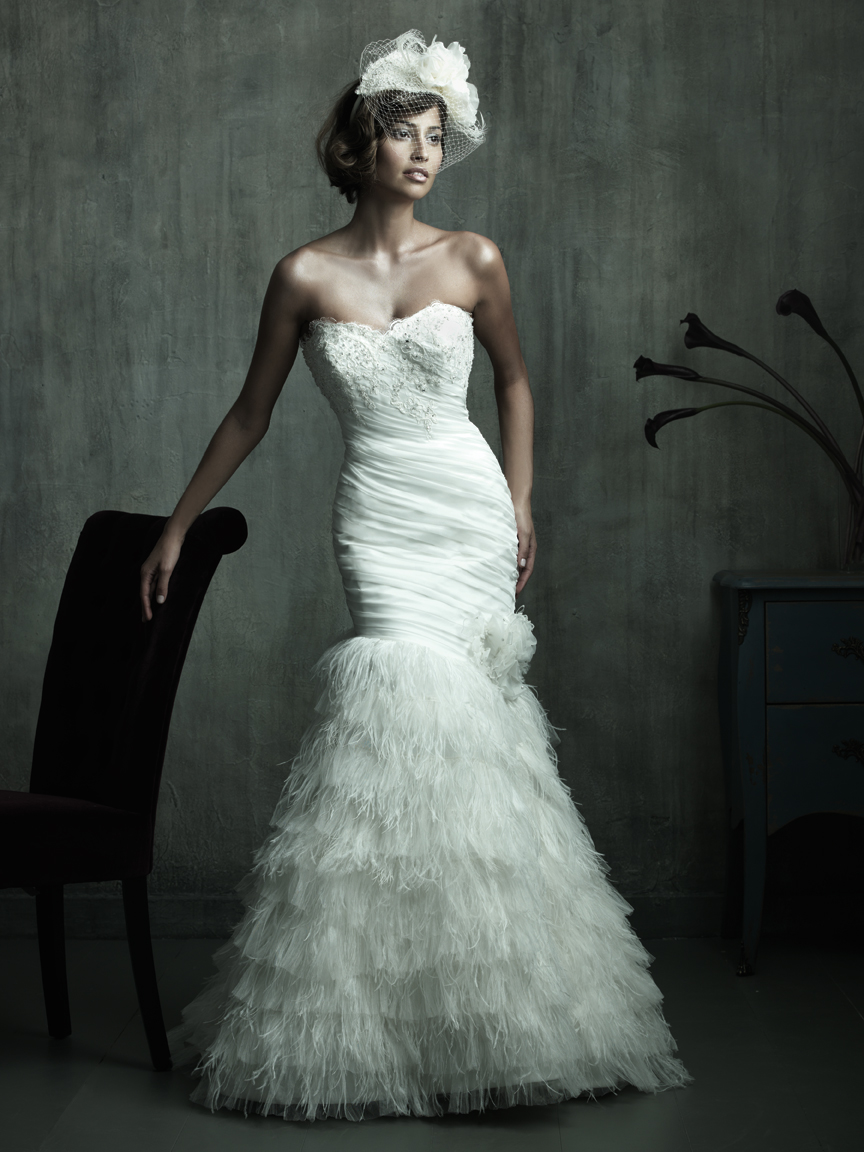
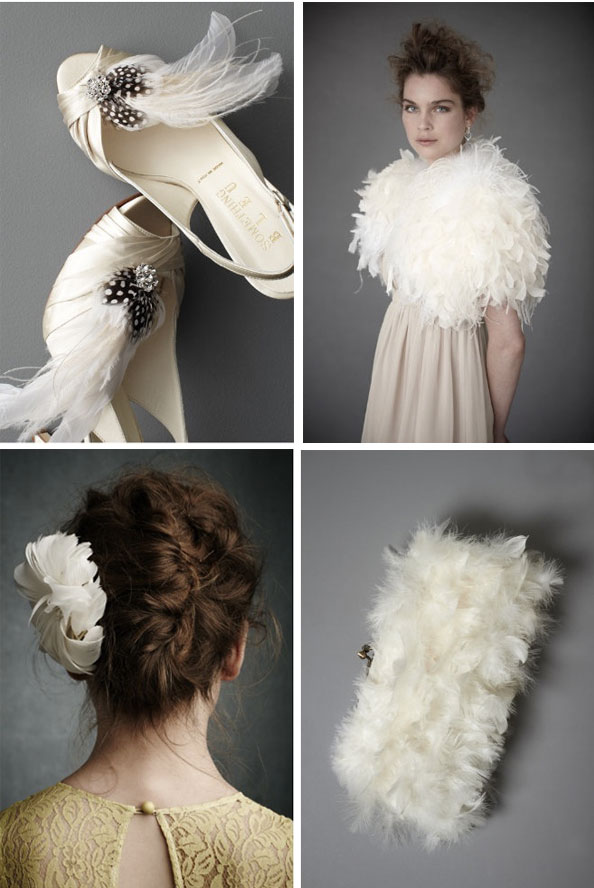
Well, it's no secret that feathers are a huge trend for wedding gowns these days and we are LOVING it! What a fun and sassy way to add texture and dimension while keeping the look soft. This gown from the Allure Couture Collection is one of many gowns that got us hooked. undefinedHowever, if investing in a wedding dress covered in feathers is a little too extreme and you still want to incorporate feathers, check out these options from BHLDN. We're especially loving the feather bolero! It's totally extravagant, but if you can't rock it on your wedding day, then when can you?!

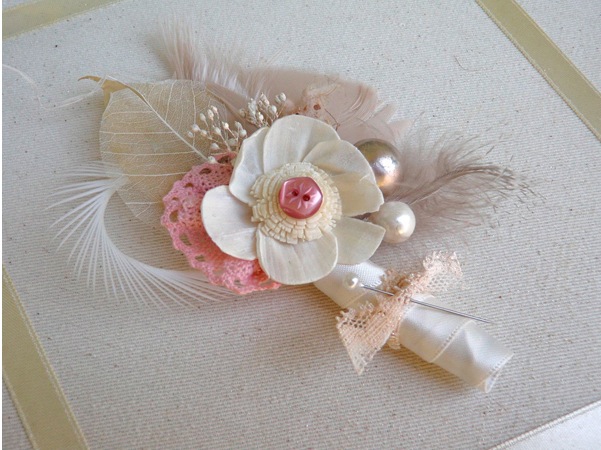
Or if you're feeling crafty, try your hand at this super cute Feather Boutonnière D.I.Y. that we found on Ruffled! Who would have thought that adding feathers could be so fun!

The happiest decoration of all

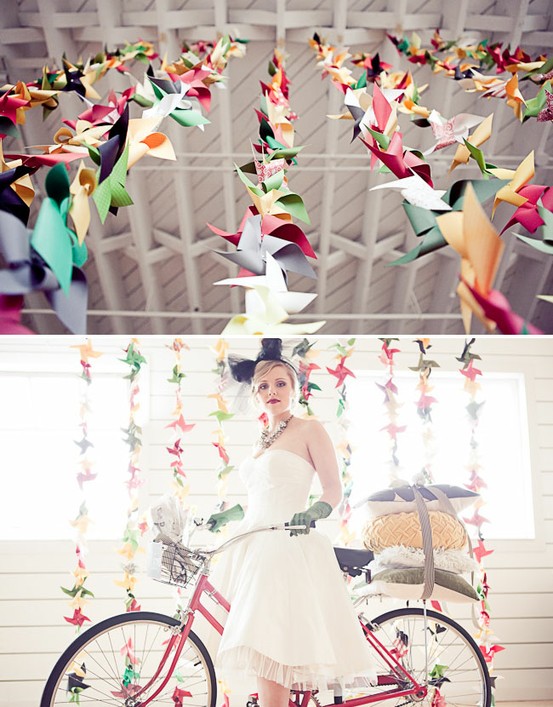
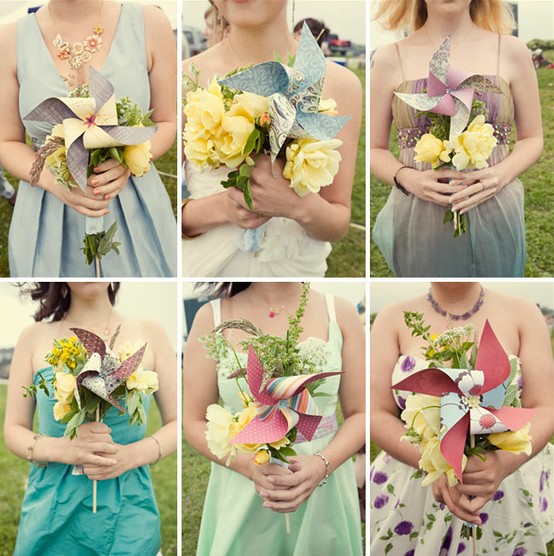
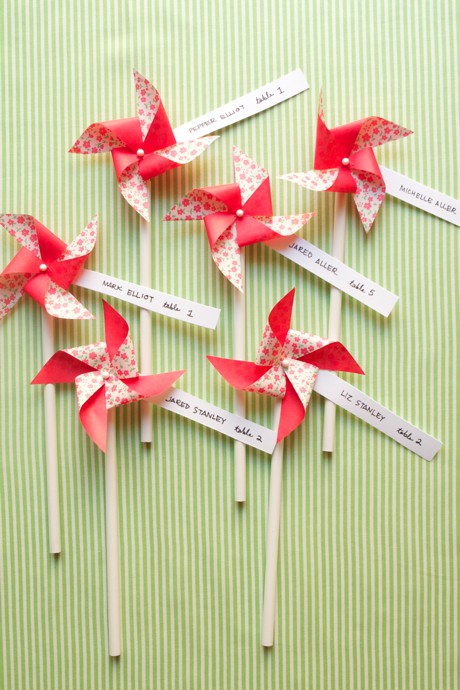
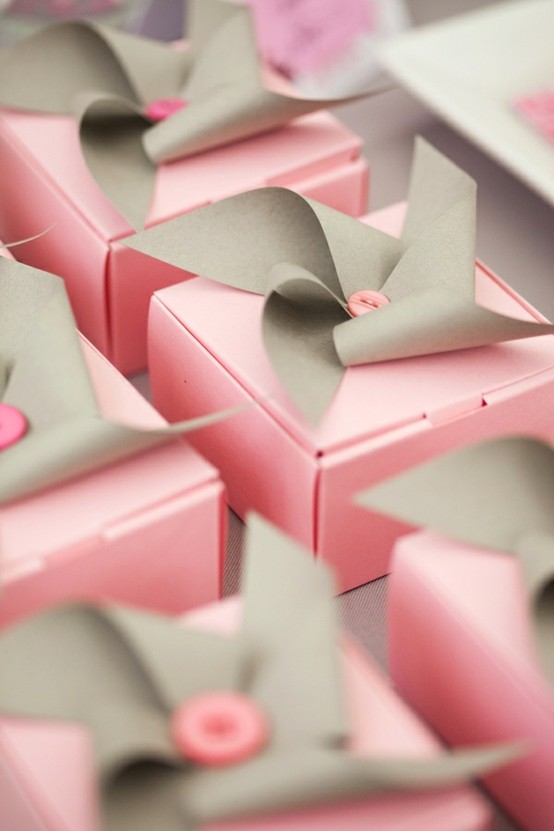
Pinwheels have got to be the happiest decoration we've ever seen. They seem to make everything better with their colorful, playful shape spinning in the wind. Lately we've seen a few ways to incorporate pinwheels into weddings {or other events} and we couldn't resist sharing such cute ideas! Though time consuming to make them, this can be a super cost effective decoration and depending on the style of the wedding it could be a great way to repurpose old books, magazines and bags.

{1} As a back drop:

{via}

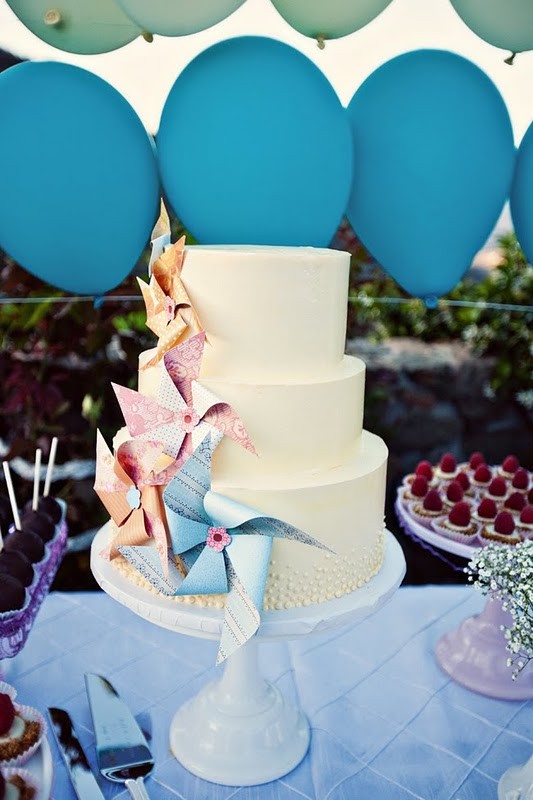
{2} On the cake in lieu of flowers:

{via}

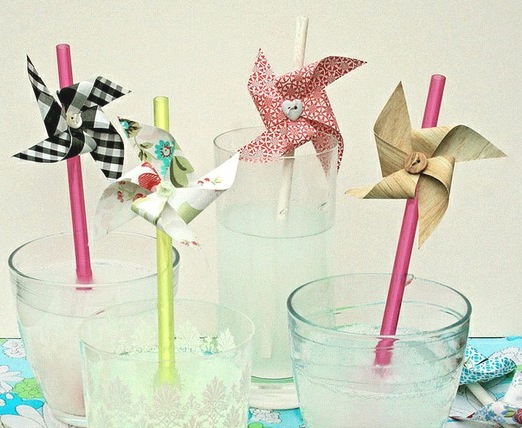
{3} Add some sassiness to the beverages:

{via}

{4} Spice up those bouquets:

{via}

{5} Use as escort cards:

{via}

{6} On favor boxes instead of bows:

{via}

Now that our wheels are spinning {pun intended}, we can't stop thinking of ways to incorporate pinwheels into daily life! Any and all ideas are welcome!!

Keep it cool

Oh sweet surrender, we're having a heat wave here in Boston! What is going on with this crazy weather?! Today is supposed to be up to 100 degrees and "feel like" 110. All we can possibly think to do is cling to anything with air conditioning and have a diet consisting solely of iced coffee and popsicles. In order to prevent over-dosing on one type of popsicle, we deemed it appropriate to try a few new recipes. Want to join us??

Recipe from {Obsessionist}

Recipe from {A Cup of Jo}

Recipe from {Desserts for Breakfast}

Recipe from {Pass the Sushi}

Are there any amazing recipes for frozen pops that we're missing out on? Don't hesitate to share!! :) Hope you're staying cool on this hot Friday!

A delicious Boston tradition

Happy Monday everyone! How was your weekend? After a few days off, we're feeling rested and rearing to conquer all that awaits! Well, sort of... Last night marked the end of a 5 day staycation with some west coast guests who came to tour Boston. One thing that always works into conversations with visitors is Boston Cream Pie. Although this infamous dessert originated at the Omni Parker House Hotel in Boston, I must say that after recently trying it there, their recipe didn't do justice to how it has evolved through the years.

It got us thinking: how cute would it be to make mini- Boston Cream Pies?! Well, here's one for the recipe box friends. Pastry chef, Penny Stankiewicz let us in on her recipe {via Design Sponge} and these little beauties are perfect for a dinner party, birthday party, holiday or a perfectly plain Monday night! Love the new spin on this old tradition!

{Recipe via Design Sponge}

What makes a party?

Having people over to celebrate the 4th? Well, there are a few things that can transform a "get-together" into a PARTY! Without going over the top to rent dishes or have it catered, here are five easy ways to turn a festive 4th get-together into a party:

1. Invitations

It shouldn't come as a surprise to you that INVITATIONS might be first on our list. There are plenty of {non-custom} stationery companies that make adorable invites for occasions such as a BBQ. {Please note that Paper Moss is more than happy to design custom invitations for your upcoming BBQ, if needed :)}

{We like these from Jack & Ella Paper Press}

2. Signature cocktail

Do it. Go above, go beyond and think of a catchy little name for a signature cocktail! Your guests will LOVE it. If kids are coming, make a signature kid friendly drink for them too. We suggest the Patriotic Margarita or Berry Splash for the kiddos. Seriously- Check. These. Out. :)

{via}

3. Extra little touches

Adding little decorative things like center pieces, drink umbrellas or signs for the food can spice things up a lot. Hostess with the Mostess even offers free designs that you can print out at home. Check out their patriotic parasols and party signs like these:

{via}

So cute, free and super easy! You could even mount these signs on thick paper or laminate them to give a more polished look!

4. Party favors

Don't you remember diving in to goody bags at birthday parties as a child? Well it might not be quite as fun as when we were five, but still... guests will delight in party favors ESPECIALLY if they involve matches. Guaranteed. The folks over at Twig & Thistle were really on to something when they came up with the template for these sparkler holders:

{You can find the template here}

5. Games

For a 4th of July party, go with a classic yard game like bocce ball. If you don't already have a set, hop over to Pottery Barn and score this sassy one:

{via}


Whatever fun plans you have to celebrate independence day, we hope you have a fabulous {and safe} long weekend!

A festive little refresher

Can you believe the 4th of July is a week from today?!  After checking out the weather report for this week, we're anticipating some much needed sunshine so naturally, we have barbecues, block parties and fireworks on the mind!! It's only appropriate to enjoy a refreshing beverage such as this Fruit Tea Cocktail, during a hot summer afternoon.

Ingredients:

1 1/2 parts green apple vodka 1 1/2 parts raspberry iced tea 1 1/2 parts ginger ale lemon wedges

They also suggested adding frozen raspberries, but we think adding more fruit for a "sangria influence" would be yummy :)

Directions:

In order, add vodka, iced tea, and ginger ale to glass over ice. Stir gently to combine. Squeeze lemon wedge over, and add to drink. If you decide to add more fruit, let it marinate for several hours prior to serving.

Having people over this week? If you want to get really festive, you could add a cute little drink stirrer like these mini-pinwheels we found on Joy Ever After, to get in the mood for Independence Day! This DIY is super easy and such a fun touch for your guests!

{D.I.Y.}

*Photos courtesy of Erin's Food Files & Joy Ever After

Wave those banners!

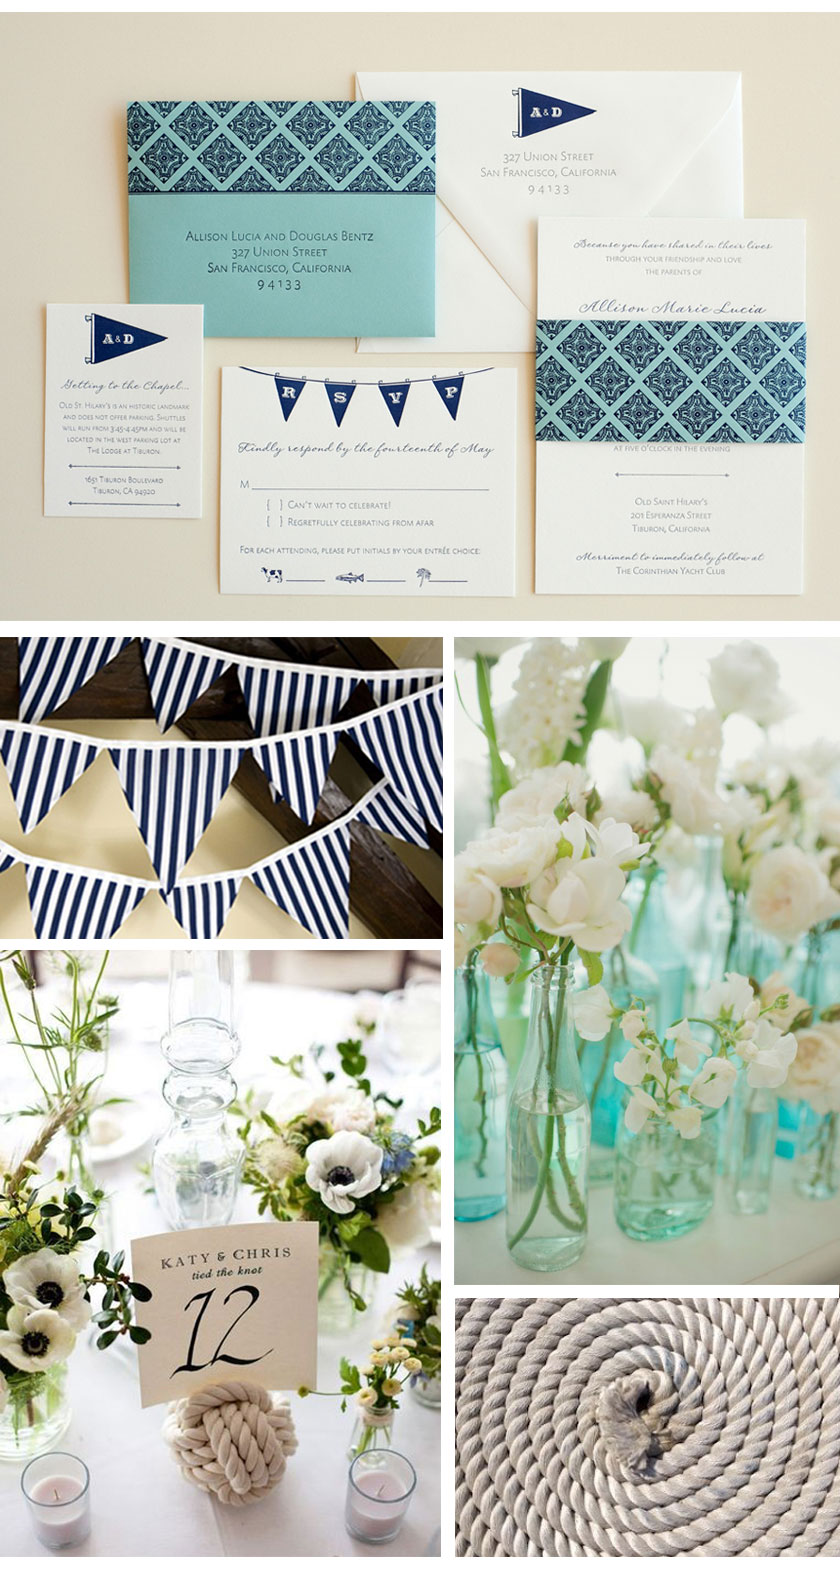
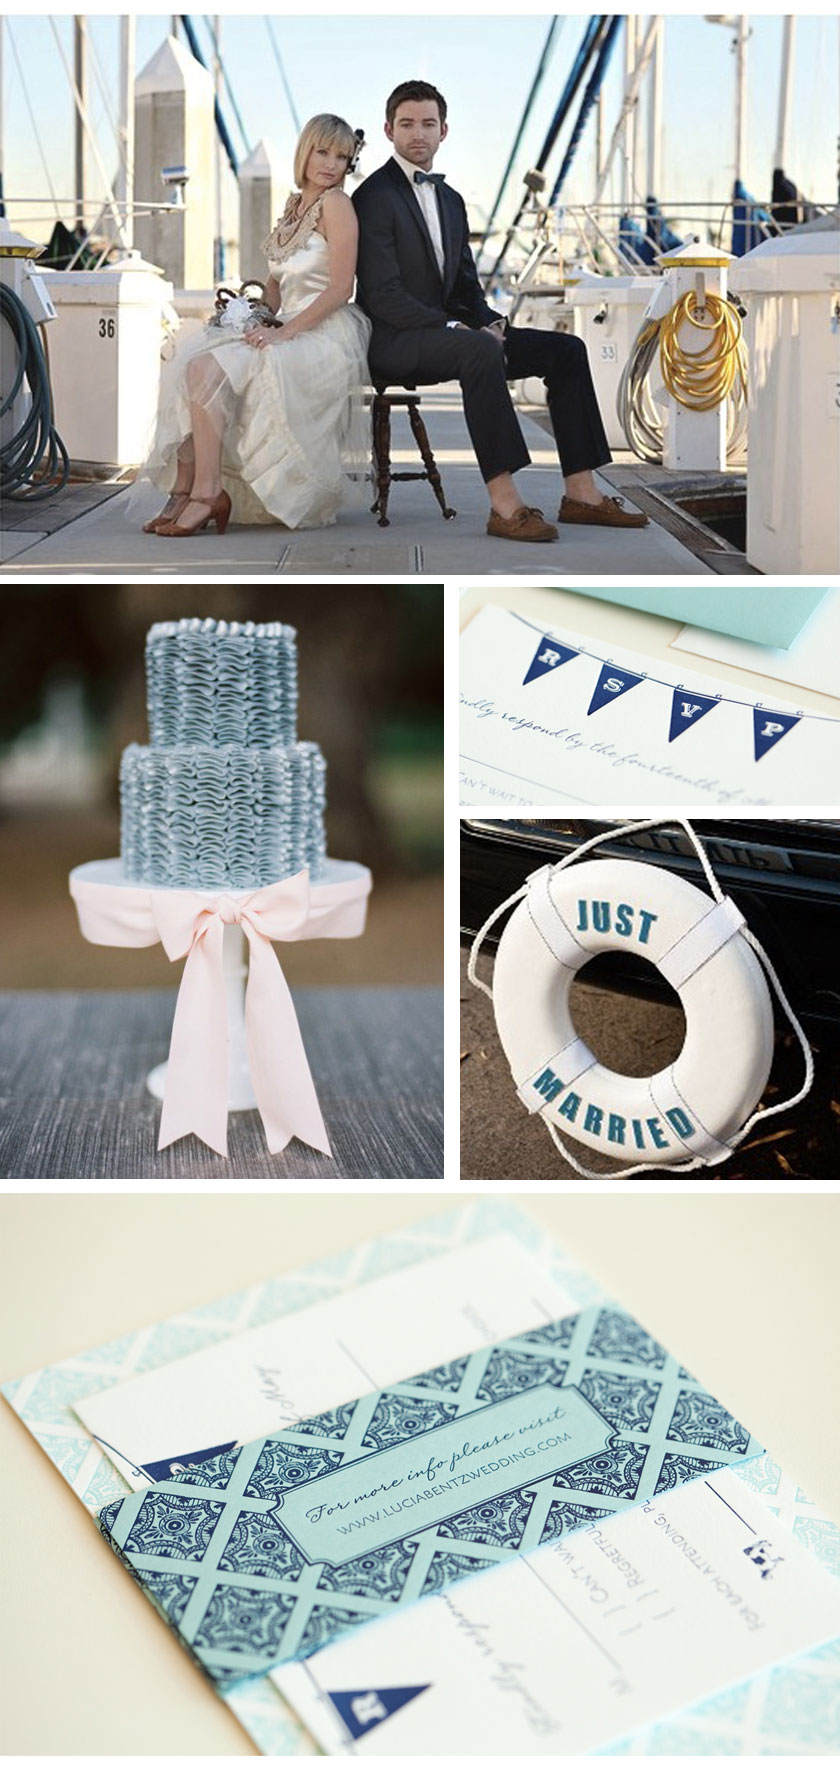
Letterpress, the color blue & all things nautical... these are a few of our favorite things. We were thrilled that while working with Allison and Doug, their custom design process led us to this crisp and classic invitation suite. Their wedding is actually this weekend and we couldn't resist putting together this little inspiration board in their honor!! undefined

{clockwise from top: Paper Moss; Style Me Pretty; Rope; Ritzy Bee; Betty and Barclay}undefined

{clockwise from top: Jasmine Star Photography; Paper Moss; Style Me Pretty; Paper MossWedding Whimsy}

A huge congratulations to the happy couple as their festivities begin!

*Paper Moss photos courtesy of Laura Ashbrook Photography

A little of this & s'more of that

A childhood classic... A sign of the times... A chocolatey crunchy combination with just the right amount of goo... yes, S'mores. Of all of the ideas for customizing food {or building an interactive display} at an event, we are head over heels in LOVE with the ideas of a literal S'mores Bar. Jennifer from Cookie Creatives came up with the most stellar of them all.

I mean seriously, flavored marshmallows? White chocolate? Toppings such as toasted coconut? OMG, let's try out some of these combos ASAP and have some people over!

Anyone planning a summer wedding or shower?? :)

*Photos courtesy of Cookie Creatives

A Monogram DIY

As a little one, our great grandmother gave us a gigantic container of vintage buttons. They were each so colorful and unique that we couldn't resist spilling them all out on the floor to sort and admire them. What we would give to have those buttons now!! Luckily we found this amazing button shop on Etsy for this super cute DIY from American Craft Studio. Wouldn't this be so cute for the bride and groom's initials at a vintage or rustic wedding? For this DIY, you'll need:

- Printer - Scissors - Cardstock - Pen or Pencil - Adhesive - Paper Piercer - Buttons!!! - Frame without glass or shadowbox

Get the detailed tutorial here... how cute is the final product?! Love it!

*Photos courtesy of Oritdotan on Etsy; American Craft Studio

Baby shower etiquette

Remember all of those weddings you were in a couple years back? Well, if they haven't already popped one out, chances are that babies are in the near future. Hosting a baby shower is fun but if you don't have a child of your own, hosting your first shower might seem a little foreign. Here are a few basic tips for baby shower etiquette that you may not know:

Timing and Inviting

Showers are usually given four to six weeks before the baby's due date. Parents who receive gifts in advance of the birth have the advantage of knowing what additional items they'll need to buy or borrow.

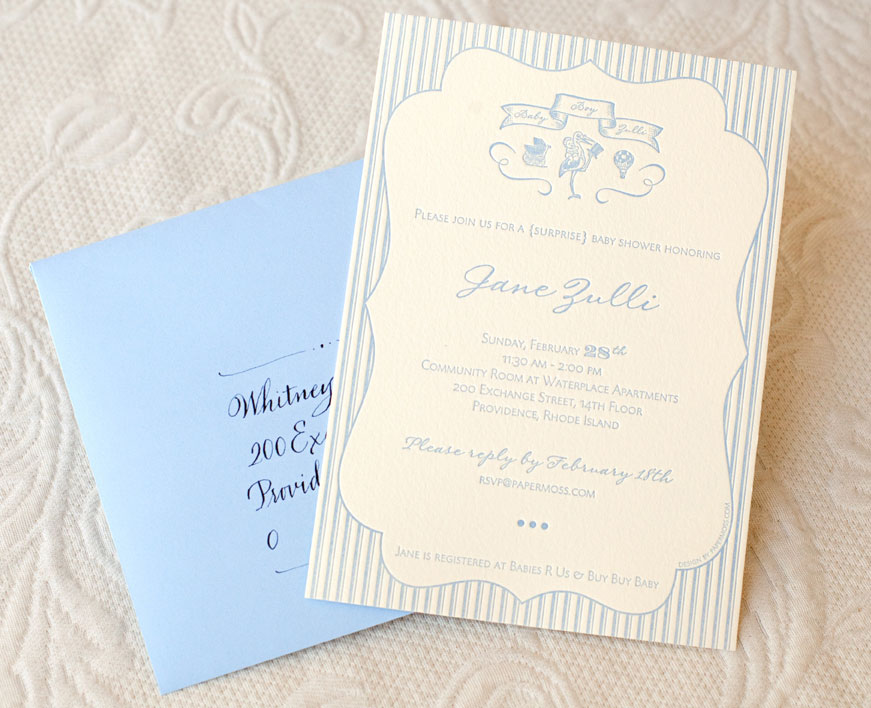
Invitations are sent out three weeks before the shower. Gift information is never listed on the invitation itself, but it's fine to mention the nursery colors {or theme} or the gender of the baby. Traditionally, the host should be prepared to give gift suggestions and nowadays it's acceptable to include baby registry information on a separate enclosure.

Gifts

While registering for shower gifts at a store or online is practical and time-saving for the parents-to-be and guests alike, many people feel that a registry list robs a shower of its charm. Guests should always feel free to choose whatever gifts they think are best, and half the fun of giving and receiving presents is the element of surprise.

Thank you notes

Thank you notes should be written for baby shower gifts, and the wise expectant mother or father writes them as soon as possible. Even when the giver has been enthusiastically thanked in person and has told the new parent not to bother with a note, a note is still always appreciated, if not a must.

*Etiquette tips courtesy of Emily Post

*Photos courtesy of The Cake BlogLaura Ashbrook Photography; Real Simple; Etsy

An easy way to impress those guests

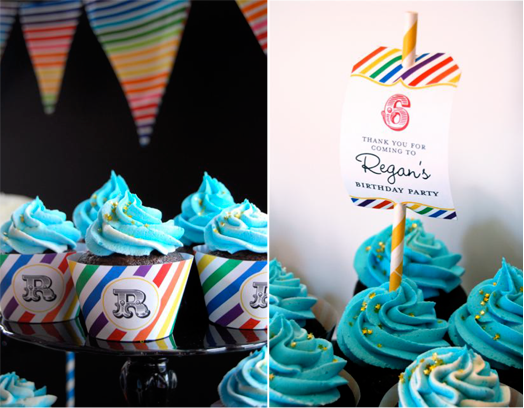
You're busy with work, errands, going to the gym {on a good day}, keeping the house clean, going to appointments, trying to relax {somewhere in the madness} and then... maintaining a social life? Birthday parties, get-togethers, showers and other celebrations pop up all the time. So what do you do if you're strapped for time but need to bring something? The clever and classy lady can follow these easy suggestions to make a Betty Crocker Box cake mix into stunning cupcakes. Start with these precious designer cupcake wrappers. Oh yes, they're real and worth every penny! Either match the theme of the party or keep some on hand for those last minute occasions.


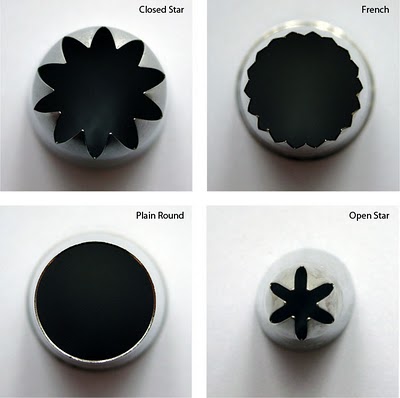
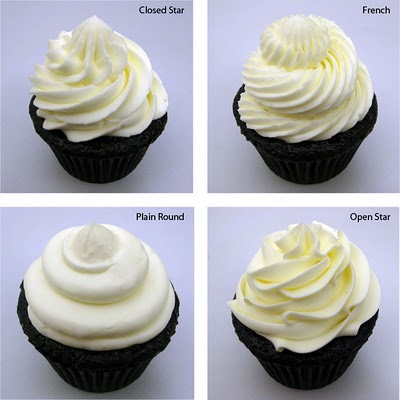
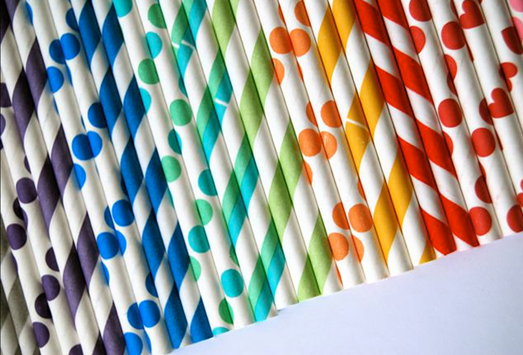
And then get your hands on some decorating tips {also can be found on The Cupcake Social} such as these.


undefined

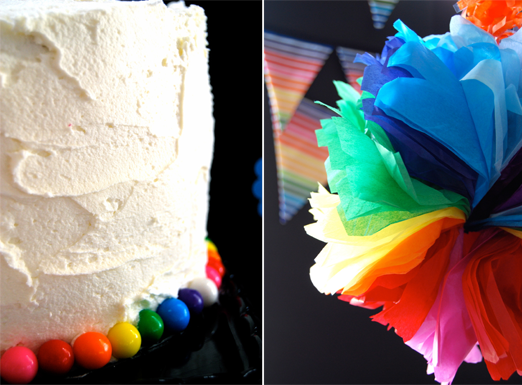
Follow the frosting tutorial on Decorate This to add some fancy frosting décor. It's really not as difficult as it looks!

undefined

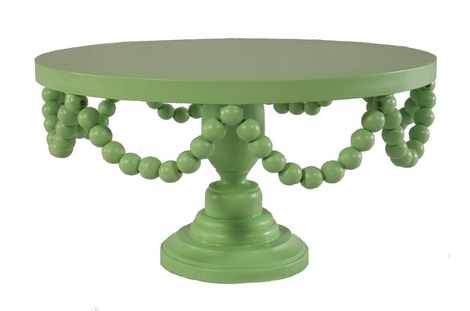
And last, put them on a cute stand such as this one we found on Delightfully Lovely.

Now, you can party like the savvy yet busy woman that you are. How who wants an excuse to make cupcakes??


*Photos from respective sites


Our favorite party favors

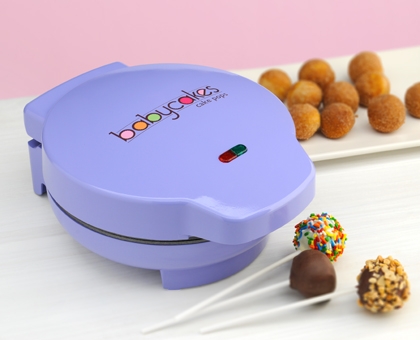
While flipping through the May issue of InStyle magazine, we were floored to see that a company called Baby Cakes came out with a Cake Pop maker!  Remember those darling little balls of cakey goodness that we shared awhile back?  Well, although we like to believe that Bakerella was the original founder of the pops, we are oh - so - grateful for this waffle - like maker to simplify the process. ESPECIALLY if you're making large quantities for party favors!

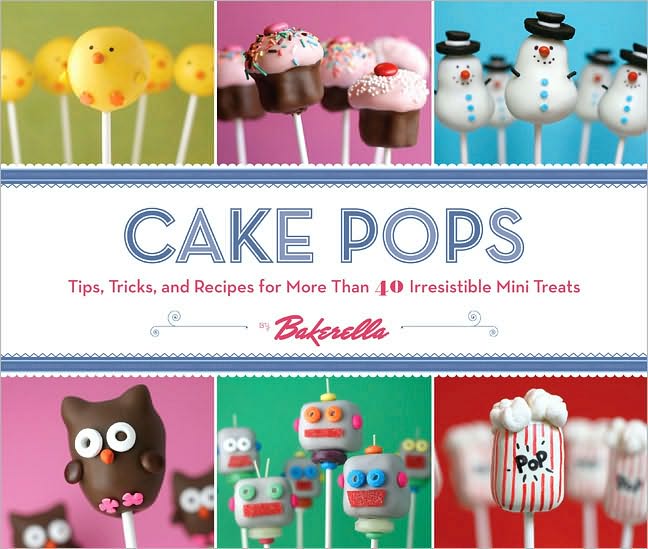
Buy your Cake Pop machine here, and take note that they also offer mini- doughnut and whoopie pie makers!! If you're looking for some cake pop inspiration {or a cute gift} get your hands on a copy of this:

We couldn't resist a sharing the good news!! Hope you all had a lovely weekend!


*Photos courtesy of Baby Cakes &  Bakerella

A new kind of flower power

Plastic flowers are near the top of my hate list. Well, not that a "hate list" actually exists, but if it did, we know where fake flowers stand. Perhaps it was an overindulgence in the 80s and early 90s? Bleh! Well, when a friend mentioned that she was in search of alternatives to fresh flowers for her wedding {due to severe allergies of a bridesmaid} I was excited to come across this idea from A Field Journal. These are pretty stinkin' cute for D.I.Y Flowers! And you know how much we LOVE paper...

For the full scoop on how to make these, visit The Brides Cafe. Loving this as a plastic flower alternative!!

*Photos courtesy of A Field Journal

Let's get Cheesy

You may have heard that April is National Grilled Cheese month. If you were "out of the loop", don't fret, it's not too late to pay tribute to that childhood classic. Why not host a tasting party {as if we need another reason to throw a party} and feature some of the gourmet combinations that have revitalized this comfort food. Perhaps a wine pairing is in order?? Mmmm :)  

Goat Cheese and Strawberry Grilled Cheese

{via}

Spread 1 (4-oz.) goat cheese log, softened, on 1 side of 3 whole grain bread slices. Spread 4 1/2 tsp. red pepper jelly on 1 side of 3 whole grain bread slices; layer with 3/4 cup sliced fresh strawberries, 6 large basil leaves, and 1 1/2 cups fresh watercress or arugula. Sprinkle with salt and pepper to taste. Top with remaining bread, goat cheese sides down. Cook sandwiches in a large, lightly greased nonstick skillet over medium heat 2 to 3 minutes on each side or until golden brown.


Smoked Salmon and Gruyere Grilled Cheese

{via}

Lay out 4 slices of French bread. On top of them layer slices of smoked salmon (4 ounces total), Gruyere cheese (4 ounces sliced or shredded) and chives (1 tablespoon). Use a fork to lift the lemon slices out of the pan and add one large lemon slice to each sandwich. Butter the top slices of bread and let cook on medium heat until both the top and bottom are well toasted. If the cheese isn't melting, turn the heat to low, cover the pan and let cook for a few minutes more.


Sauteed Jalapeno and Aged Jack Grilled Cheese

{via}

Heat a large frying pan over medium heat. When it’s heated, add oil and 2 jalapeños, seeded & thinly sliced lengthwise. Season well with salt and freshly ground black pepper; sauté peppers until tender, about 5 minutes. Set jalapeños aside and let cool slightly. Combine 1.5 ounces of grated aged Monterey Jack cheese and jalapeños in a small bowl. Spread butter on 1 side of each slice of bread. Return the pan to medium-low heat. Once the pan is warm, add 1 slice of bread (buttered side down), top with cheese mixture, then close sandwich with second bread slice (buttered side up). Cook until bread is toasted and cheese is melted, about 5 minutes per side.


BLT Grilled Cheese

{via}

Heat a large nonstick skillet over medium-low heat. Coat pan with cooking spray. Add 1 cup onion and garlic; cook for 10 minutes or until tender and golden brown, stirring occasionally. Sprinkle 2 tablespoons shredded reduced-fat sharp white cheddar cheese over each of 4 bread slices. Top each slice with 1/2 cup spinach, 2 tomato slices, 2 tablespoons onion mixture, and 1 1/2 bacon slices. Sprinkle each with 2 tablespoons cheese; top with the remaining 4 bread slices. Heat skillet over medium heat. Coat pan with cooking spray. Place sandwiches in pan, and cook for 3 minutes on each side or until golden brown and cheese melts.


Well even if you dont feel so ambitious to have a tasting party, one of these recipes is sure to spice up your weekend! Happy cooking!!

xo


*Photos from respective sites

A little Vineyard Vines touch

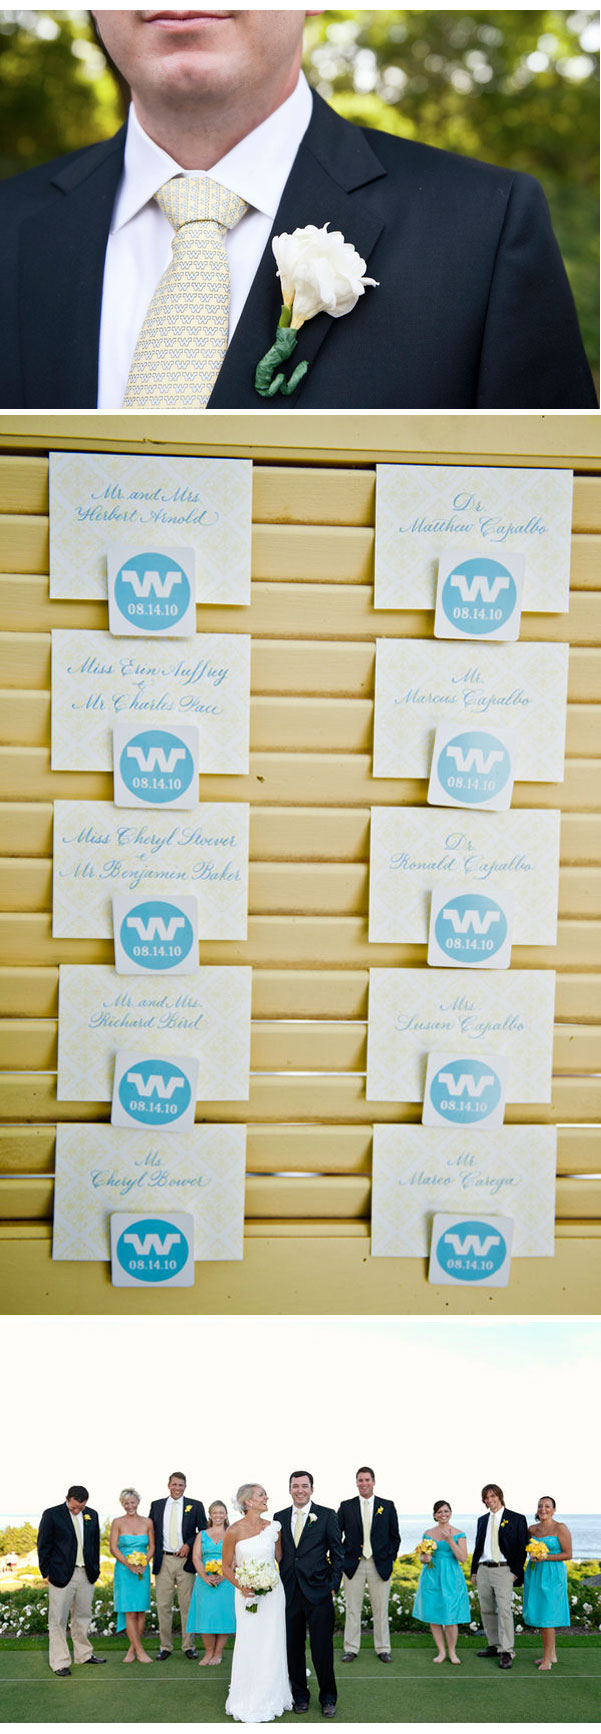
One of our favorite weddings of 2010 brought the opportunity for Paper Moss to work with a classic New England brand, Vineyard Vines. By now, you have got to know how much we thrive on customizing things. When the opportunity came about to customize ties for one of our grooms and his groomsmen, see the classic, preppy and sentimental spin it put on this idyllic wedding.

What a gorgeous group of people! To see more of Abby & Andrew's big day, check out our previous post.


Interested in having custom ties for your wedding? Don't hesitate to ask us how to make it happen!!! The possibilities are endless...


*Photos courtesy of Leila Brewster Photography ; Wedding coordinated by TRUE Event

DIY: precious place cards

There is something so satisfying about embarking on a DIY journey and knowing that the delicious outcome is in your hands. Those of you who love to have that personal touch on your events {be it a bridal shower, wedding or birthday party} you'll adore these vintage award ribbon place cards. Thank you, Laurie Cinotto and Once Wed for passing the inspiration! undefined

You'll need:
- Crepe paper (two or three colors,  any thickness in a roll or folded pack)
- Decorative Paper
- Ribbon (1/2 inch wide,  a simple, acetate florist ribbon works well for these)
- Glue gun and glue sticks
- Scissors (regular, pinking shears, or any decorative scissor)
- Stapler
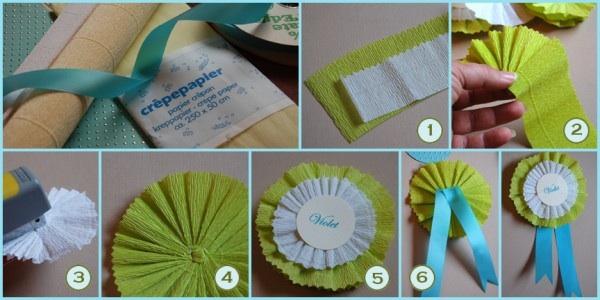
Directions:
1.  Begin by cutting a 2″ wide by 20″ long strip from your roll or folded pack of crepe paper.  You’ll want the “grain” of the paper to run the short way.    The bottom of your strip should be cut with standard scissors, but you can use any decorative scissors to cut the top edge.  (See figure one)
2.  If you are right handed, pick up the left end of your paper strip (straight edge at the bottom, ruffled edged on top) and begin folding small, angled pleats.    Keep the completed pleats pinched between your left hand thumb and index finger as you work.  Keep your pleats even.   
If you’re left handed, start from the right end.   Hold the completed pleats with your right thumb and index finger, fold with your left hand.  (See figure 2)
3.   Keep folding your angled pleats and a circle shape will naturally form.    
4.  When you have a complete circle, stop folding and trim any remaining paper.
5.  Keep holding your medallion between your index finger and thumb.  Take your plier stapler and carefully staple the center of the medallion.  Turn the medallion 45 degrees, and staple again to create a “x” in the center.   This should secure all the pleats. If, by chance, it doesn’t, it’s fine to add another staple or two.  (See figure 3 and 4)
6.  Cut another crepe paper strip  approximately 1.5 inches high and 15 inches long.  Repeat steps 2 through 5 to create a second,  slightly smaller  medallion.   You can use the same color paper as you did for the first medallion, or you can chose a coordinating color.
undefined

7.  When you have completed the second piece, put a dab of hot glue in the center of your larger medallion and place the smaller medallion on top of it.
8.  Print your guests name on a sheet of card stock and cut out a circle with the  name centered on it.  Glue the circle in the middle of the smaller medallion.   (See figure 5)
9.  Cut two 4 – 5 inch lengths of ribbon.   Snip a little triangle  from one end of each ribbon.
10.  Glue the ribbons to the center of the back side of the larger medallion. (finished ends dangling down).   Cut a circle out of your decorative paper, ( smaller than the diameter of your largest medallion)  and glue to the back.  (See figure 6)
11.  Place the ribbon medallions at each guest’s place setting, on their napkin,  or attach to the backs of their chairs.
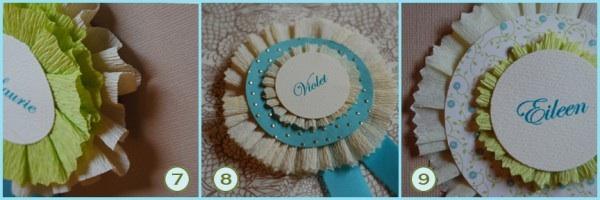
To make a more ruffly medallion, cut a extra long strip and begin making your pleats.  When your circle is complete, go around it again and make a second row of pleats and then staple the center.   (See figure 7)
Add decorative patterned papers between your medallion layers to add a little more color.  (See figure 8 and 9)


*Photos courtesy of Once Wed
 

Nice napkins!

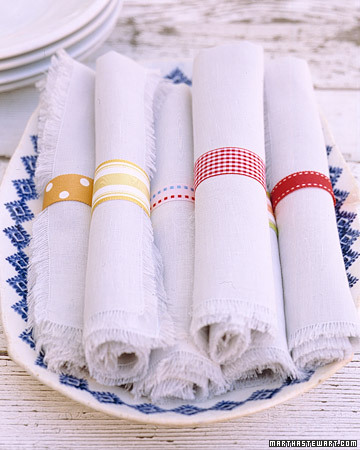
While prepping for a little get-together several weeks ago, we realized at the last minute that all details were covered - except the napkins. This may sound trite, but everything else was perfectly coordinated and in place! Of course the guests had such a fabulous time that no one noticed, but this definitely inspired us to look into some napkin options for our next soiree. undefined

Dress up plan cloth napkins with a variety of ribbon rings.... the options are endless and you can mix and match to fit the event! For each ring, fold a 6-inch length of fabric ribbon in half, right sides facing, and sew ends together with a 1/4-inch seam allowance. Turn the rings right side out, and slip them around rolled napkins.

undefined

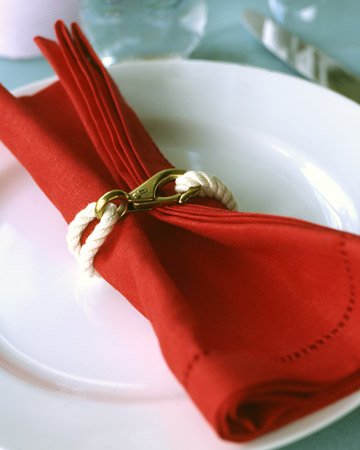
Use boat snaps (available at boating stores) and an off-white cord to make these super cute nautical napkin rings! {Make them}

undefined

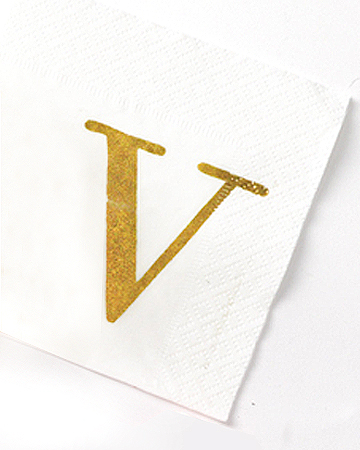
Make an instant monogram with metallic ink and rubber stamps. What a simple and chic way to spice up paper napkins!

undefined

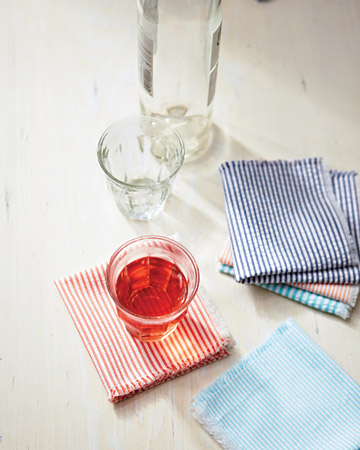
Seersucker makes us giddy. So do parties... what a perfect combination!  The classic fabric is inexpensive and available at almost any cloth store, so you can mix and match a few colors and make 'em yourself!

undefined

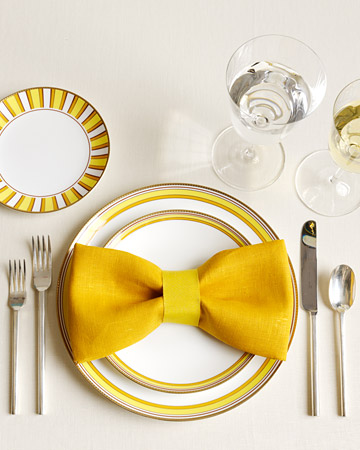
For a sit down dinner, this bow is such a fun way to class up the setting. Here's how to make it happen: spread a dinner napkin out, lying flat. Fold opposite sides in so they meet at the center. Then fold again at the center to form a narrow, ribbonlike shape. Next, fold short ends in so they meet at the center. Cinch in the middle with a ribbon in a coordinating color, and glue at back.

undefined

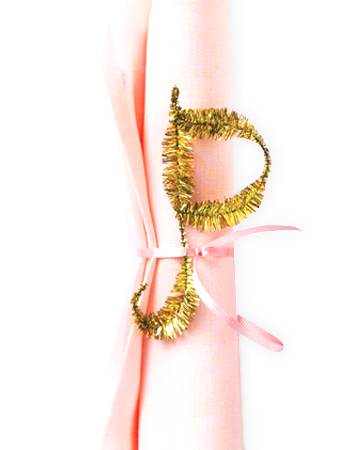
A childhood craft favorite gone classy: metallic or colorful pipe cleaners! Twist them into letters to make monogramed accessories for napkin rings. How cute are these??


Check out more of Martha's napkin ideas here.

*Photos courtesy of Martha Stewart


Link those cuffs!

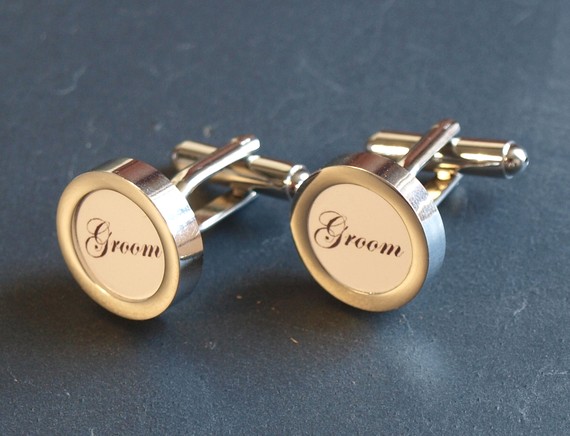
French cuffs: the words go together perfectly. While it's not the cuffs that matter {but rather the man inside the shirt} we can't deny our love for the options and splash of personality that cuff links can provide. What a fun way to add another element of customization to a wedding! Have you seen all of the options available??! A fabulous gift for your groom-to-be? Perhaps a little groomsmen gift? Here are some of our favorite sweet & classic ideas for a wedding, but don't stop here, browse on!!

{via Neiman Marcus}

{via THOMAS PINK}

{via Urban Eye}

{via Bragging Bags}

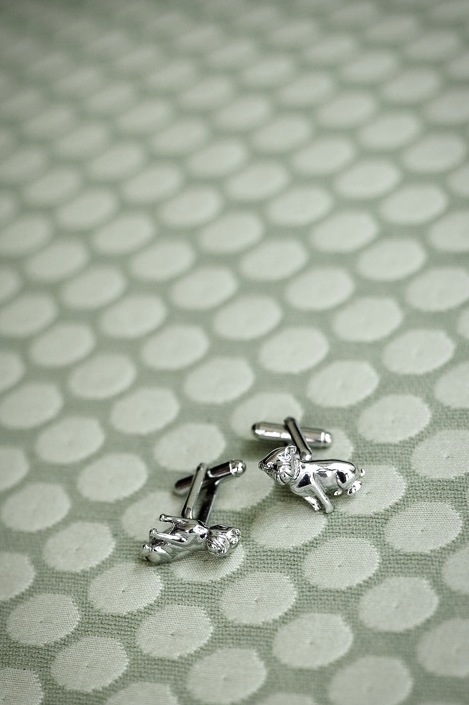
We couldn't leave out one of our favorite couples, Kaitlyn & Ben who's gorgeous wedding was featured on SMP as it boasted some fabulous details, including his bulldog cufflinks from Banana Republic!

undefined {via Laura Ashbrook Photography}

*Photos courtesy of respective sites