Initial here, please

It seems rare anymore that a wedding cake would be topped with the old-school miniature plastic bride and groom.... seriously, when is the last time you saw one of those?! There are so many fun ideas for wedding cake toppers and these days it's all about personalizing every detail! We ran across this D.I.Y Glitter Monogram topper from Ruffled and instantly fell in love!

{via}

If you're not in the market for a cake topper, there has got to be SOMETHING you can use this D.I.Y for... it's just SO CUTE! :) To get the details on the details on the "how to" go here.

All those old books

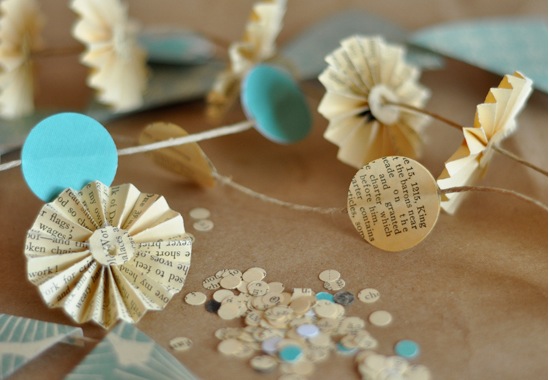
Hello and happy Monday! How was everyone's weekend? While blog hopping over the weekend, we stumbled upon this ADORABLE paper garland from Project Wedding... in fact, it kind of reminds us of the D.I.Y. Envelope Liner that we featured a few weeks ago! Anyway, wouldn't this be a perfect decoration for a rustic chic wedding or event?! It's so stinkin' cute AND {not to mention} made of pretty paper that's covered in stories- call us crazy, but there's something romantic about that. :)

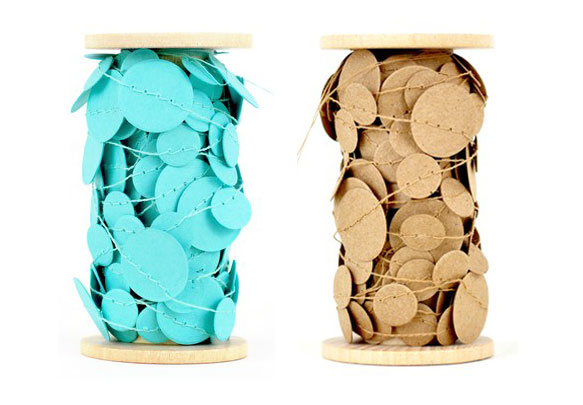
Plus, what a great way of getting rid of old books or sheet music that isn't donation worthy. Visit Project Wedding for the full tutorial. If it seems a bit daunting to make a lot of these little garlands, you can always mix them with solid ones that can be found on Etsy, such as these from Kristina Marie.

* Photos courtesy of Katherine Chong via Project WeddingKristina Marie

Let's have a ball

In light of one of our dear friends being in the midst of wedding planning, we found ourselves searching for a fun D.I.Y. that would create ambience at the outdoor reception. We think these yarn balls from Wednesday Custom Design add the perfect modern flare and though they're messy to make, they're super budget friendly! Hang them over the dance floor, string them with lights, line them over dining tables or even use them for centerpieces.
undefined
You'll need:
- Balloons
- Sharpie
- Scissors
- Cotton yarn
- 4oz. White school glue
- 1/2 cup of Corn starch
- 1/4 cup of Warm water
- Something to stir with
- Petroleum jelly
- Clear fast drying spray paint
- Hanging lamp cord or fishing line {depending on your desired final product}
- Container for mixing
undefined
For the step - by - step directions, visit Wednesday Custom Design. If you dare to replicate these yarn balls, we wish you happy crafting!!
*Photo courtesy of Wednesday Custom Design

Keep it cool

Oh sweet surrender, we're having a heat wave here in Boston! What is going on with this crazy weather?! Today is supposed to be up to 100 degrees and "feel like" 110. All we can possibly think to do is cling to anything with air conditioning and have a diet consisting solely of iced coffee and popsicles. In order to prevent over-dosing on one type of popsicle, we deemed it appropriate to try a few new recipes. Want to join us??

Recipe from {Obsessionist}

Recipe from {A Cup of Jo}

Recipe from {Desserts for Breakfast}

Recipe from {Pass the Sushi}

Are there any amazing recipes for frozen pops that we're missing out on? Don't hesitate to share!! :) Hope you're staying cool on this hot Friday!

DIY: {to die for} Envelope liners!

You are in for an adventure today, my pretties! The sweet & incredibly talented Michelle Peterson is our guest today to share this adorable and easy D.I.Y!! I don't know about you, but envelope liners make my heart skip a beat!! We couldn't be more excited, so here it is from the woman herself: Michelle: As an avid follower of Pearls for Paper, I love all things paper, ribbon, and hand-written. Living in Wisconsin, we were too far away to attend and celebrate our dear friend's son's very special first birthday in Washington. So, when she asked me if I would help with the party planning and make his invitations, I jumped at the chance! We decided on a Mustache Bash.  How silly and adorable for a one year old, right? After several failed attempts at getting just the right pattern to print for the background, I bagged it and grabbed what I had around - an old fairy tale book.

I used these delightful book pages as the background for the invite, and then went one step further to line the envelopes to match. Want to try it?

Here's what you'll need:

- Book pages

- Double sided tape and/or glue

- Paper trimmer

- Envelopes

- A pen

Here are the steps:

1. Tear some book pages.

I used an old damaged copy of Hans Christian Anderson Fairy Tales. You can find some great old books at thrift stores.

2. Measure the book page to your envelope.

I look to make sure the page will be tucked behind the sides of the envelope, but not as wide as the envelope itself.

3. Trim your book page.

Think about cutting off the outside margin, as well as trimming down to the right width. Don't worry about trimming the torn edge, since you'll be tucking that into the envelope. It makes for a cute hand-made surprise if someone looks into the envelope.

undefined

4. Insert the page into the envelope.

Make sure the top ends up just below the glue line and eyeball it to be centered between the two sides.

5. Fold the page with the crease of the envelope.

6. Open the envelope to see the top side of your book page. Apply double stick tape and/or glue.

7. Press and done!

These are soooo cute, right? Thank you, Michelle for being a guest on Pearls for Paper and inspiring our weekend project!

*Photos courtesy of Michelle Peterson

What makes a party?

Having people over to celebrate the 4th? Well, there are a few things that can transform a "get-together" into a PARTY! Without going over the top to rent dishes or have it catered, here are five easy ways to turn a festive 4th get-together into a party:

1. Invitations

It shouldn't come as a surprise to you that INVITATIONS might be first on our list. There are plenty of {non-custom} stationery companies that make adorable invites for occasions such as a BBQ. {Please note that Paper Moss is more than happy to design custom invitations for your upcoming BBQ, if needed :)}

{We like these from Jack & Ella Paper Press}

2. Signature cocktail

Do it. Go above, go beyond and think of a catchy little name for a signature cocktail! Your guests will LOVE it. If kids are coming, make a signature kid friendly drink for them too. We suggest the Patriotic Margarita or Berry Splash for the kiddos. Seriously- Check. These. Out. :)

{via}

3. Extra little touches

Adding little decorative things like center pieces, drink umbrellas or signs for the food can spice things up a lot. Hostess with the Mostess even offers free designs that you can print out at home. Check out their patriotic parasols and party signs like these:

{via}

So cute, free and super easy! You could even mount these signs on thick paper or laminate them to give a more polished look!

4. Party favors

Don't you remember diving in to goody bags at birthday parties as a child? Well it might not be quite as fun as when we were five, but still... guests will delight in party favors ESPECIALLY if they involve matches. Guaranteed. The folks over at Twig & Thistle were really on to something when they came up with the template for these sparkler holders:

{You can find the template here}

5. Games

For a 4th of July party, go with a classic yard game like bocce ball. If you don't already have a set, hop over to Pottery Barn and score this sassy one:

{via}


Whatever fun plans you have to celebrate independence day, we hope you have a fabulous {and safe} long weekend!

A festive little refresher

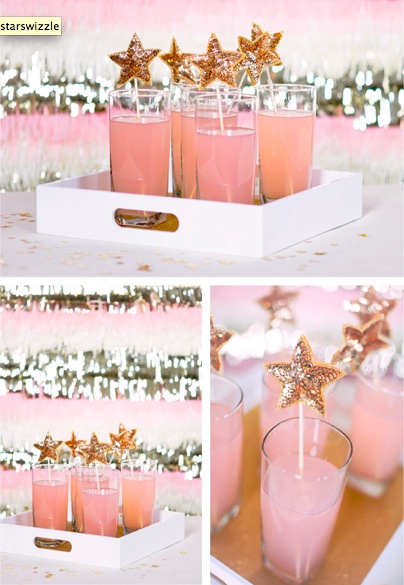
Can you believe the 4th of July is a week from today?!  After checking out the weather report for this week, we're anticipating some much needed sunshine so naturally, we have barbecues, block parties and fireworks on the mind!! It's only appropriate to enjoy a refreshing beverage such as this Fruit Tea Cocktail, during a hot summer afternoon.

Ingredients:

1 1/2 parts green apple vodka 1 1/2 parts raspberry iced tea 1 1/2 parts ginger ale lemon wedges

They also suggested adding frozen raspberries, but we think adding more fruit for a "sangria influence" would be yummy :)

Directions:

In order, add vodka, iced tea, and ginger ale to glass over ice. Stir gently to combine. Squeeze lemon wedge over, and add to drink. If you decide to add more fruit, let it marinate for several hours prior to serving.

Having people over this week? If you want to get really festive, you could add a cute little drink stirrer like these mini-pinwheels we found on Joy Ever After, to get in the mood for Independence Day! This DIY is super easy and such a fun touch for your guests!

{D.I.Y.}

*Photos courtesy of Erin's Food Files & Joy Ever After

More chevron, please!

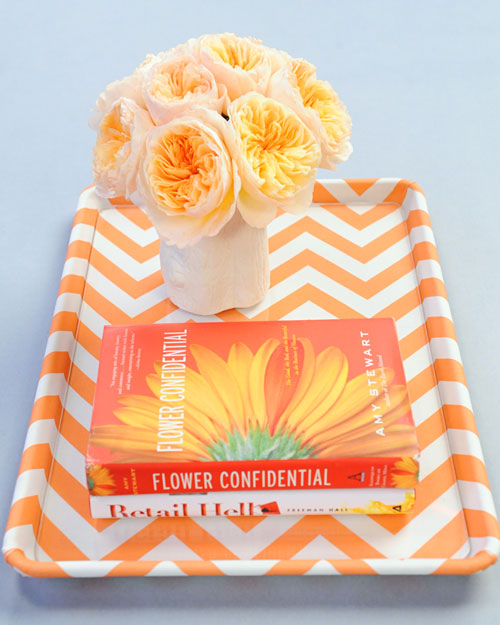
You may have caught on that we are obsessing over the Chevron pattern lately. Who'd have thought that after all those years of staring at the Chevron gas station sign, it would materialize into something so pretty?! In the spirit of spring cleaning, moving & getting organized, this saucy little chevron printed tray started calling our names...

So naturally, we must obey and attempt to D.I.O.S {Do It Our Self}... and if you'd like to D.I.Y, here is the how to:

You'll need:

1 yard decorative fabric

Aluminum rimmed baking sheet {yes, a COOKIE SHEET!}

Spray adhesive

Scissors

Fabric glue

Synthetic felt

1/4-inch-thick acrylic sheet cut to fit inside of tray, with corners rounded

{the hardest part might be choosing the fabric!}

"How to":

1. Cut fabric large enough to cover the front and wrap around the back of the baking tray. Cover the front of the tray with spray adhesive.

2. Place fabric on tray so pattern is aligned, leaving enough room to wrap fabric around all sides to the back. Smooth fabric onto tray, pressing out any bubbles.

3. Pull any extra material into corner and push around the edge. Turn tray over. Cover the back of the tray with spray adhesive.

4. Press the fabric over two edges of the tray first, then fold in on each remaining side, as if wrapping a gift. Trim any excess fabric with scissors. Use fabric glue to secure, if needed.

5. Cut a piece of felt to fit the back of the tray and conceal fabric edges. Smooth felt on the back the tray.

6. Place acrylic sheet in center of tray.

*Photos courtesy of Martha Stewart; Premier Fabrics

A Monogram DIY

As a little one, our great grandmother gave us a gigantic container of vintage buttons. They were each so colorful and unique that we couldn't resist spilling them all out on the floor to sort and admire them. What we would give to have those buttons now!! Luckily we found this amazing button shop on Etsy for this super cute DIY from American Craft Studio. Wouldn't this be so cute for the bride and groom's initials at a vintage or rustic wedding? For this DIY, you'll need:

- Printer - Scissors - Cardstock - Pen or Pencil - Adhesive - Paper Piercer - Buttons!!! - Frame without glass or shadowbox

Get the detailed tutorial here... how cute is the final product?! Love it!

*Photos courtesy of Oritdotan on Etsy; American Craft Studio

The most important meal

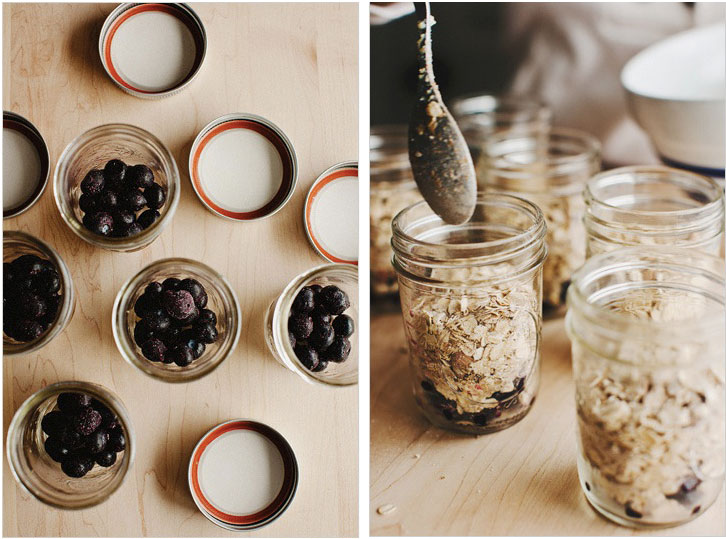
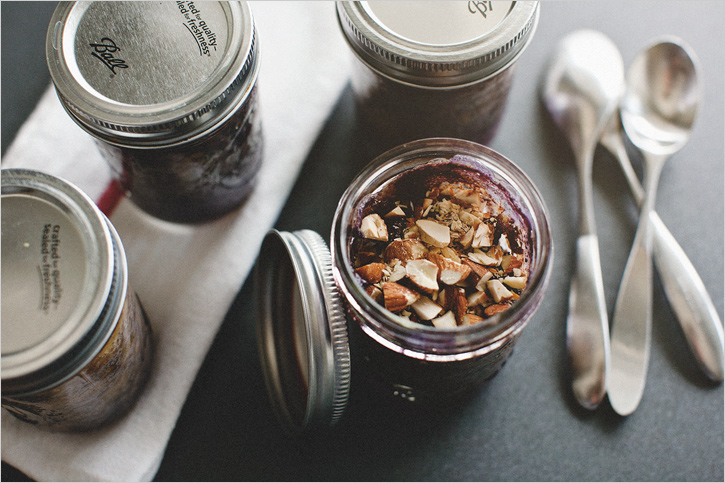
The most important meal of the day... in the cutest way possible! People are constantly coming up with cute ways to display and present food and the mason jar method is so rustic and adorable!! Wouldn't this idea from Sprouted Kitchen be so cute for a weekend brunch with friends??

You'll need:

2 Cups Blueberries, plus extra for garnish

2 Cups Old Fashioned Oats 1 tsp. Cinnamon 1 tsp. Aluminum Free Baking Powder 1/2 tsp. Sea Salt

2 Cups Whole Milk 1 1/2 Tbsp. Melted Butter 1/3 – 1/2 Cup Maple Syrup 2 tsp. Vanilla Extract

1 Cup Toasted Chopped Almonds 1/4 Cup Turbinado Sugar


1. Preheat the oven to 375′. Divide the berries between six small mason jars. 2. Mix the oats, cinnamon, baking powder and salt in a bowl. Divide the dry mix between the jars, just layering on top of the blueberries, about 1/3 cup. 3. Mix the milk, butter, maple and vanilla together. Pour a scant 1/2 cup on top of the oats, letting it seep through to the bottom. Place all the jars in a baking dish, sprinkle a few fresh berries on top, and bake on the middle rack for about 30 minutes until the liquid is absorbed, tops are just browned but the oats are still moist.

The best part is that it is easy AND healthy! You have got to check out Sprouted Kitchen to see their other yummy ideas :)

Happy Friday!!


*Photos courtesy of Sprouted Kitchen

Monday muffins

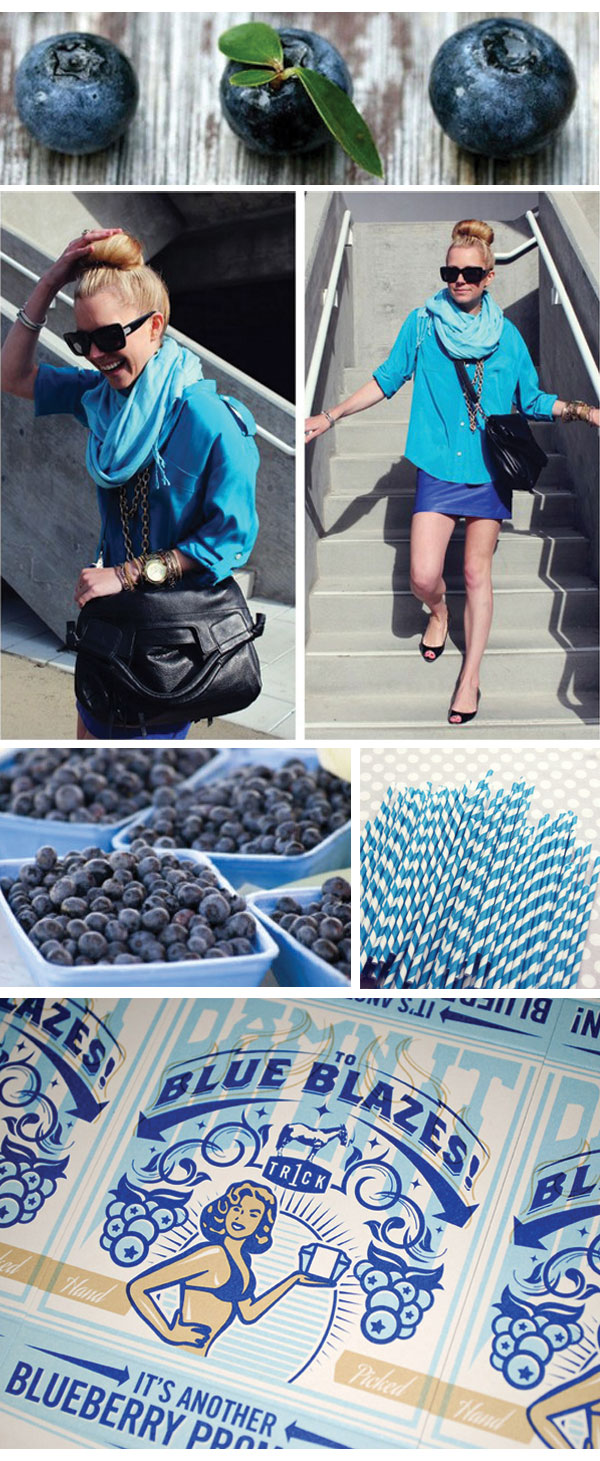
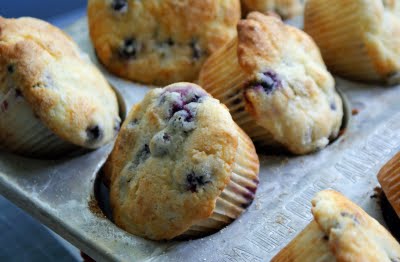
Sometimes we think of our food in terms of Pantone chips. Yes, it sounds a little crazy- but we prefer to think of it as "quirky" or "endearing" which sounds way less threatening than "crazy". Case and point:

Emily made us delicious Gluten Free Blueberry muffins for our Monday morning meeting, so I couldn't resist running with the inspiration... and if you're in the Gluten Free Club {or know someone who is} check out the yummy recipe below!

Now if you're sufficiently inspired to get some blueberries, here is that delicious recipe from Dinner with Julie...


10 Tbsp. butter, softened 1 cup sugar grated zest of a lemon 2 large eggs 3 cups gluten-free flour blend (or 1 cup sweet white sorghum flour, 1 cup white rice flour and 1 cup tapioca flour) 1 ½ tsp. baking powder ½ tsp. baking soda ½ tsp. salt 1 ½ cups plain yogurt 1 cup fresh or frozen (don’t thaw them) blueberries, raspberries, Saskatoon berries, blackberries.. or diced peaches, pears, apples, whatever you have that you want in your muffin

Sugar, for sprinkling

Preheat the oven to 375F.

In a large bowl, cream the butter, sugar and lemon zest together with a spatula. (If you beat the mixture for awhile with an electric mixer, the muffins will not rise – stick to doing it by hand.) Add the eggs one at a time, mixing after each.

Add a cup of the flour along with the baking powder, soda and salt, and mix well. Add half the yogurt and stir until combined, then another third of the flour, the rest of the yogurt and the rest of the flour. Stir in the berries, or whatever fruit you want to use.

Divide the batter among muffin tins that have been lined with paper liners or sprayed with nonstick spray, filling them. (You’ll get about 18-20 muffins.) Sprinkle the tops with sugar and bake for 25-30 minutes, until golden and springy to the touch.

Makes about 1 1/2 dozen muffins.


*Photos clockwise from top: fffound; Atlantic-Pacific; Sweet Lulu; The Dieline; Yahoo Sports; Dinner with Julie

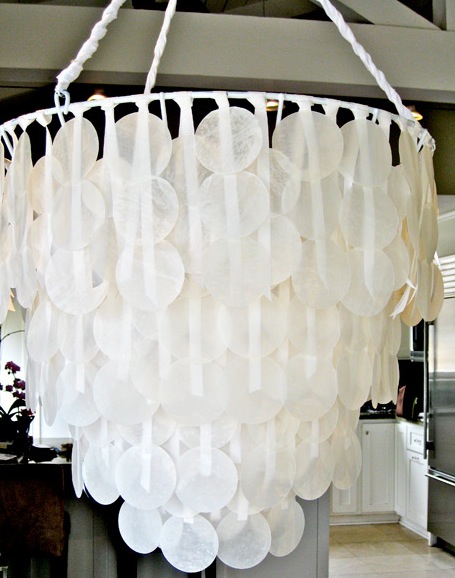
A nautical chandelier

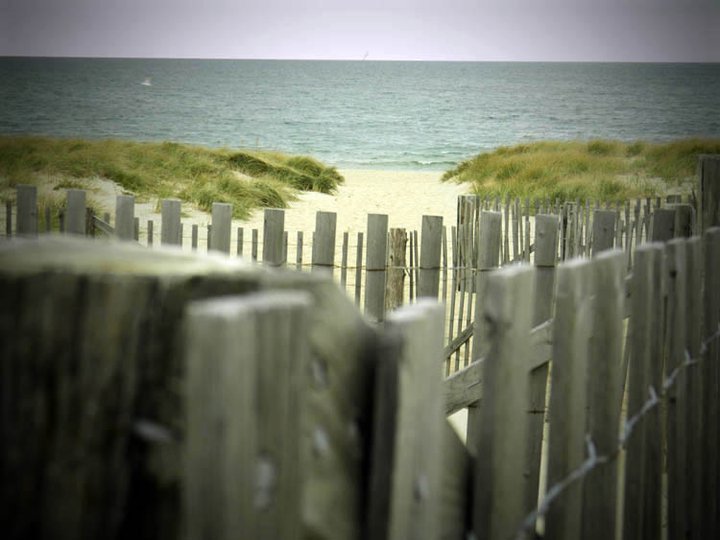
Nothing reminds me of summer like the beach. Since I can't be at the beach right now, I figured bringing a little beachy-inspiration home might help in the meantime.

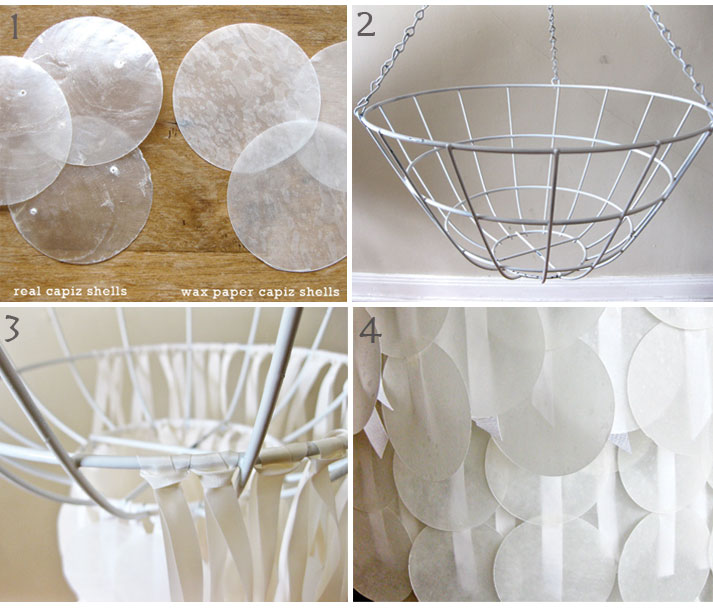
And this... is our weekend project, thanks to Design*Sponge. Isn't it fabulous to know that you can Do It Yourself??? Haha, but seriously, look at how easy it {hopefully} is...

Supplies:

- hanging planter basket - white spray paint - ribbon - scissors - 1-2 rolls wax paper - 2 big pieces of parchment paper -  iron - hot glue gun & glue sticks - circle cutter (i didn’t have any luck with a “punch”) - cutting mat


For directions on "how to", visit Design*Sponge and be sure to take some time to poke around on their site. There is much to adore!

I hope my chandelier looks as lovely as this one!!


*Photos courtesy of Daniel Sinner & Design*Sponge

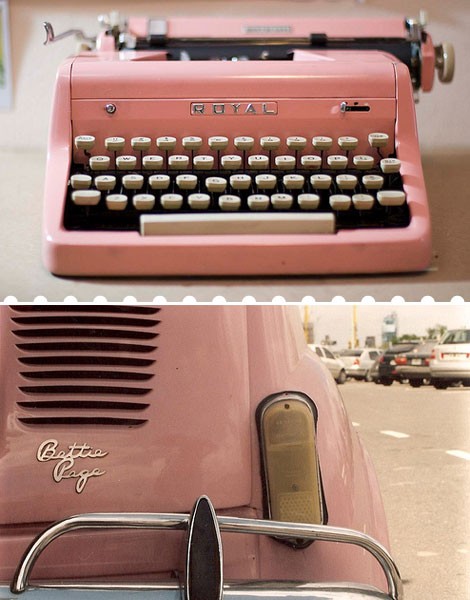
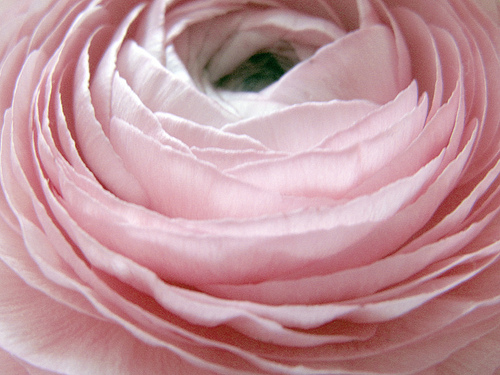
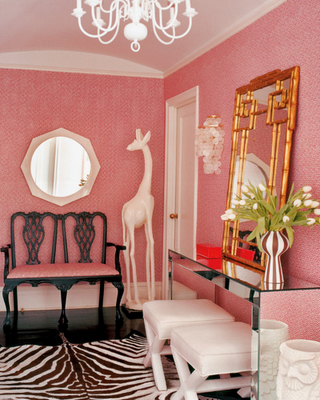
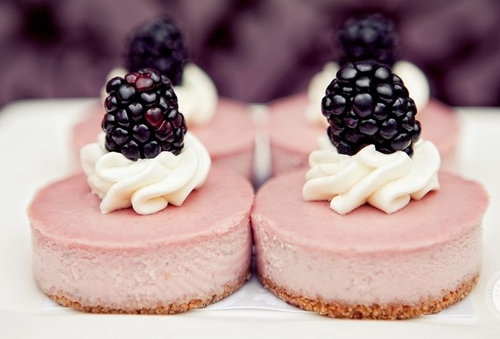
Pretty Pink

Pink. Some love it, some hate it. Right now, we are loving the color- can't get enough, in fact. Besides being cheerful, it is said to increase energy and encourage action and confidence. Why does that not come as a surprise when we think of our beloved friends who have obsessed over this color for years... they are some of the most energetic and positive people!

Be sure to check out the last {adorable} photo for a DIY!

undefined

{via}

undefined{via}

undefined

{via}

undefined

{via}

{via}

This last photo is a DIY from the Inspired Bride.... just in case you want to add some more pink in your life!!


Happy Monday!

An easy way to impress those guests

You're busy with work, errands, going to the gym {on a good day}, keeping the house clean, going to appointments, trying to relax {somewhere in the madness} and then... maintaining a social life? Birthday parties, get-togethers, showers and other celebrations pop up all the time. So what do you do if you're strapped for time but need to bring something? The clever and classy lady can follow these easy suggestions to make a Betty Crocker Box cake mix into stunning cupcakes. Start with these precious designer cupcake wrappers. Oh yes, they're real and worth every penny! Either match the theme of the party or keep some on hand for those last minute occasions.


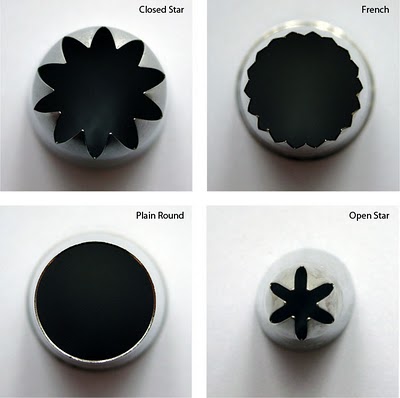
And then get your hands on some decorating tips {also can be found on The Cupcake Social} such as these.


undefined

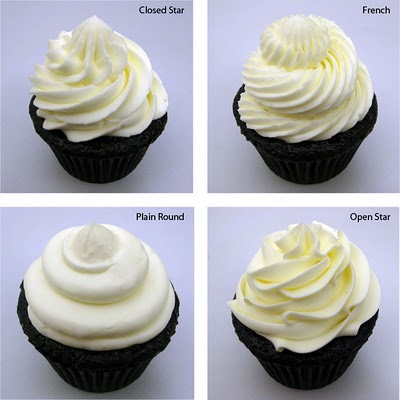
Follow the frosting tutorial on Decorate This to add some fancy frosting décor. It's really not as difficult as it looks!

undefined

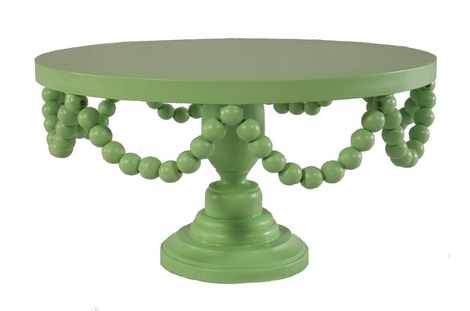
And last, put them on a cute stand such as this one we found on Delightfully Lovely.

Now, you can party like the savvy yet busy woman that you are. How who wants an excuse to make cupcakes??


*Photos from respective sites


A new kind of flower power

Plastic flowers are near the top of my hate list. Well, not that a "hate list" actually exists, but if it did, we know where fake flowers stand. Perhaps it was an overindulgence in the 80s and early 90s? Bleh! Well, when a friend mentioned that she was in search of alternatives to fresh flowers for her wedding {due to severe allergies of a bridesmaid} I was excited to come across this idea from A Field Journal. These are pretty stinkin' cute for D.I.Y Flowers! And you know how much we LOVE paper...

For the full scoop on how to make these, visit The Brides Cafe. Loving this as a plastic flower alternative!!

*Photos courtesy of A Field Journal

DIY: precious place cards

There is something so satisfying about embarking on a DIY journey and knowing that the delicious outcome is in your hands. Those of you who love to have that personal touch on your events {be it a bridal shower, wedding or birthday party} you'll adore these vintage award ribbon place cards. Thank you, Laurie Cinotto and Once Wed for passing the inspiration! undefined

You'll need:
- Crepe paper (two or three colors,  any thickness in a roll or folded pack)
- Decorative Paper
- Ribbon (1/2 inch wide,  a simple, acetate florist ribbon works well for these)
- Glue gun and glue sticks
- Scissors (regular, pinking shears, or any decorative scissor)
- Stapler
Directions:
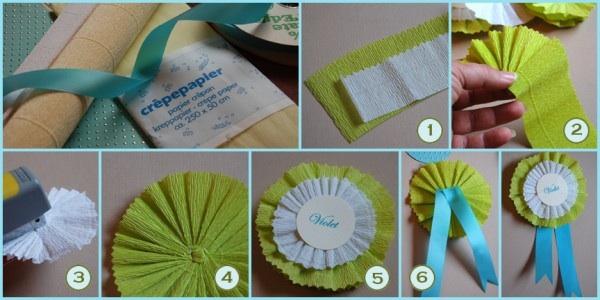
1.  Begin by cutting a 2″ wide by 20″ long strip from your roll or folded pack of crepe paper.  You’ll want the “grain” of the paper to run the short way.    The bottom of your strip should be cut with standard scissors, but you can use any decorative scissors to cut the top edge.  (See figure one)
2.  If you are right handed, pick up the left end of your paper strip (straight edge at the bottom, ruffled edged on top) and begin folding small, angled pleats.    Keep the completed pleats pinched between your left hand thumb and index finger as you work.  Keep your pleats even.   
If you’re left handed, start from the right end.   Hold the completed pleats with your right thumb and index finger, fold with your left hand.  (See figure 2)
3.   Keep folding your angled pleats and a circle shape will naturally form.    
4.  When you have a complete circle, stop folding and trim any remaining paper.
5.  Keep holding your medallion between your index finger and thumb.  Take your plier stapler and carefully staple the center of the medallion.  Turn the medallion 45 degrees, and staple again to create a “x” in the center.   This should secure all the pleats. If, by chance, it doesn’t, it’s fine to add another staple or two.  (See figure 3 and 4)
6.  Cut another crepe paper strip  approximately 1.5 inches high and 15 inches long.  Repeat steps 2 through 5 to create a second,  slightly smaller  medallion.   You can use the same color paper as you did for the first medallion, or you can chose a coordinating color.
undefined

7.  When you have completed the second piece, put a dab of hot glue in the center of your larger medallion and place the smaller medallion on top of it.
8.  Print your guests name on a sheet of card stock and cut out a circle with the  name centered on it.  Glue the circle in the middle of the smaller medallion.   (See figure 5)
9.  Cut two 4 – 5 inch lengths of ribbon.   Snip a little triangle  from one end of each ribbon.
10.  Glue the ribbons to the center of the back side of the larger medallion. (finished ends dangling down).   Cut a circle out of your decorative paper, ( smaller than the diameter of your largest medallion)  and glue to the back.  (See figure 6)
11.  Place the ribbon medallions at each guest’s place setting, on their napkin,  or attach to the backs of their chairs.
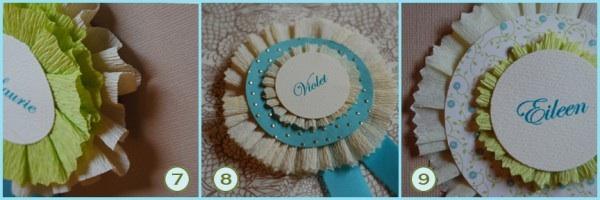
To make a more ruffly medallion, cut a extra long strip and begin making your pleats.  When your circle is complete, go around it again and make a second row of pleats and then staple the center.   (See figure 7)
Add decorative patterned papers between your medallion layers to add a little more color.  (See figure 8 and 9)


*Photos courtesy of Once Wed


Nice napkins!

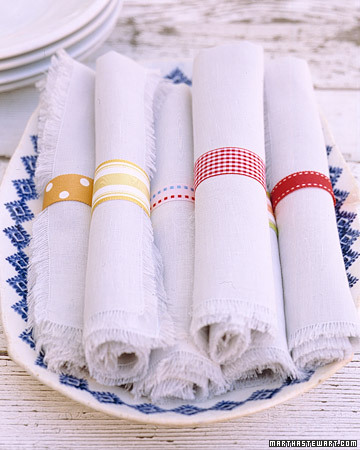
While prepping for a little get-together several weeks ago, we realized at the last minute that all details were covered - except the napkins. This may sound trite, but everything else was perfectly coordinated and in place! Of course the guests had such a fabulous time that no one noticed, but this definitely inspired us to look into some napkin options for our next soiree. undefined

Dress up plan cloth napkins with a variety of ribbon rings.... the options are endless and you can mix and match to fit the event! For each ring, fold a 6-inch length of fabric ribbon in half, right sides facing, and sew ends together with a 1/4-inch seam allowance. Turn the rings right side out, and slip them around rolled napkins.

undefined

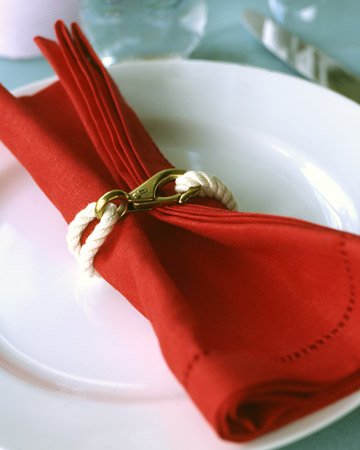
Use boat snaps (available at boating stores) and an off-white cord to make these super cute nautical napkin rings! {Make them}

undefined

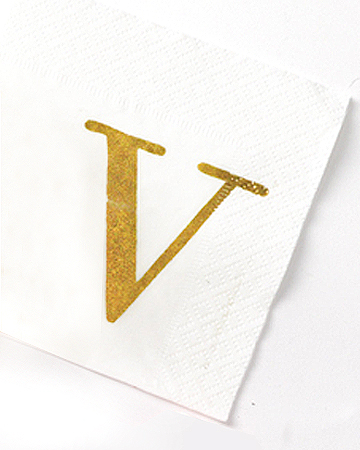
Make an instant monogram with metallic ink and rubber stamps. What a simple and chic way to spice up paper napkins!

undefined

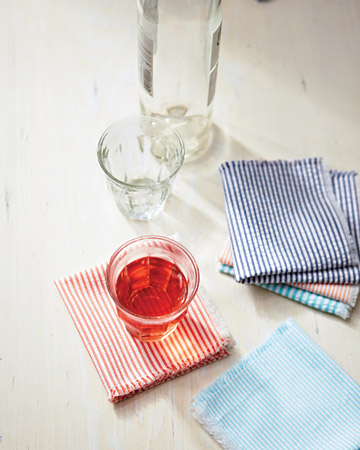
Seersucker makes us giddy. So do parties... what a perfect combination!  The classic fabric is inexpensive and available at almost any cloth store, so you can mix and match a few colors and make 'em yourself!

undefined

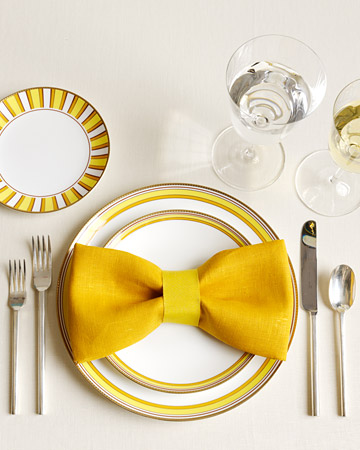
For a sit down dinner, this bow is such a fun way to class up the setting. Here's how to make it happen: spread a dinner napkin out, lying flat. Fold opposite sides in so they meet at the center. Then fold again at the center to form a narrow, ribbonlike shape. Next, fold short ends in so they meet at the center. Cinch in the middle with a ribbon in a coordinating color, and glue at back.

undefined

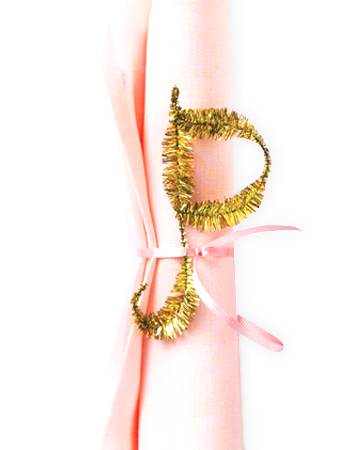
A childhood craft favorite gone classy: metallic or colorful pipe cleaners! Twist them into letters to make monogramed accessories for napkin rings. How cute are these??


Check out more of Martha's napkin ideas here.

*Photos courtesy of Martha Stewart


{Milk} Shake it up

Now that daylight savings officially happened, we are mentally heading into Spring & Summer full force! Events on warm days are some of our favorites- sundresses, warm nights, ice cream- an irresistible combination! Ami from Elizabeth Anne Designs shared this precious, flirty, ice cream sundae bar idea that is just delicious. What a fun element to add to a wedding, shower, birthday party... or even a family reunion. As shown in the photos below, there are plenty of opportunities to customize a station like this to perfectly complement a color scheme or party theme.  

Love and LOVE.

Oh, and how stinkin' cute is this couple?!?

*Photos courtesy of Kellie Kano Photography

Pop Rocks turned Classy

Remember Pop Rocks?! We used to love those little candies - especially when we learned how to shoot them/pop them at our siblings. Oh the memories! While checking out one of our blog crushes, Birthday Girl, we saw this fabulous recipe for Pop Rocks Chocolate Cake {original recipe via Chubby Hubby} and couldn't resist sharing. What a fun, unique treat to have at a birthday party or shower!
undefined
{before}
Pop Rocks Chocolate Cake
For the popping-candy base
85g whole hazelnuts
40g milk chocolate
2 tsp mixed spice
100g popping candy
For the chocolate mousse
350g dark chocolate
400ml double cream
Pinch of salt
For the chocolate glaze
20g chocolate (same type as for the mousse)
120ml water
8 whole coffee beans
Couple of pinches of salt
30g cocoa powder
70g unrefined golden caster sugar
Directions
To make the base, preheat the oven to 180C/ 350F and roast the hazelnuts for about 10 minutes until lightly coloured. Blend to a paste in a food processor, then set aside. Melt the milk chocolate in a bain-marie (a large basin over a saucepan of simmering shallow water — take care that the water does not touch the basin) and stir in the ginger spice and popping candy. Next, fold in the hazelnut purée. Place the 12 cm ring mould on a serving dish and gently press in the base mixture to a depth of about 1cm. Refrigerate for at least 2 hours, until hard.
To make the mousse, chop the chocolate into small pieces and place in a metal bowl. Bring 150ml of the cream to the boil in a small saucepan. Pour it over the chopped chocolate and stir extremely gently until all the chocolate has melted, watching carefully to ensure it doesn’t take on a granular texture. Add the salt to taste. Once the chocolate cream has cooled to room temperature, lightly whip the remaining 250ml cream to soft peaks, but do not over whip. Fold into the chocolate mix. Pour over the base in the ring mould and place in the fridge to set for two hours.
To make the glaze, chop up the chocolate and set aside. Place the water, coffee beans and salt in a pan, whisk in the cocoa powder, then set over a medium heat and simmer for about 3 minutes. Meanwhile, put the sugar in a small pan and melt over a medium heat. Unrefined sugar will caramelise quickly, so keep an eye on it; when it does, pour over the coffee and cocoa mix — stand back, as it will bubble and spit. Beat in the chopped chocolate and, when melted, pass through a fine sieve. When cool, but still liquid, pour over the mousse to your preferred depth and return the cake to the fridge to set.
To serve, run a hot knife around the inside of the ring before removing the cake. When slicing it, again make sure the blade of the knife is nice and hot.
undefined
{after... oh sweet heavens}
Yes please!
*Photos courtesy of Chubby Hubby

Sweets for your Sweet

Food is the way to pretty much anyone's heart {let's be honest}. Well in light of the upcoming holiday, we thought it appropriate to highlight some of our favorite Valentine Day treat finds.

Perhaps you're a fan of our Cake Pops post from a few months back... we noticed it was quite a hit! Well, Bakerella, the creators of Cake Pops have many other fabulous recipes up their sleeves such as this one for Red Velvet Sandwich cookies. Oh HEAVENS! Roll up a stack in clear cellophane and tie ribbons on each end and it's the perfect little V-day gift!

If you haven't heard of the Message-in-a-Cookie from Williams-Sonoma yet, then climb out of the cave you've been hiding in! Okay, not all of us are up to speed on cookie trends, but seriously, you have to check this out. Granted, the actual making of the cookies is quite tedious, but the outcome is so adorable and so worth it! What better way to say how you feel than through a COOKIE?!!

We spotted this post from Baking Therapy's 2010 Valentines day celebration. Not only are they super cute, but they used the chocolate cupcake recipe from the infamous Magnolia Bakery with a little inspiration from Scootabaker {LA's home delivery bakery... brilliant!!}

*Photos courtesy of Williams-Sonoma, Baking Therapy, Bakerella