Favorite posts from 2010

2010 has been quite the year for Paper Moss! We are giddy about all that has happened and want to wrap this year up just right. In honor of the last week of the year, we thought it was only appropriate to do a throwback of our {personal} favorite posts.

Throwback #1: Monograms Galore

Needless to say, life wouldn't be nearly as pretty without monograms. That being said, take a peek at some that were designed for Paper Moss clients for their invite suite and beyond!

Here are a few favorites... some have stories behind them, and others are just pretty stinkin' cool looking if we do say so.

Enjoy!

Louisa and Frank are nature lovers who got married on a farm in lush Georgia. The bird on the left is meant to represent her and the trout on the right (both are avid fly fishers) for him.

The inspiration for this monogram came from the engagement ring. Adam had a custom band designed to have the Texas star on the side since his bride, Stacy, was originally from Waco...!

Rachel and Adam got married in beautiful San Diego, CA. The little 'beach shack' seen in this monogram is an actual representation of a famous one on the beaches in San Diego. The groom loved to surf so we had to squeeze a surf board in there...

A Bahama Beach monogram is not complete without a palm tree and the bride's favorite shells!

How can you not fall in love with this little bird? Holly and Greg's style was perfect to incorporate a bird and swirls.

Paisley. Classic. Unique. Formal. Kristen and Brian's monogram was a detailed version of a paisley pattern that the bride loved.

You simply can't go wrong with a custom monogram... and best, you don't have to wait for a wedding to create one! Perhaps a special anniversary or a big birthday calls for some monogrammed stationery, towels, totes or dishes. The possibilities are endless!

Winter Inspirations

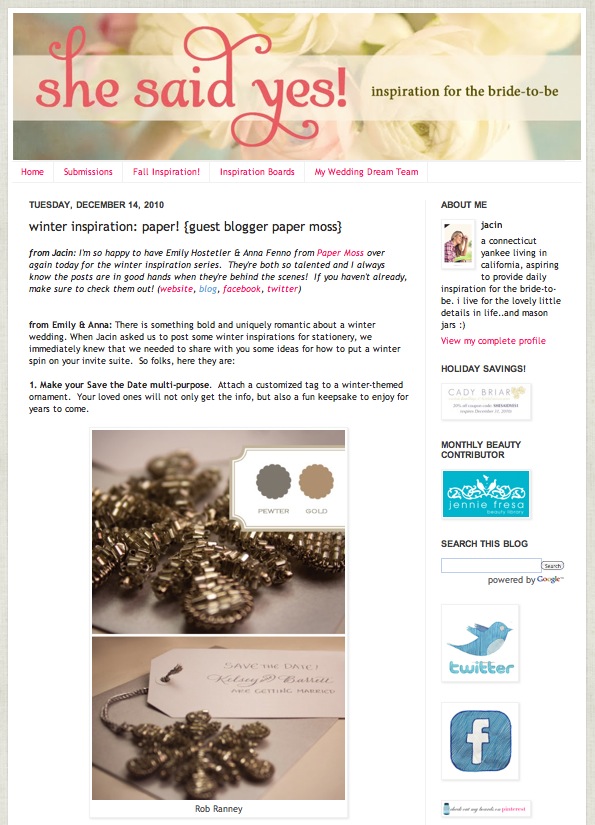
A few weeks ago we contributed to the Fall Inspiration series on She Said Yes. Well, it was so  much fun that we were thrilled when Jacin asked us to put together a little something for the paper portion of her Winter Inspiration series. So grab your hot bevie and take a peek at our suggestions for how to "winterize" an invitation suite - just click on the teaser photo below for more! Oh, and let us know what you think. ;)

Be sure to check back throughout the week as others in the industry guest post more winter inspiration!

A Holiday Nest

As if the holidays aren't magical enough, some of our fabulous clients are heading into their first Christmas with their new spouse. We fell in love with these custom ornaments from Austin based Paloma's Nest - a company who succeeds in every way at their goal to be "dedicated to creating Handcrafted Modern Heirlooms - pieces for the home and for the heart."

Here are just a few that would be a thoughtful gift for any of the newly weds that you might know... or even for yourself and your hubby! What a lovely way to celebrate an extra special holiday season!

Or perhaps you're looking for something to spice up the presentation of a gift? Of course, they've still got you covered! We can't get enough of these guys!!

Thanks Paloma's Nest, for making such beautiful and sentimental things!

*Photos courtesy of Paloma's Nest

Real Weddings: Selene and Rich

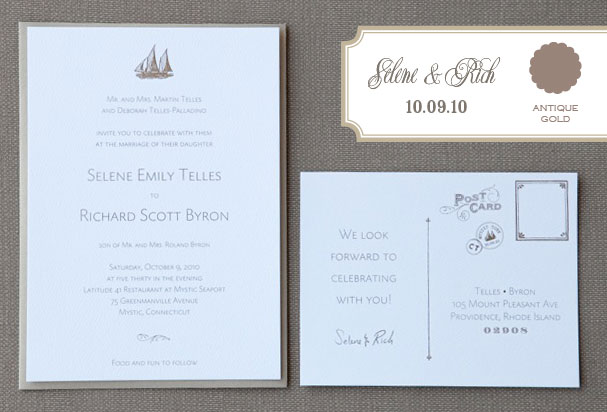
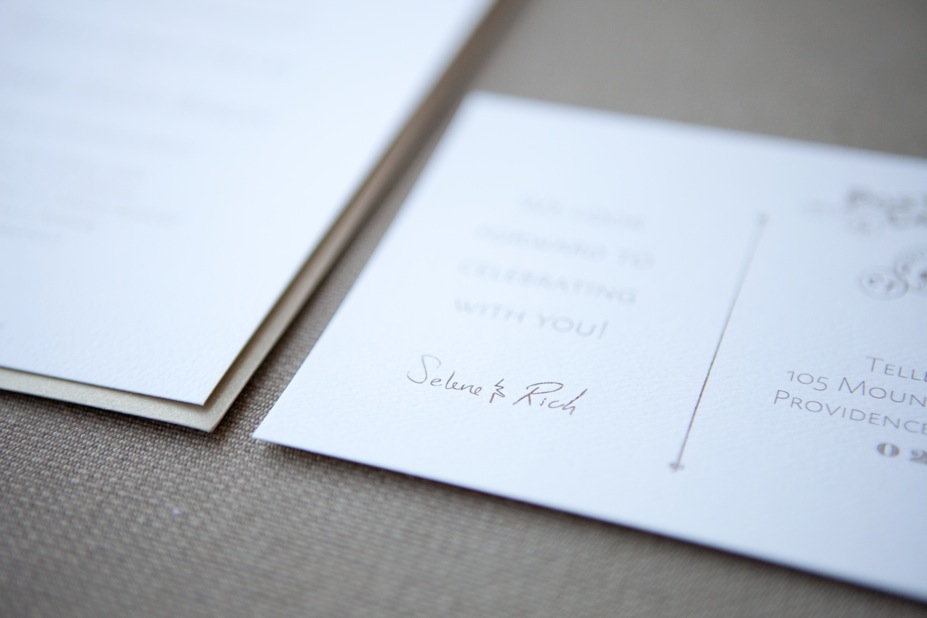
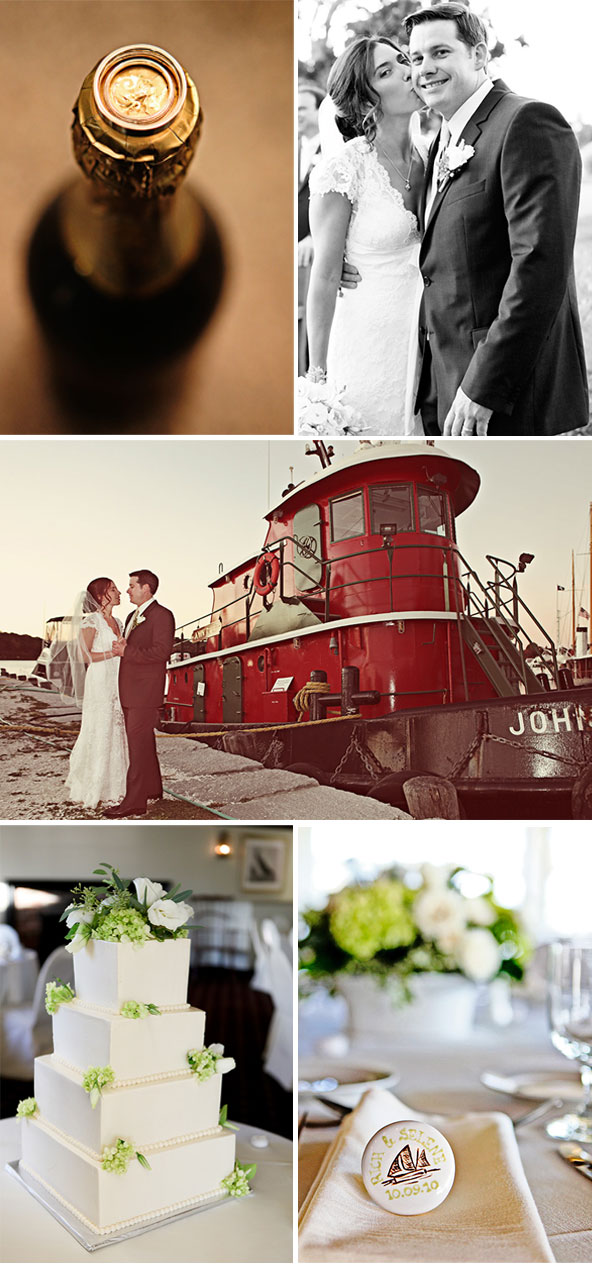
You asked for more Real Weddings, so the following is from us, to you! Selene and Rich married each other on October 9th of this year. They are a prime example of a gorgeous, seasonally appropriate {but not cliche autumn} invitation suite.

With a nautical influence laced throughout their big day, this precious couple tied the knot at a fitting location: Latitude 41 at the Mystic Seaport, a nautical museum in Connecticut. The day could not have been more perfect... from the weather to the wedding & reception details, it was a magical day!

Enjoy the photos, courtesy of Zenobia Studios... and be sure to check out the other fabulous vendors listed below, one of which is our beloved florist, Christina of Studio 539 Flowers!

Stationery: Paper Moss

Flowers: Studio 539 Flowers

Photography:  Zenobia Studios

Favors: Shop Alli Online

Venue: Latitude 41 at Mystic Seaport

Calligrapher: Hillary Cannon, Featherletter

{ Invitation photos by Laura Ashbrook Photography }

She Said Yes!

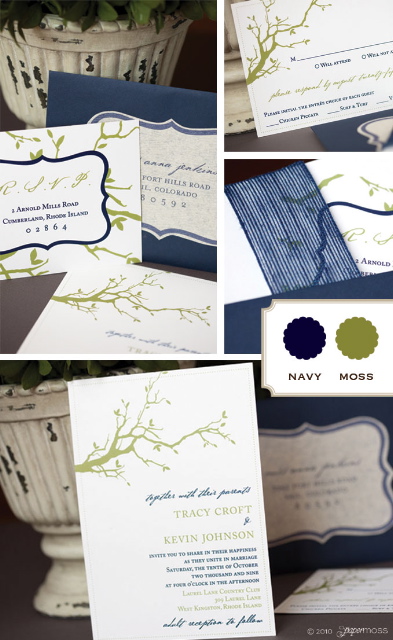
The lovely Jacin from She Said Yes {one of our blog-friends} asked us to guest blog for her Fall Inspiration series. The entire series has been fantastic so far- she covers all bases from decor to favors to festive drinks and fall cakes. Check it out, even if you're not planning an Autumn wedding... you'll find fun, unique ideas that might lend an excuse to host an impromptu party!

Paper Moss decided to share some ideas to gracefully side - step the stereotypical fall wedding invitation. There are countless ways to create a seasonally appropriate motif without being confined to a fall color palate or standard fall designs {pumpkins, leaves or scarecrows}. Tracy and Kevin's invitation suite is just one of our examples that we share for our part in the Fall Inspiration series.

See the rest and learn how we arrived at each of the final designs. For the full effect, check out our guest post. Thanks She Said Yes, for letting us share our love for paper and design. Blog to you soon! {hahahah, bad joke?}

*Photos courtesy of Laura Ashbrook Photography

Custom... chocolate?

Happy Monday everyone! As you know, we are all about customization, but even we couldn't have predicted that the day would come when you could customize chocolate bars! When we found out about Chocomize, it was an overwhelming joy, to say the least. Here's how it works:

1. Select the chocolate: White, Milk or Dark

2. Choose the ingredients: candy, spices, nuts, fruit or seasonal sprinkles - up to 5! There are so many fun options to choose from, it was hard to even pick these to show you! {And believe it or not, Strawberry Gushers was one of the options...!}

3. Name your chocolate bar and check out! It's mailed to you in a cute festive box, surrounded by cold packs just to make sure it's as perfect as you intended for it to be.

What a fun idea for special stocking stuffers, hostess gifts or even wedding favors! Chocomize can help you add an edible image {even a monogram or custom logo!} and they even give a wedding discount.

Oh how we love custom work! Especially this kind. Be sure and share with us your ideal chocolate bar below!

*Photos courtesy of Chocomize

Top this!

Wedding cake toppers. When we used to think of cake toppers, it was not a positive thing. The reason being that we had a very limited awareness of the possibilities of this... art medium. Until this creation popped on the screen while doing some Etsy surfing:

{Concarta on Etsy}

This topper was so impressive that after staring at it for weeks, we decided that it might be worth peeking around at some other creations. So, here are some favorites:

{Bragging Bags on Etsy}

{Milk Tea on Etsy}

For the love birds out there... {yeah, pun intended}

{Red Light Studio on Etsy}

{Button Eyed Teddy Bear on Etsy}

Thank you, Etsy for showing us that there are such fun, funky and elaborate wedding cake toppers!

Vendor Profile: Calligrapher Extraordinaire

We hate to brag, but it's true that Paper Moss often receives compliments on the extraordinary calligraphers we work with. We'll just say, there's a reason we search far and wide for the best of the best vendors - they constantly "wow" us too!!! That being said, it shouldn't come as a surprise that one of our beloved calligraphers had the honor of working on Chelsea Clinton's wedding. {We're still jumping up and down over it!} Meet the lovely, Megan Chapin Calligraphy, and enjoy a few photos from 2 of our favorite invite suites that we had the pleasure of working on with her. (It was tough to pick our favorites!) Be sure and visit her website for more!

Name & Profession: Megan Chapin, Calligrapher

Years in profession: Forever...I made my mom teach me how to write my name in cursive when I was 5, but technically I've only been in business for 3 years.
Based out of: Little old Uxbridge, MA. I mostly work with brides in the New England area, but I have done weddings for people in many other states including the state of Washington.
What's your favorite part about doing calligraphy for an event? My favorite part is working with the bride (and groom). I get caught up in their excitement and joy and can't wait for them to come and see what I've done for them! The reaction that I get is absolutely priceless. I had a mom cry when she saw her daughters envelopes. It really doesn't get better than that.
Do you have a favorite style? In calligraphy we have the broad edge pen and the pointed pen - among others.  I learned lettering with the broad edge pen starting with the Italic hand and for years was very satisfied with it. But I had always admired the work of the pointed pen so when I got the chance to take classes in 2003 I went for it. I have never looked back. Using the pointed pen is like coming home to me... I feel like I belong with it!
How did you get into the business? I've always loved drawing, art in general and lettering. When I was in high school I never thought that I could possibly make a career out of loving letters, so I became a bookkeeper and had two children and just lived my life. However, I was constantly taking calligraphy classes and looking at any book I could about lettering. In 2002 I took a year long class with Reggie Ezell. He taught me more in that one year class than anything I had learned in total about lettering. When I finished that class I realized I could make a career out of doing what I love, and it took me a bit, but I got up the courage to make up business cards and started networking.
What do you do to unwind while working on a big project? Ha, I don't!  I'm very intense when working on a job and focus completely on it until it’s done. Though I do listen to the television while I work...  I guess that must calm me in some way.
When you were little, what did you want to be when you grew up? An artist.  Even though I did other things I never saw myself as anything else.
The most inspiring person you know? Maria Thomas. She is an artist and a calligrapher. Her work is AMAZING and she is so grateful for all that she has and for her talent that I often find myself saying "What would Maria do?" I guess that is how you know you admire someone.
In high school you ........ ? {fill in the blank}  This is kinda funny. I wanted to be a punk rocker! Actually I sort of still do.
Do you have any advice for brides? Hmmm...don't wait ‘til the last minute to hire me! Everything I do is done by yours truly and I need plenty of time to insure it’s up to my standards. Last minute jobs are difficult because of that. Another thing: if you have taken the time to get beautiful invitations and had them hand addressed, put some thought into the stamps as well. You're creating a wonderful presentation with the arrival of your package. Make sure that it’s saying what you want it to - using beautiful stamps just finishes that off perfectly. I always say...Invite your guests the way you would want to be invited!
*****

*Photos {Red & Blue Suite} courtesy of Laura Ashbrook Photography

*Photos {Grey & Sage Suite} courtesy of Public Image Photography

Meet Mr. & Mrs. C

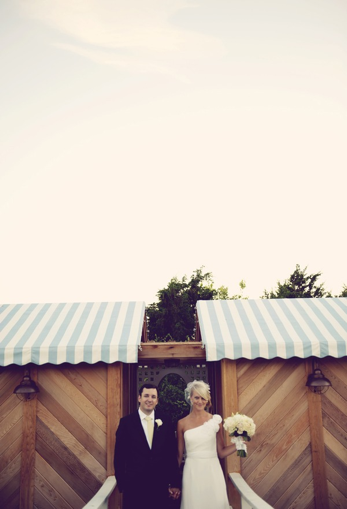
Over the summer, we blogged about a fabulous wedding we went to in Watch Hill, RI. Since then, we've been waiting in anticipation for the day that we can share more about this chic affair at The Ocean House... and today is that! Ms. Abby Shaughnessy {of Life in the Superburbs} married the man of her dreams, Andrew Capalbo after meeting him 6 years prior at the very venue where they tied the knot. This couple is stunning - inside and out - and we were so happy to be a part of making their day as magnificent as it was!

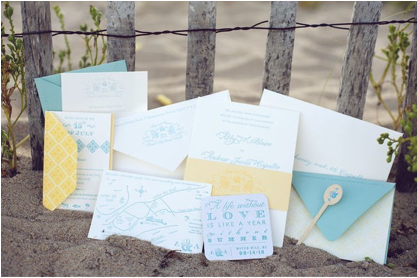
To lure you over to the full feature on Style Me Pretty, we are only giving you a glance at some of the gorgeous stationery and other goodies that Paper Moss created to help "brand" the wedding.

The guests were invited with stationery letter pressed in the vibrant blue and yellow that was throughout the wedding. What a perfect way to set the scene for nuptials and an elegant party to follow, in a beach mansion.

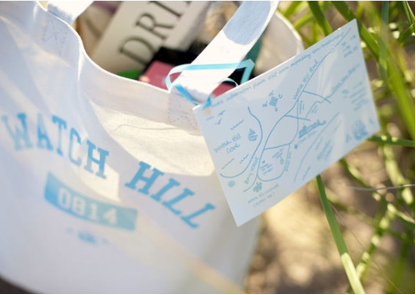
Out of town guests each received a custom made welcome tote {with Abby & Andrew’s monogram} filled with lots of goodies, one of which was a beach pass for the weekend!

You MUST see the other pictures of this wedding! Seriously, we are requiring it. NOW! But after you're done, come back and tell us your thoughts.

Photos courtesy of Olive Juice Photography via Style Me Pretty

Purple please!

Among the many fun wedding trends for 2011, we noticed that purple is making a royal appearance. We recently had some clients who shared a love for this color and had a beautiful purple and white wedding. Enjoy this little inspiration board we put together to encompass some purple potential! How fabulous is the purple wedding dress in the center?! Style Me Pretty has a fabulous feature on her wedding that you should totally check out!

*Stationery photos courtesy of Paper Moss

*Suit photo courtesy of Susan Stripling Photography

*Cake photo courtesy of The Caketress

* Purple wedding gown photo courtesy of Simply Bloom Photography

* Favor box photos of Real Simple

*Invite Photos courtesy of Laura Ashbrook Photography

Cookies! {and some Press}

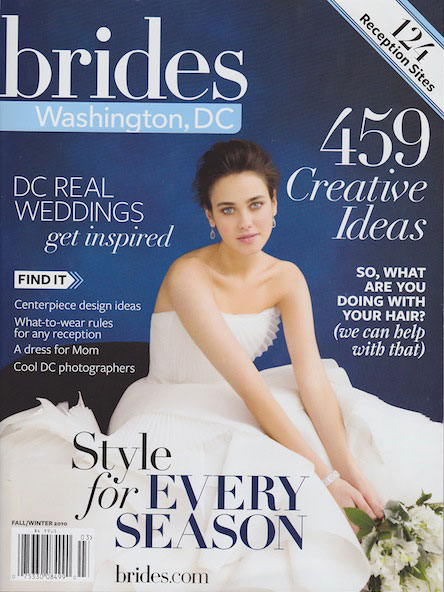
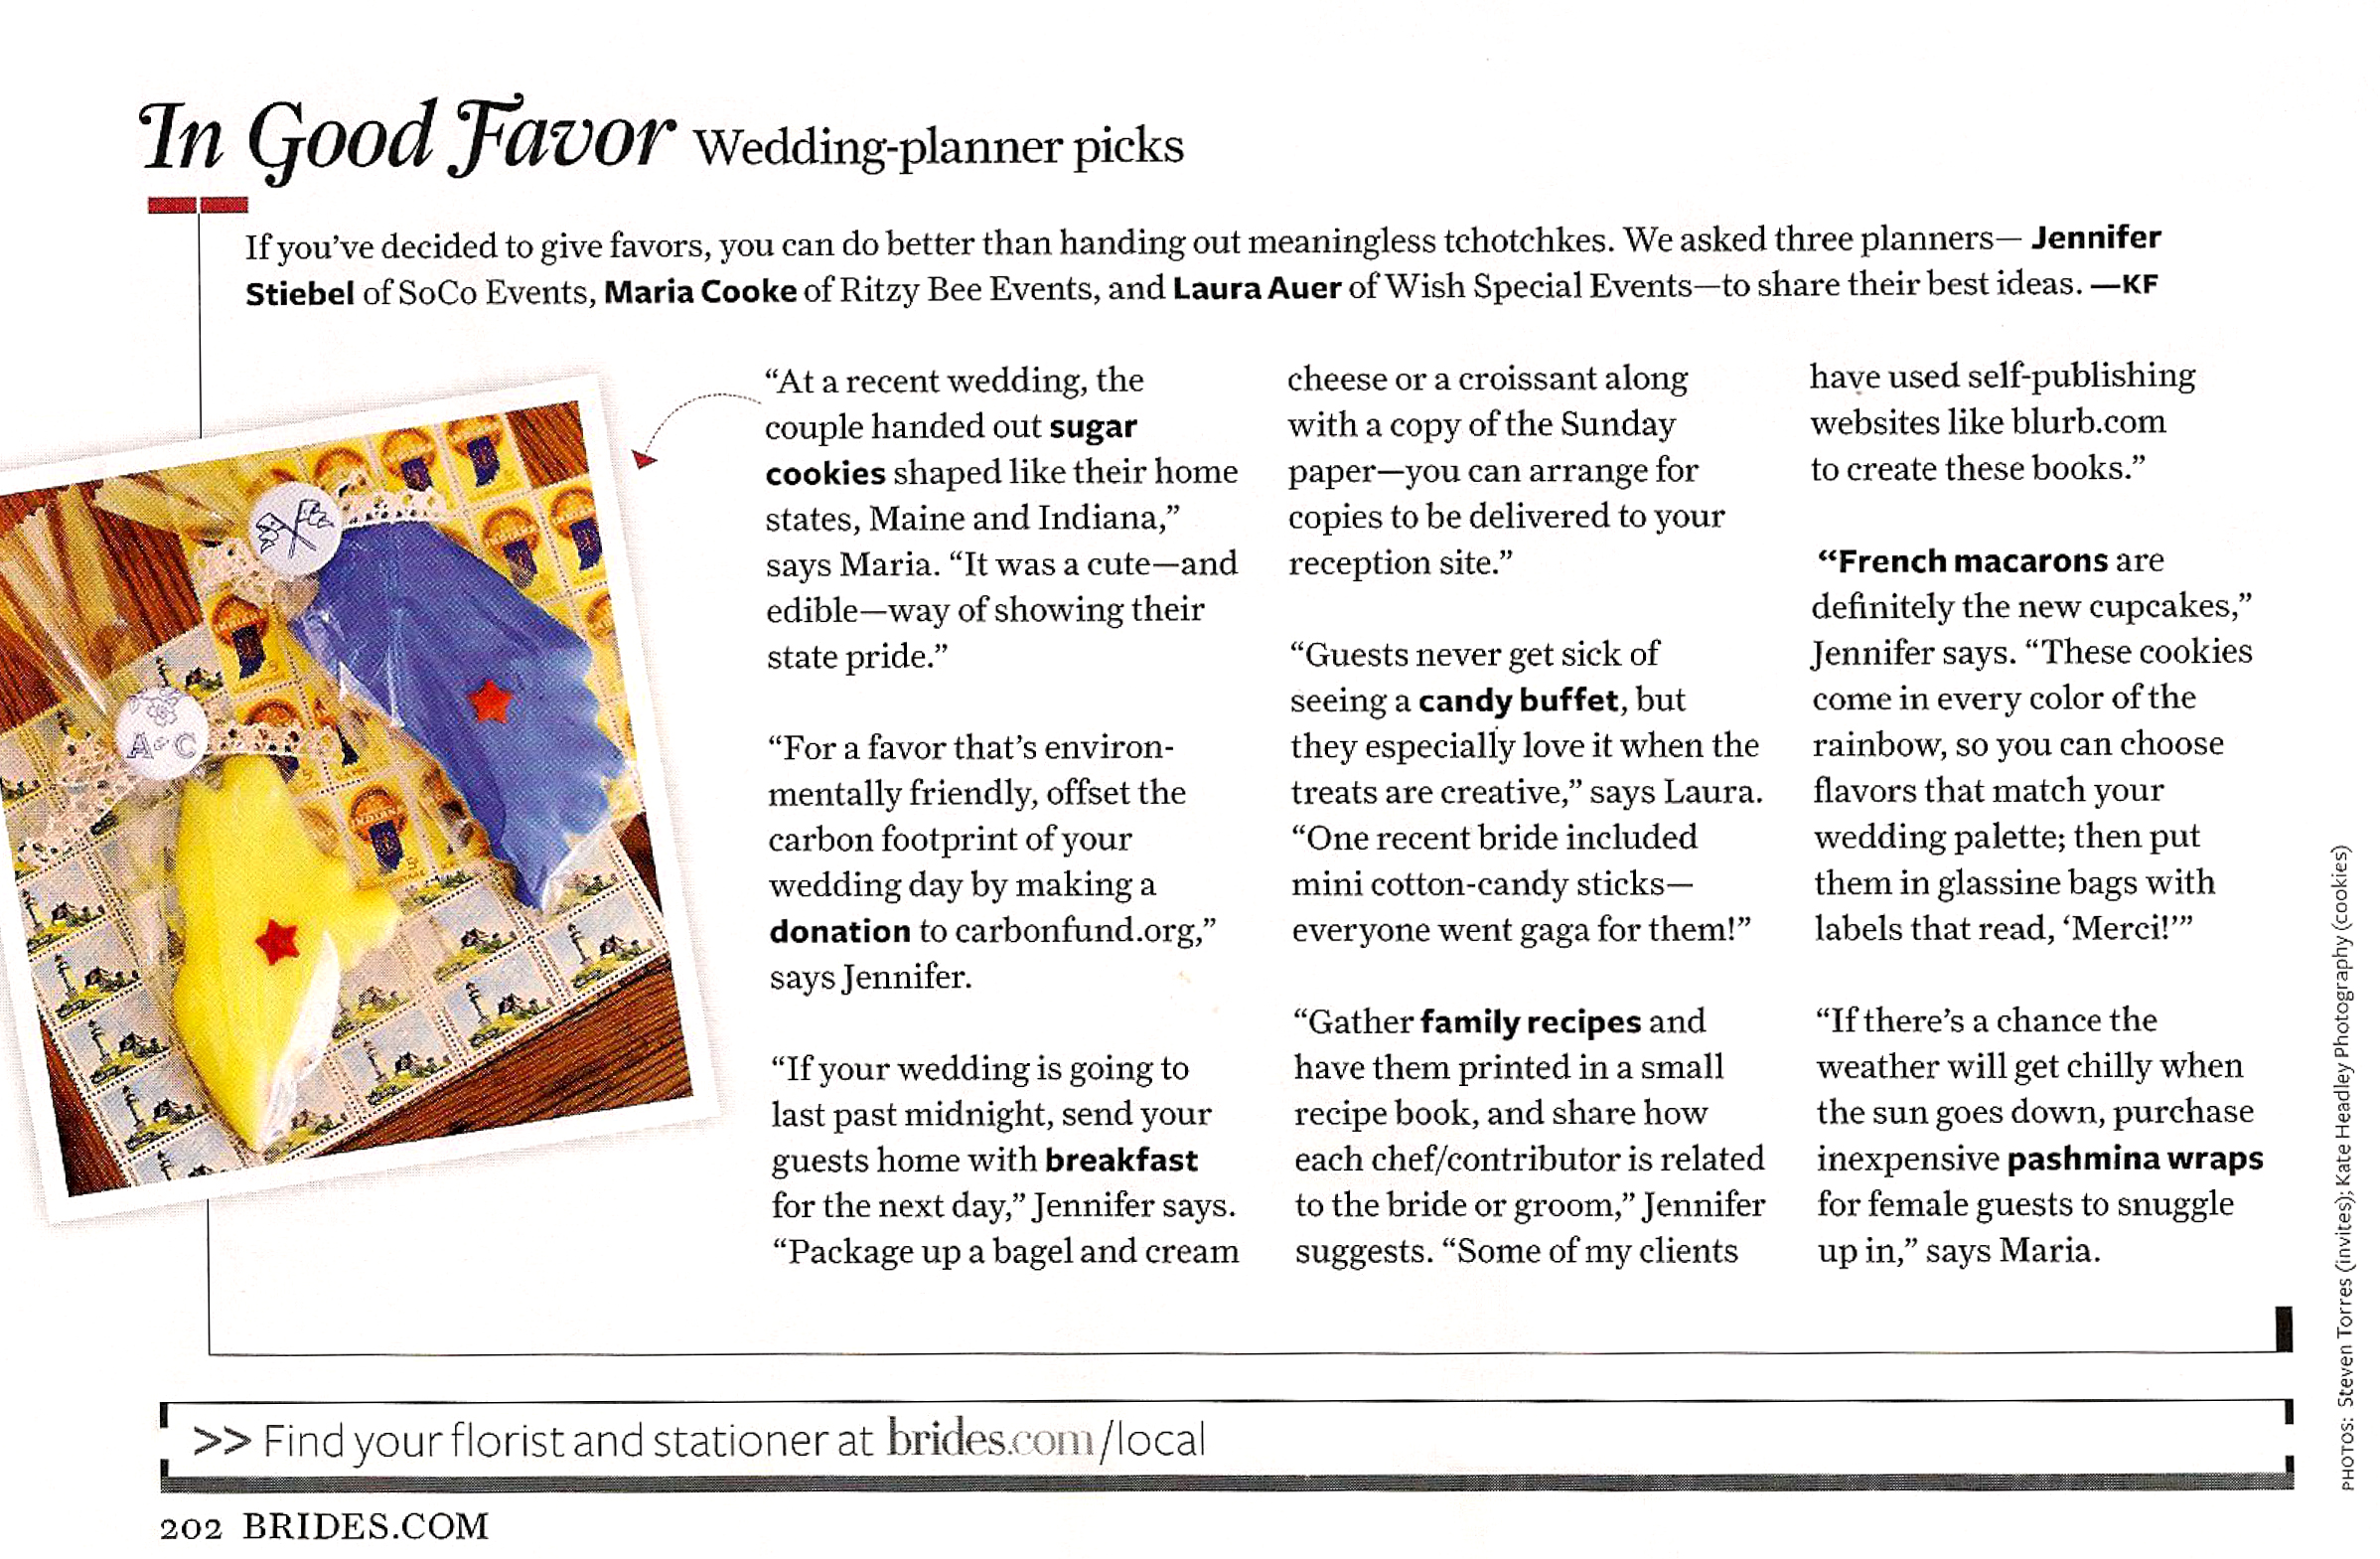
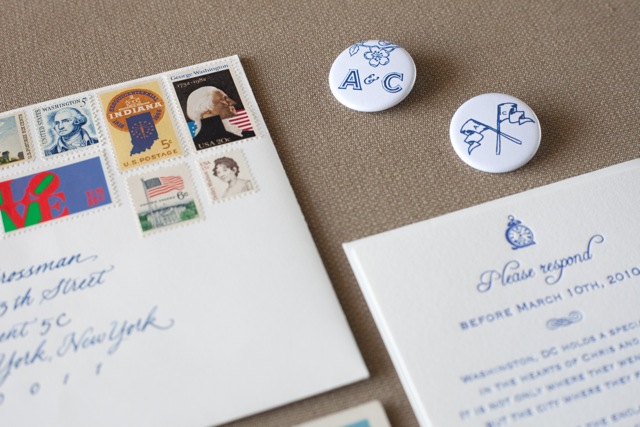
A few weeks back we shared invites and details from a "Vintage Collegiate" wedding. Apparently the buttons we made were popular and Brides Magazine from Washington DC agreed! The bride and groom sent their guests away with cookies in the shapes of the states that they each grew up in. As if the bright, delicious cookies were not cute enough on their own, each bag was fastened with lace and adorned with one of our adorable mini-buttons.

new-BRIDES-dc.jpg

We are so happy that Brides Magazine liked these cute favors and we hope that you do too!

buttons1.jpg
15_Allison_and_Chris.jpeg

Be sure and contact us if you are looking for buttons for your next event!

*Bottom Photo courtesy of Laura Ashbrook Photography

Evolution of an invitation

Anything custom requires more time and attention than something mass-produced. In fashion-speak, it's the "haute couture" of stationery, while pre-made designs are equivalent to the ready-to-wear. Paper Moss has been custom since its first breath. There is something so satisfying about working with clients to make their vision a reality. The design process goes through many "renovations" to finally achieve the look that our brides and grooms are dreaming of. When we first sat down with {bride to be} Mary Jo, she mentioned her love of Paris and the time she spent abroad. As the conversation evolved and we learned more about her and her honey, it only seemed natural to aim for a "Vintage Parisian" look for their invitation suite... without being cliche. Since we all needed a little inspiration, she sent these photos to inspire designs:

After identifying their color palette, discussing fonts, deciding on the type and weight of paper and getting a general idea of what they wanted, designs for Mary Jo and Paul began. In the first round, we included several options that the bride and groom evaluate and give feedback on. We pulled characteristics from one and add them to another, flip things around, make one design smaller or another less detailed... the list goes on! Here are some of their initial designs:

Sparing the details of the back and forth, the questions, the answers, the tweaking, the perfecting, the printing and yadda yadda, you get the point... their final product fit the bill! PUN intended! Our bride and groom both adored their invitation suite and we were gladly able to accommodate the budget they were working with.

And here is their final "Vintage Parisian" wedding invitation...

And that friends, is how a custom invitation evolves!

*Invite photos courtesy of Laura Ashbrook Photography

Head gear

What comes first: the dress or the accessories? We would have laughed at the question... prior to setting our eyes on this femme & chic trend of wedding day hair decor. What a fun way to add some pizazz if you decide to forgo a vail or even to spice things up post ceremony! A few months ago, Untamed Petals was gracious enough to let us {well, a model actually} play dress up for our Style Me Pretty inspiration - to - reality shoot. Here are some more of their precious pieces:

*Photos courtesy of Untamed Petals

These two love birds

Jen and Scott, who are off honeymooning as we type {as you read}, were married this past weekend at the Ocean House in Watch Hill, RI. This happens to be one of our favorite New England venues {have you SEEN IT?!} This sweet couple shared our passionate obsession with the Ocean House and were so determined to have their wedding there that they booked it while still under construction for it's renovation... they even had to wear hard hats at the site visit!

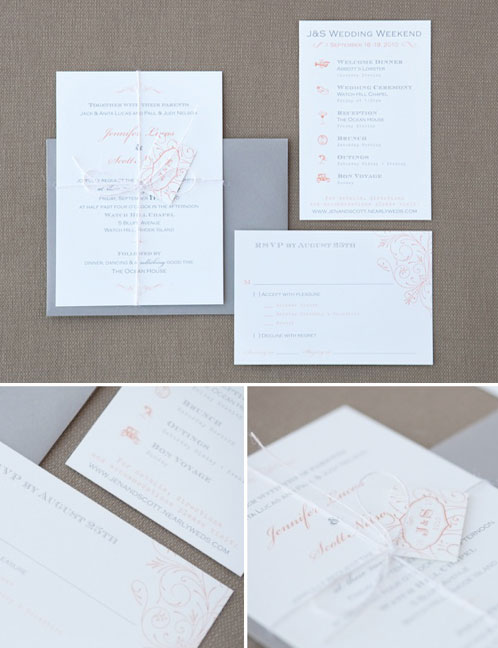
With such a gorgeous destination, Jen and Scott decided to make a weekend out of it. Take a peek at the agenda that was sent out with their invitations:

The hand-drawn icons were a hit! We heart these little icons and will certainly share more in the future. Going for a vintage and romantic feel, we thought that peach, ivory and grey was the perfect color scheme for a end of summer wedding. While the natural twine is a fun touch and adds texture, it also served its purpose and held all cards together, complete with a personalized tag. 

Congratulations to the happy couple! We hope the wedding weekend extravaganza was magical!

*Photos courtesy of Laura Ashbrook Photography

Put it on a pedestal

Happy Monday!! We hope your weekend was a little rowdy and a lot relaxing. Regardless of the level of sleep deprivation the last few days caused, the start of a new work week is always a chore. So, with coffee in hand, we hope you enjoy and feel inspired by this little gem we found while visiting Bee in our Bonnet. We were so impressed by this D.I.Y. and couldn't resist sharing!! Visit their blog for the step - by - step instructions and to read the sweet story that inspired this project. There's definitely a project in our future... how cute would it be to display pretty cards & stationery on these pedestals in a store front? Hmmm, if only Paper Moss had a retail line... {wink wink}

*photo courtesy of Shandi Marie Photography

East Greenwich Wedding Walk

To all the future brides, friends of brides and mothers of brides, this one's for you! Paper Moss, along with other businesses are joining forces for the 2nd annual East Greenwich Wedding Walk. Come on out to Main Street in East Greenwich, RI {the fun starts at 174 Main Street, the old Dugan Jewelers} and indulge in all - things - wedding. Spend the day collecting ideas, tasting yummy cake {we'll likely be loitering around the cake samples}, enjoy complementary jewelry cleaning and take home some swag in reusable canvas totes. It's supposed to be a gorgeous day, so slather on that sun screen and enjoy the fun!

A Vintage Collegiate Wedding

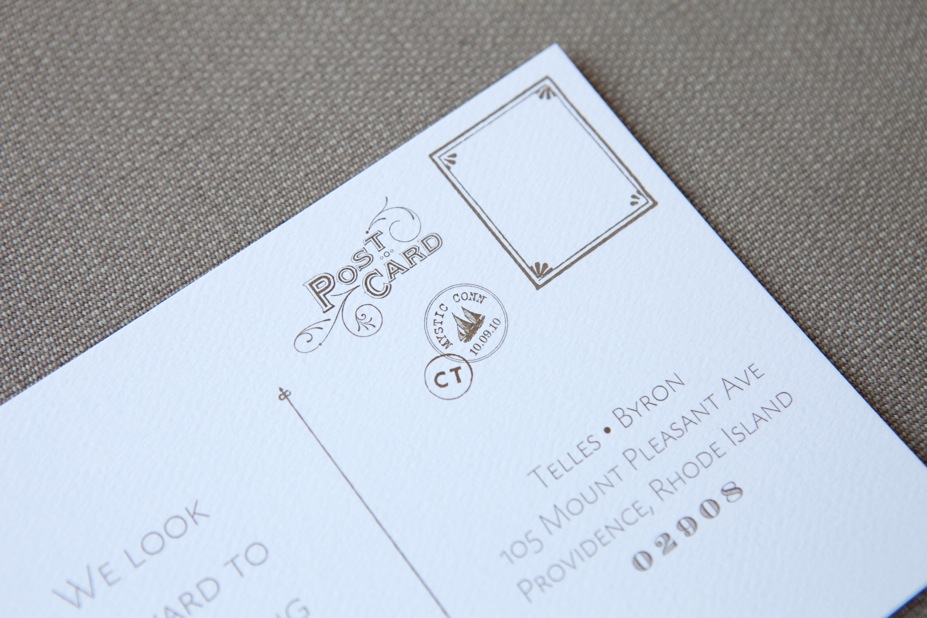
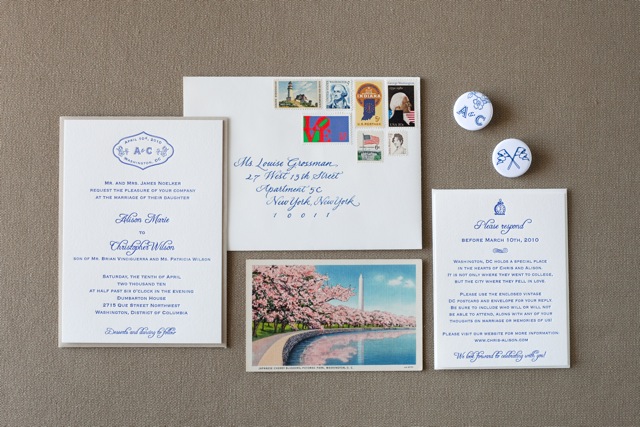
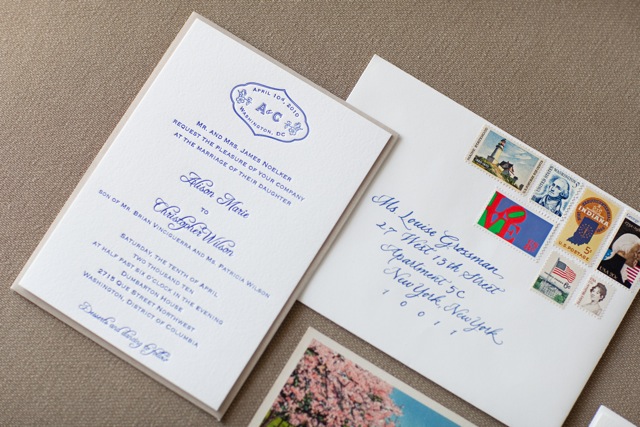
If there was a trophy to be given for the most unique wedding theme {while still keeping it classy}, Alison and Chris would surely be the proud owners. When they first described the vision for their Norman Rockwell inspired or "Vintage Collegiate" Wedding, we fell in love. The couple had the help of Ritzy Bee Events to design and coordinate this incredible affair that took place at the Dumbarton House in Georgetown, DC. They incorporated unique elements to reflect history, one of which was an actual vintage postcard from Washington, DC that was used for their RSVP cards, and then displayed at the reception along with a variety of other old trinkets. Alison and Chris chose to use vintage stamps with their invitation suite, each one carefully selected to fit the theme and reflect themselves... a Dolly Madison stamp relating to the Dumbarton House, a Maine stamp representing where the groom is from, an Indiana stamp for where the bride is from, in addition to a variety of other DC related ones.We absolutely LOVED their idea of making monogram buttons to attach to little bags of cookies as wedding favors... pretty much everything about this wedding was adorable. The attention to detail in every area made their day glitter. We hope to be able to share some other fun details at some point, but for now, enjoy these pics!

*Photos courtesy of Laura Ashbrook Photography

Savvy Setting

Whether you’re preparing for a birthday dinner, bridal luncheon, dinner party or a holiday get-together, you may be given the glorious opportunity to set the table. No big deal, right? After all, you’ve been doing this since you were a child. But when you are given your weight in polished silver and more than enough drinking glasses for each guest to double fist, your heart starts beating faster and the questions invade your mind: Oh no - what side do the forks go on? And these miniature knives! What am I supposed to do with them? Why so many glasses?? We’ll run out of room!!! While you fear sounding like an idiot for asking, “How many of what goes where and why?”, you know it must be done! {Can you tell we've been there?} It’s pretty ridiculous how complex setting a table can be, but those of us that adore etiquette know that it’s a vital part of hosting a polished event. Take some tips from the Etiquette-obsessed, Emily Post and you’ll know more than you ever thought possible about table settings.

Basic Setting

For a basic table setting, here are two great tips to help you -- or your kids -- remember the order of plates and utensils:

To remember the order of plates and utensils, picture the word "FORKS." The order, left to right, is: F for Fork, O for the Plate (the shape!), K for Knives and S for Spoons. (Okay -- you have to forget the R, but you get the idea!) Bread and butter go to the left of the place setting and  drinks go on the right.

Things to remember:

  • Knife blades always face the plate
  • The napkin goes to the left of the fork, or on the plate
  • The bread and butter knife are optional

Informal Setting

When an informal three-course dinner is served, the typical place setting includes utensils and dishes to accommodate a  soup course, salad or first course, entrée and dessert

(a) Dinner plate: This is usually the first thing to be set on the table. In our illustration, the dinner plate would be placed where the napkin is, with the napkin on top of the plate.

(b) Two Forks: The forks are placed to the left of the plate. The dinner fork, the larger of the two forks, is used for the main course; the smaller fork is used for a salad or an appetizer. The forks are arranged according to when you need to use them, following an "outside-in" order. If the small fork is needed for an appetizer or a salad served before the main course, then it is placed on the left (outside) of the dinner fork; if the salad is served after the main course, then the small fork is placed to the right (inside) of the dinner fork, next to the plate.

(c) Napkin: The napkin is folded or put in a napkin ring and placed either to the left of the forks or on the center of the dinner plate. Sometimes, a folded napkin is placed under the forks.

(d) Dinner Knife: The dinner knife is set immediately to the right of the plate, cutting edge facing inward. (If the main course is meat, a steak knife can take the place of the dinner knife.) At an informal meal, the dinner knife may be used for all courses, but a dirty knife should never be placed on the table, placemat or tablecloth.

(e) Spoons: Spoons go to the right of the knife. In our illustration, soup is being served first, so the soupspoon goes to the far (outside) right of the dinner knife; the teaspoon or dessert spoon, which will be used last, goes to the left (inside) of the soupspoon, next to the dinner knife.

(f) Glasses: Drinking glasses of any kind -- water, wine, juice, iced tea -- are placed at the top right of the dinner plate, above the knives and spoons.

Other dishes and utensils are optional, depending on what is being served, but may include:

(g) Salad Plate: This is placed to the left of the forks. If salad is to be eaten with the meal, you can forgo the salad plate and serve it directly on the dinner plate. However, if the entree contains gravy or anything runny, it is better to serve the salad on a separate plate to keep things neater.

(h) Bread Plate with Butter Knife: If used, the bread plate goes above the forks, with the butter knife placed diagonally across the edge of the plate, handle on the right side and blade facing down.

(i) Dessert Spoon and Fork: These can be placed either horizontally above the dinner plate (the spoon on top with its handle facing to the right; the fork below with its handle facing left); or beside the plate. If placed beside the plate, the fork goes on the left side, closest to the plate (because it will be the last fork used) and the spoon goes on the right side of the plate, to the right of the dinner knife and to the left of the soupspoon.

(j) Coffee Cup and Saucer: This illustration shows a table setting that would be common in a restaurant serving a large number of people at once, with coffee being served during the meal. The coffee cup and saucer are placed above and to the right of the knife and spoons. At home, most people serve coffee after the meal. In that case the cups and saucers are brought to the table and placed above and to the right of the knives and spoons.

Formal Setting

The one rule for a formal table is for everything to be geometrically spaced: the centerpiece at the exact center; the place settings at equal distances; and the utensils balanced. Beyond these placemats, you can vary flower arrangements and decorations as you like.

The placement of utensils is guided by the menu, the idea being that you use utensils in an "outside in" order.

(a) Service Plate: This large plate, also called a charger, serves as an underplate for the plate holding the first course, which will be brought to the table. When the first course is cleared, the service plate remains until the plate holding the entree is served, at which point the two plates are exchanged. The charger may serve as the underplate for several courses which precede the entree.

(b) Butter Plate: The small butter plate is placed above the forks at the left of the place setting.

(c) Dinner Fork: The largest of the forks, also called the place fork, is placed on the left of the plate. Other smaller forks for other courses are arranged to the left or right of the dinner fork, according to when they will be used.

(d) Fish Fork: If there is a fish course, this small fork is placed farthest to the left of the dinner fork because it is the first fork used.

(e) Salad Fork: If the salad is served after the entree, the small salad fork is placed to the right of the dinner fork, next to the plate. If the salad is to be served first, and fish second, then the forks would be arranged (left to right): salad fork, fish fork, dinner fork.

(f) Dinner Knife: The large dinner knife is placed to the right of the dinner plate.

(g) Fish Knife: The specially shaped fish knife goes to the right of the dinner knife.

(h) Salad Knife (Note: there is no salad knife in the illustration): If used, it would be placed to the left of the dinner knife, next to the dinner plate. If the salad is to be served first, and fish second, then the knives would be arranged (left to right): dinner knife, fish knife, salad knife.

(i) Soup Spoon or Fruit Spoon: If soup or fruit is served as a first course, then the accompanying spoon goes to the right of the knives.

(j) Oyster Fork: If shellfish are to be served, the oyster fork goes to the right of the spoons. Note: it is the only fork ever placed on the right of the plate.

(k) Butter Knife: The small spreader is paced diagonally on top of the butter plate, handle on the right and blade down.

(l) Glasses: These can number up to five and are placed so that the smaller ones are up front. The water goblet (la) is placed directly above the knives. Just to the right goes a champagne flute (lb); in front of these are placed a red (lc) or white (ld) wine glass and a sherry glass (le).

(m) Napkin: The napkin is placed on top of the charger (if one is used) or in the space for the plate.

Things to remember:

  • Knife blades are always placed with the cutting edge toward the plate.
  • No more than three of any implement is ever placed on the table, except when an oyster fork is used in addition to three other forks. If more than three courses are served before dessert, then the utensil for the fourth course is brought in with the food; likewise the salad fork and knife may be brought in when the salad course is served.
  • Dessert spoons and forks are brought in on the dessert plate just before dessert is served.

*Diagrams and information courtesy of Emily Post

Cake Pops!!

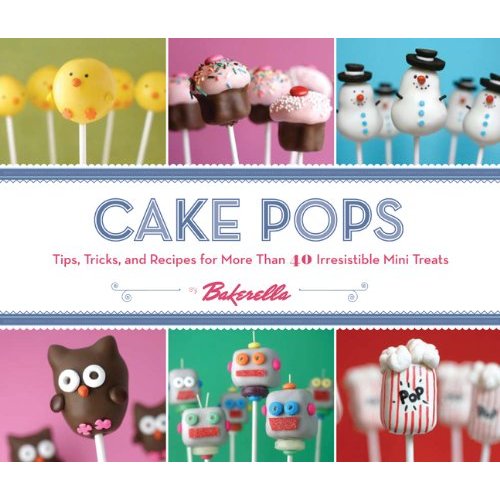
Being lovers of all things events, we are enamored with the unique ways that hostesses and event planners go above and beyond to “wow” their guests. Cake Pops would fall into that category- so adorable and delicious, they leave us raving about them and wanting more.

We first stumbled across Cake Pops while looking for ideas for a friend’s bridal shower. After some quality time blog-hopping, we landed on Bakerella, a blog dedicated to baking and decorating, and captivating people like us in the process. They are so cute and versatile, its easy to think of ways to incorporate them into every day life! Think baby showers, birthday parties, holidays, gifts, Fridays, and so on…

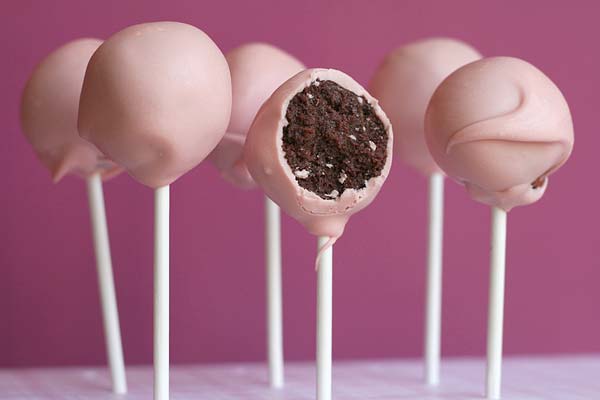
Meet the little pink pops that started this phenomenon:

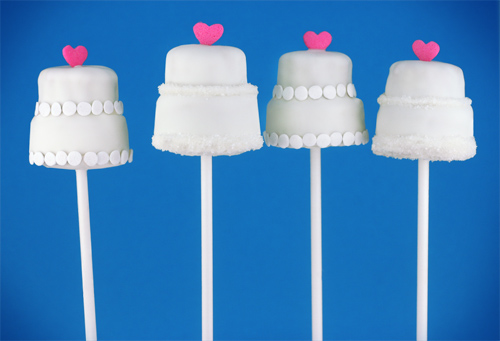
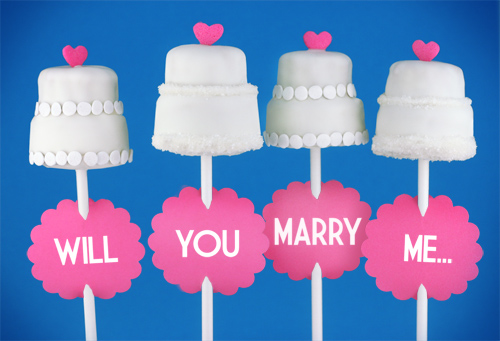
On the tutorial of how to make these precious wedding cake pops, someone proposed to their girlfriend, who is a frequent reader of Bakerella.

For an idea this precious, we'd give the man a high five if given the chance. By the end of reading the post, with tissues in hand, we were eagerly stalking the comment section to see her response...

She said YES!!!! Lucky lady!

If you want to try your hand at making these, here are directions. Don't stop there! On September 8th, Bakerella is releasing with a cook book just for Cake Pops! Pre-order it!!

*Photos courtesy of Bakerella