Contest Winner Announced

Well friends, October is over which brings our Breast Cancer Awareness Campaign to an end. Because of your enthusiasm and support, Paper Moss has made a donation to the American Cancer Society to help fund research projects. Now for the fun part... the winner of our contest! Congratulations to Erin from Sparkle and Hay, one of our many supporters who helped to spread the word. Check out her adorable blog and if you tweet, follow her on Twitter {sparkleandhay}! Erin, you have some special presents from Paper Moss that are headed your way! Thank you to everyone for your help!!!

To make your own donation in the fight against Breast Cancer, visit the Susan G. Komen Founation or the American Cancer Society.

Happy Halloween weekend

Halloween weekend is here are we're feeling pretty stinkin' festive. Yes, it's true that we're about to set out on a journey to scrape together a semi-classy costume for tonight, but our procrastination has nothing to do with a lack of festivity- we've been BUSY!! In the spirit of this holiday weekend and with Thanksgiving on the horizon, we couldn't resist passing along a fun little D.I.Y from Martha Stewart. We're thinking of varying gold, copper and orange mini-glitter pumpkins for place cards at the Thanksgiving dinner table.

Find out how to make these cute little guys here. Have a very merry & safe Halloween weekend!

*Photo courtesy of Martha Stewart

Friday Inspiration

One of the most beautiful places that we've ever been is Cape Cod. Can't you see why?? It's hard to put words to the perfection achieved through the combination of white sand, distant cliffs that line the coast, deep blue ocean water splashing around, the reeds that decorate a boardwalk, relaxed faces and full smiles of vacationers...'tis our happy place!

It probably doesn't come as a surprise to you that we find inspiration in pretty much everything... including some vintage treasures we found while scouting antique shops in East Sandwich.

Not only did we have a blast admiring all the little trinkets, the timeless jewelry and the old maps and cards but we loved talking with the couple who owned this adorable shop. If you're in East Sandwich, make a point to pop in... you will LOVE it! Antoinette's Antiques & Collectibles 774.413.9799.

{Okay, just one more photo from our trip}

*Photo collage courtesy of Laura Ashbrook Photography

Meet Mr. & Mrs. C

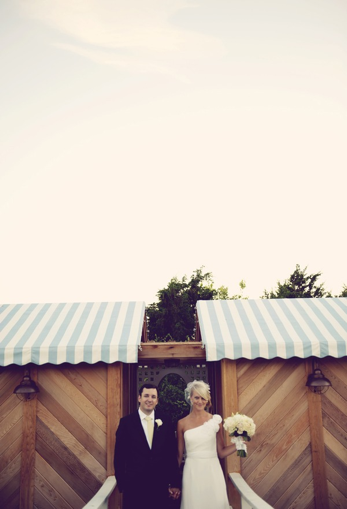
Over the summer, we blogged about a fabulous wedding we went to in Watch Hill, RI. Since then, we've been waiting in anticipation for the day that we can share more about this chic affair at The Ocean House... and today is that! Ms. Abby Shaughnessy {of Life in the Superburbs} married the man of her dreams, Andrew Capalbo after meeting him 6 years prior at the very venue where they tied the knot. This couple is stunning - inside and out - and we were so happy to be a part of making their day as magnificent as it was!

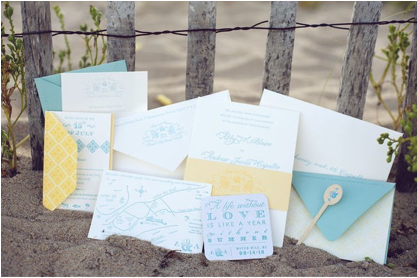
To lure you over to the full feature on Style Me Pretty, we are only giving you a glance at some of the gorgeous stationery and other goodies that Paper Moss created to help "brand" the wedding.

The guests were invited with stationery letter pressed in the vibrant blue and yellow that was throughout the wedding. What a perfect way to set the scene for nuptials and an elegant party to follow, in a beach mansion.

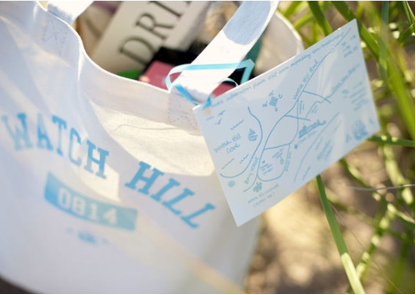
Out of town guests each received a custom made welcome tote {with Abby & Andrew’s monogram} filled with lots of goodies, one of which was a beach pass for the weekend!

You MUST see the other pictures of this wedding! Seriously, we are requiring it. NOW! But after you're done, come back and tell us your thoughts.

Photos courtesy of Olive Juice Photography via Style Me Pretty

More than an invitation

Newport Weddings Magazine included some of Paper Moss' work for a stationery feature in their recent issue! We always love the chance to share some of the behind - the - scenes action that brings our invitations from concept, to life and this was a great opportunity to walk readers through some of the steps! Pick up a copy of the magazine on their website or book a consultation with Paper Moss and take home a free copy! For now, take a look...

{Paper Moss photos are featured on page 1&2. Congrats to Sara Zarrella on the cover photo!}

We feel so understood! ;) An invitation is so much more than just an invitation.

whoopie pies!

Apparently we like cake in every form possible- cupcakes {obviously} were a long time obsession, then we moved on to cake pops and now, don’t be fooled- they’re called whoopie PIES but they are made out of CAKE. For some, whoopie pies are a long time tradition. Unfortunately this is one tradition that we didn’t partake in until this summer. Now that we’ve caught the fever, we’ll never be the same. Staying true to the season of sweets and spices, we were extra intrigued by this recipe from Two Fat Cats Bakery {Portland, Maine} for Pumpkin Whoopie Pies wtih Maple-Marshmallow Cream filling.

FILLING

1 cup powdered sugar, sifted
1 cup (2 sticks) unsalted butter, room temperature
1 7-ounce jar marshmallow creme
2 teaspoons maple extract

Using electric mixer, beat sugar and butter in large bowl until fluffy, about 2 minutes. Add marshmallow creme and maple extract; beat until blended and smooth. DO AHEAD Can be made 2 hours ahead. Let stand at room temperature.

CAKE

3 cups all purpose flour
2 teaspoons ground cinnamon
1 1/2 teaspoons baking powder
1 1/2 teaspoons baking soda
3/4 teaspoon salt
3/4 teaspoon ground nutmeg
3/4 teaspoon ground cloves
6 tablespoons (3/4 stick) unsalted butter, room temperature
3/4 cup (packed) golden brown sugar
3/4 cup sugar
1/2 cup vegetable oil
3 large eggs
1 15-ounce can pure pumpkin
1/2 cup milk
Nonstick vegetable oil spray

Sift first 7 ingredients into large bowl. Using electric mixer, beat butter and both sugars in another large bowl until blended. Gradually beat in oil. Add eggs 1 at a time, beating to blend between additions. Beat in pumpkin. Add dry ingredients in 2 additions alternately with milk in 1 addition, beating to blend between additions and occasionally scraping down sides of bowl. Cover and chill batter 1 hour.

Arrange 1 rack in bottom third of oven and 1 rack in top third of oven; preheat to 350°F. Line 2 baking sheets with parchment; spray lightly with nonstick spray. Spoon batter onto baking sheet to form cakes (about 3 level tablespoons each; about 12 per baking sheet), spacing apart. Let stand 10 minutes.

*Recipe and photo courtesy of Bon Appetit

Shopping for a cause!

It's that time of year again... there is pink around every corner! In light of October being such a special month {breast cancer awareness} we wanted to pass along some of our favorite finds that are being sold to support the cause. The following designers and/or stores are donating a portion of profits from these products to benefit breast cancer research, outreach and education. Who knew that shopping could help so many people??! Ladies, we must do this to help out everyone we know that has ta - ta's! {yes, we can rationalize just about anything}

1. {Vera Wang for Kohl's}

2. {David Yurman}

3. {Lilly Pulitzer}

4. {Hayden Harnett}

5. {Vineyard Vines}

6. {Shiseido}

Share THIS link and help Paper Moss reach 1,000 Facebook "fans". If we can do this by October 31, we've agreed to donate $1,000 to breast cancer research! Check out the details here.
*Photos provided by respective companies.

Mmmm... FRIDAY!

What a week this has been! Meetings, new designs {of course}, visiting with friends from out of town, networking events, finding inspiration all over the place... it's been jam - packed and satisfying! Last night, Paper Moss went to the Belle Mer Holiday Party in Newport, RI and it was the perfect touch to our already great week. Of course, we'll dish the details from this fun event soon! For now, we hope that your week has been equally full and fun and we wish you a delicious weekend!

xo

Think Pink

On November 22nd 1997, a momma who is near and dear to the Paper Moss Family was announced into remission from her battle with breast cancer. We are pleased to share that 13 years later this wonder woman remains cancer free! Paper Moss needs your help! If we are able to add 1,000 facebook fans before October is up, we will donate $1,000 to Breast Cancer Research. Spread the word by suggesting the Paper Moss Facebook Page to your friends. But wait, there’s more! For those of you that repost this on your own page & leave a comment below will be entered into a drawing for a lil' stationery treat from yours truly. The winner will be chosen at random and announced on the 1st of November.

Let’s do this!

To make a donation on your own click here!

DIY: Rosette ruffle pillows!

Seeing the final product of a Do-It-Yourself {DIY} is so exciting. Even just looking at the "recipe" for how to make it - to know all of the "ingredients" and the step - by - step directions, is inspiring in it self. Take this gorgeous ruffle pillow from Felt Furnishings, {via The Storque} for example...

You will need the following:

  • Feather pillow insert, 10 x 18" (25 x 45cm)
  • For the pillow cover: 23 1/2 x 19" (57 x 47cm) orange felt or felted woven-wool fabric
  • For the folded rosettes: 20 x 18" (50 x 45cm) orange felt or felted woven-wool fabric
  • Matching zipper, 18" (45cm) long — optional
  • Matching sewing thread
  • Basic sewing kit
  • Sewing machine

And here's how you make the magic happen:

1. If you wish to make a pillow back with a zipper, cut out three pieces of felt for the pillow cover — one piece measuring 11 x 19" (27 x 47cm) for the front and two pieces measuring 6 x 19" (14.5 x 47cm) and 6 1/2 x 19" (15.5 x 47cm) for the back. If you wish to make a sewn-in pillow back, cut the back panel to the same measurements as the front. To make the rosettes, cut out 60 felt circles with a 3" (7cm) diameter.

2. Pinch each felt circle in the middle, and fold the sides in to form a rosette. Hand-stitch the base of each folded rosette to hold it together.

3. Starting at one end of the front pillow panel, hand-stitch the rosettes onto the fabric, stitching neatly and securely through the base of each one.

4. Continue adding rosettes, positioning them very close together to form a dense, wide row of rosettes through the center of the pillow panel. Make sure that the row of rosettes is straight and that there is the same amount of undecorated base fabric on either side of the row.

5. Make up the pillow back and join the front and back following one of the two options below. Insert the pillow form into the finished cover.

For instructions on how to make up the pillow back, visit The Storque's posting. While you're there, find out more about what inspired this book on Felt design ideas and also be sure to peek at some of their other fantasticly fun DIY ideas!! Perhaps one of these days we'll post pics of our humble attempt at this... once we get our little paws on a sewing machine again :)

*Photos courtesy of Felt Furnishings

Purple please!

Among the many fun wedding trends for 2011, we noticed that purple is making a royal appearance. We recently had some clients who shared a love for this color and had a beautiful purple and white wedding. Enjoy this little inspiration board we put together to encompass some purple potential! How fabulous is the purple wedding dress in the center?! Style Me Pretty has a fabulous feature on her wedding that you should totally check out!

*Stationery photos courtesy of Paper Moss

*Suit photo courtesy of Susan Stripling Photography

*Cake photo courtesy of The Caketress

* Purple wedding gown photo courtesy of Simply Bloom Photography

* Favor box photos of Real Simple

*Invite Photos courtesy of Laura Ashbrook Photography

A sucker for seersucker

Once upon a time, a young woman moved into her very own apartment. Being that this was the first time sans roommates, she had free reign on the decor... and things had to be just right. For the sake of keeping said character anonymous, we'll call her Hannah. Anyway, Hannah searched high and low for the perfect shower curtain - it even became an obsession. She scoured all of the usual stores: Target, Macys, Crate and Barrel, Anthropologie, Urban Outfitters... the list goes on... until one day a conversation with a certain stranger led her to India Rose. This adorable online boutique (with one physical location all the way in Cali) sells some of their goods at Anthropologie and other equally lovable stores. Well, it was love at first seersucker when Hannah's eyes met this fabulous, feminine and preppy curtain.... and it's been bliss ever since.

Well, Hannah's success story keeps us coming back to see what gorgeous goods India Rose has in store. Take for instance the recently introduced Anna Rose collection that we are totally crushing on. What a lovely color combination AND more seersucker?!?

Let's be honest. If we ended up with this duvet, we would really have to consider getting a new shower curtain too. After all, how perfect would this one be:

We can always appreciate when design, detail and quality come together.

*Photos courtesy of India Rose

Cookies! {and some Press}

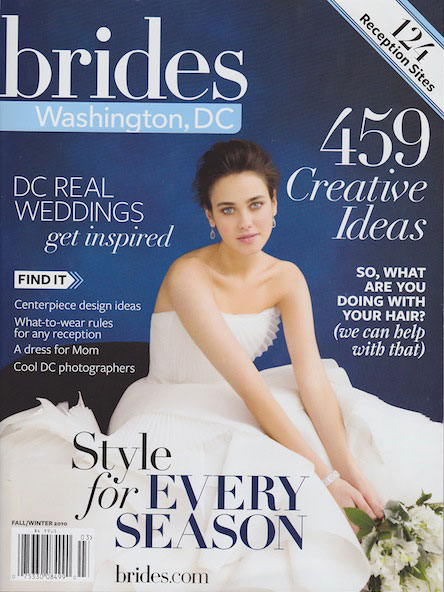
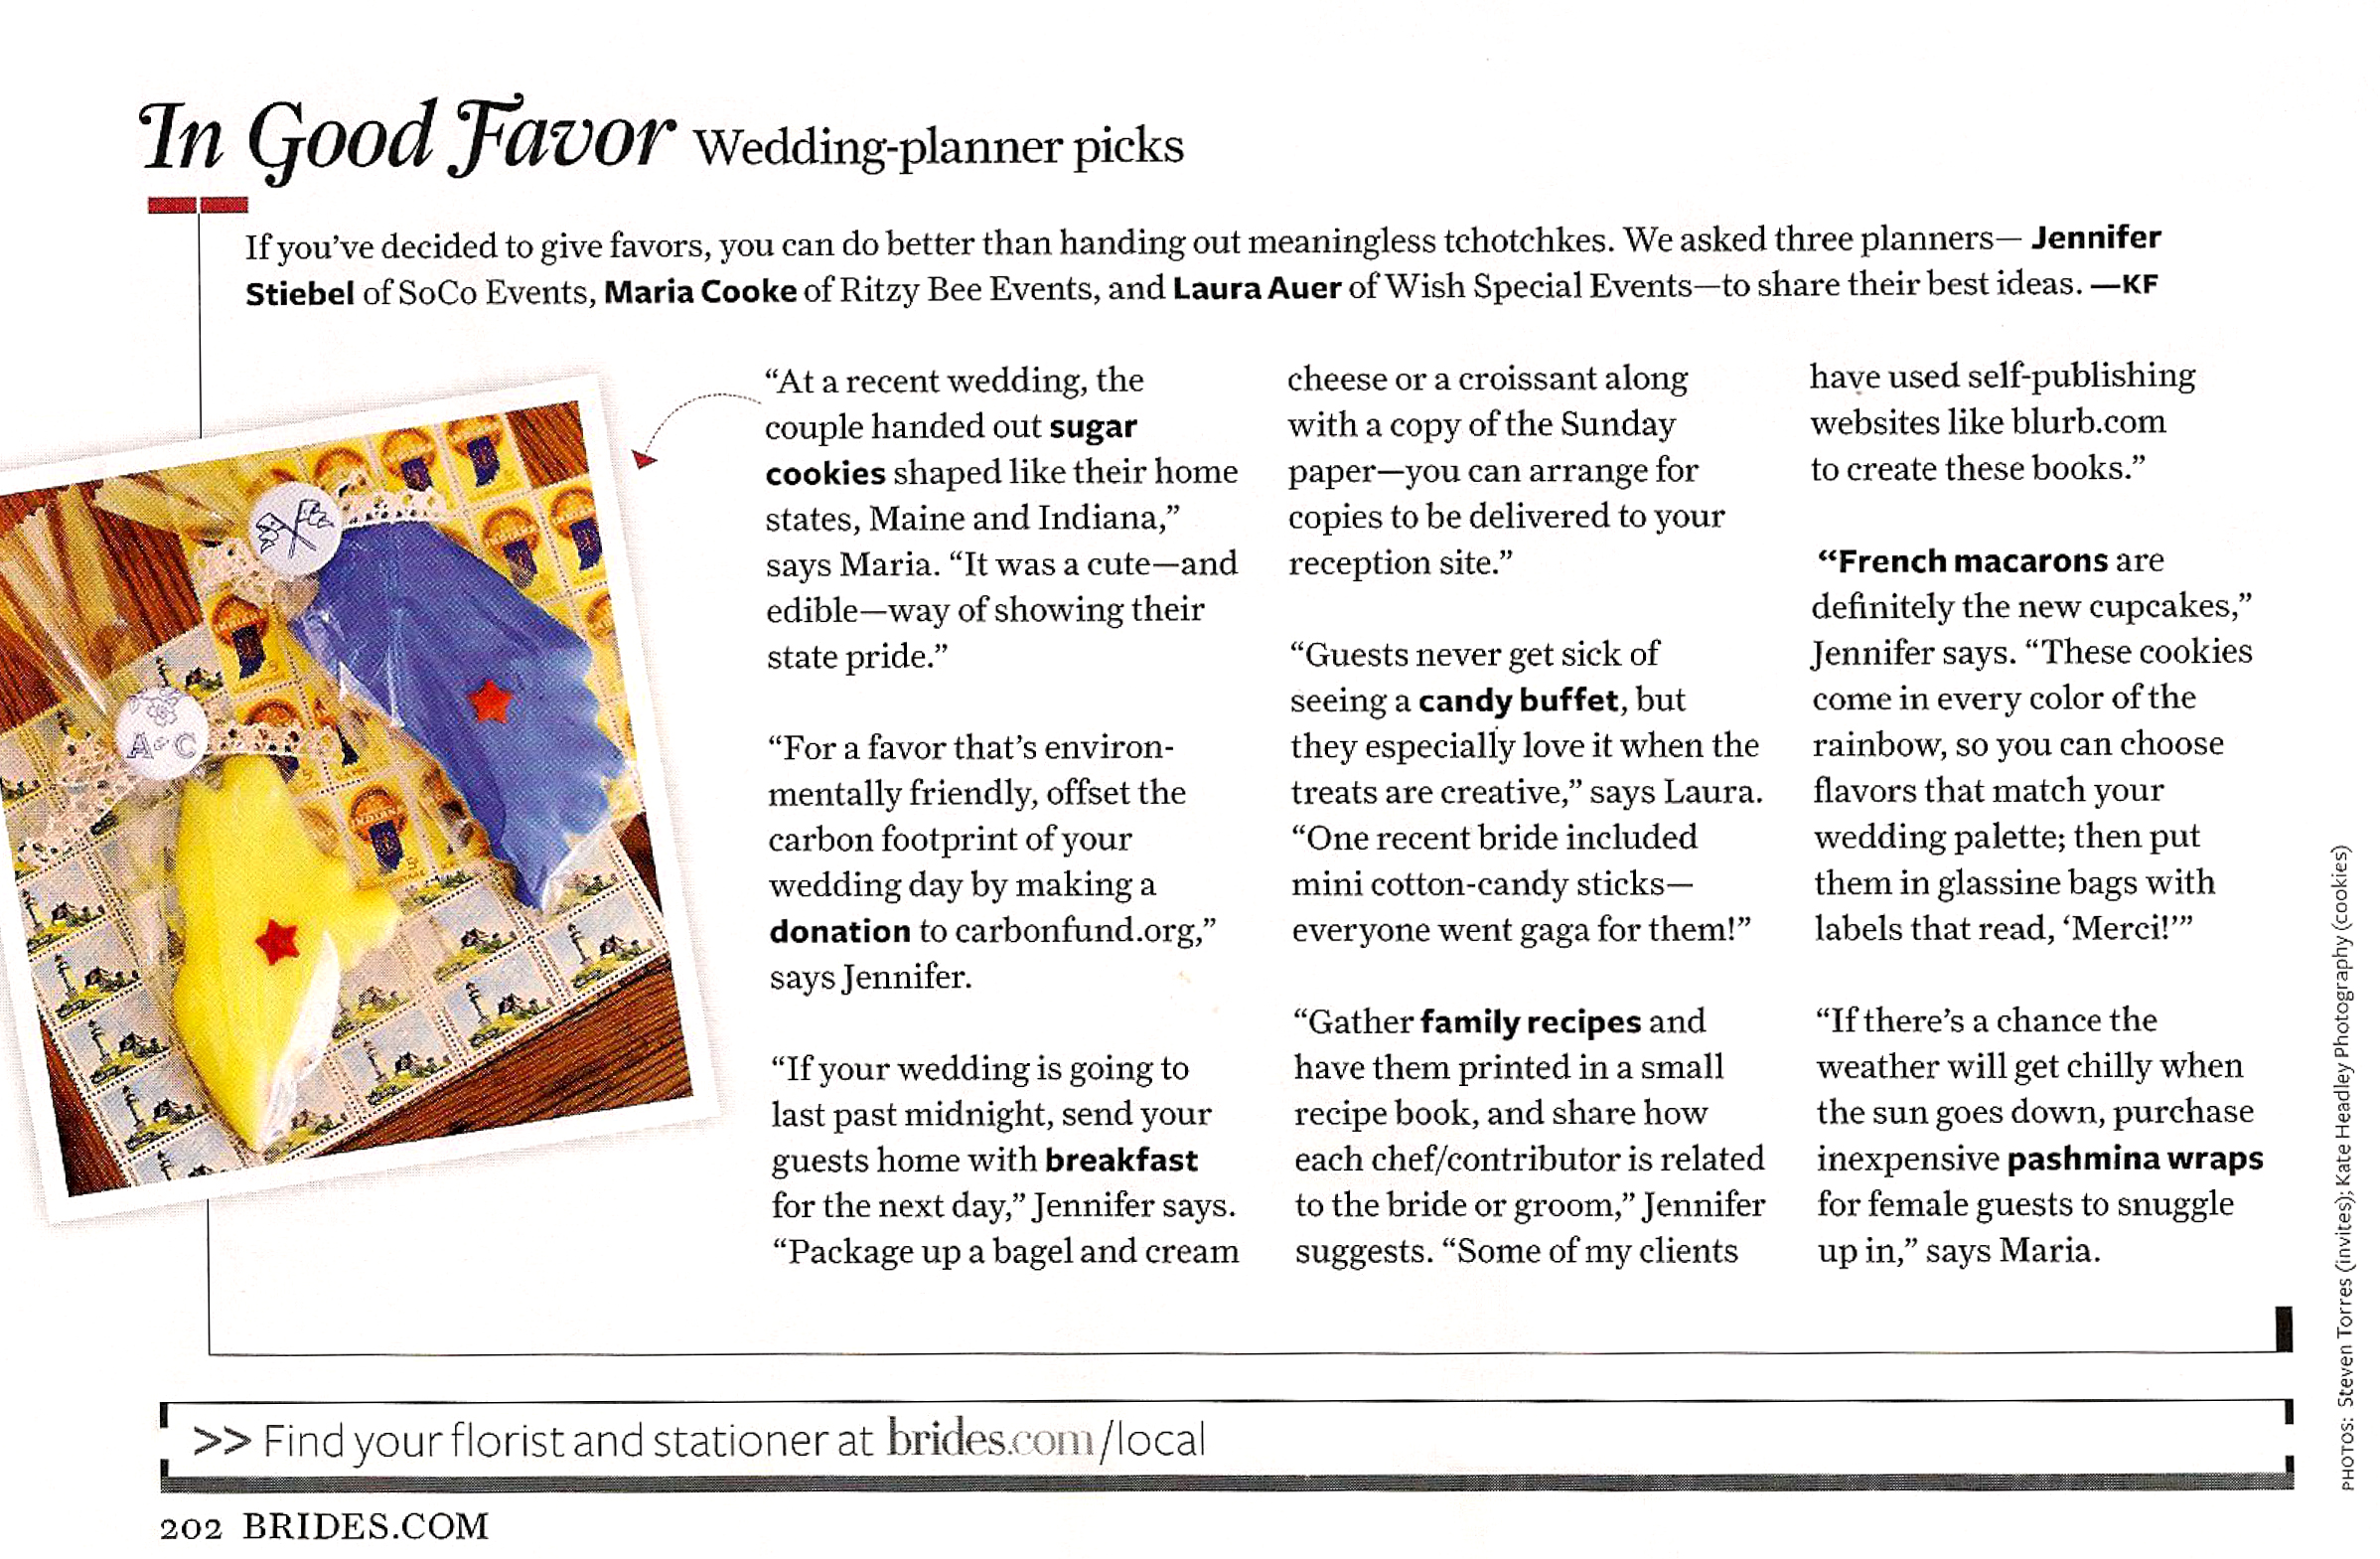
A few weeks back we shared invites and details from a "Vintage Collegiate" wedding. Apparently the buttons we made were popular and Brides Magazine from Washington DC agreed! The bride and groom sent their guests away with cookies in the shapes of the states that they each grew up in. As if the bright, delicious cookies were not cute enough on their own, each bag was fastened with lace and adorned with one of our adorable mini-buttons.

new-BRIDES-dc.jpg

We are so happy that Brides Magazine liked these cute favors and we hope that you do too!

buttons1.jpg
15_Allison_and_Chris.jpeg

Be sure and contact us if you are looking for buttons for your next event!

*Bottom Photo courtesy of Laura Ashbrook Photography

A thank you from Ms. Post

Remembering to say please and thank you is the first step to any kind of etiquette, right? Well, the opportunity to write thank you notes arrives way too frequently. This either means we are spoiled rotten and surrounded by fabulous people or... well, no, we are just spoiled rotten and surrounded by fabulous people. That is a FACT. Regardless of what instigates a hand written thank you, {be it a job interview, a birthday gift, a slew of wedding presents or a special outing with a special friend} they can easily slip off our to-do lists, especially in this day in age where we could just shoot off a thank you text or email! We are here to remind you that it is WORTH taking the extra time to hand write a thank you. How many pieces of "personal" mail have you received via USPS in the last week? And how many "personal" emails have you received. Point made... getting a thank you card in the mail is straight up classy and makes us all feel special. Our etiquette icon, Emily Post addresses (pun intended) some of the most common questions people have about writing thank you notes. We found them to be insightful and hope that you do too...

Before you start...

Remember that thanking people needs to be about just that: expressing thanks. So refocus, reorganize, and rethink the process. Get in touch with the sincerity of thanking people for thinking about you and sending you something—even if it’s a hot pink polyester sweater.

Who needs a note?

All gifts should be acknowledged with a note, unless the goodies were opened in front of the giver—then you have the chance to thank them in person.  An important exception: many of an older generation expect a hand-written note. Providing them with one is an appropriate gesture of respect and consideration.

When should thank-you notes be written?

Write your notes as soon as possible, and don’t hesitate if you feel you’re late: a late note is always better than no note at all.

Can a thank-you note be creative?

Absolutely. Incorporating photos, children’s drawings... anything at all that compliments the sentiment is appropriate. Just remember to include a short written thank-you as well.

Will an e-mail suffice?

The reality of email thank-you’s, much like email itself, is a degree of emotional distance: an email to your grandmother is simply not as personal as a note written in your own hand. So if you have a casual relationship with the gift giver and you correspond via email regularly, an email thank-you may be appropriate. For most other people, the written thank-you is your best bet for an expression of warm, heartfelt thanks. The last thing you want is for someone to be disappointed when her hand-knit scarf is acknowledged with a loud, animated e-card.

How do I make writing thank-you notes fun?

Break up the list and schedule a few different days to write your note. Each time give yourself a little something to make it interesting: music, a glass of wine, your favorite radio show, a cup of tea—perhaps even some chocolate. Take the time to yourself for writing out thank-you notes: don’t try and wedge it in between laundry, a TV show and extra work from the office. You’ll be able to think more clearly and your focus will translate to the page. Above all, try to enjoy yourself. Giving thanks shouldn’t be a chore—and doesn’t have to be if you make the effort to keep it interesting.

We think the fun starts with cute stationery... of course! If you have a large amount of notes to send out from a wedding, anniversary or large party, consider having a custom "Thank you" post card made. One side can include pictures from your event while the other side can share a general sentiment while still leaving room for a couple of sentences and signatures. Badda - bing - badda - boom! What a sweet way to save time and people will love them!

*Photos courtesy of Laura Ashbrook Photography

Let it rain

Fall wouldn't be Fall without rain. It's a necessary evil that is sure to kill any potential for a good hair day, not to mention soak your hot new heels while running for cover. In all the madness of a downpour this week, we foolishly left our 6 year old umbrella in a cab {blonde moment} as we were bolting to shelter. Well, one lucky Bostonian scored a vintage umbrella that day... it was BEYOND time for a new one anyway. We popped into a local boutique and it was instant umbrella heaven when we saw the happy and colorful assortment. Stripes, polka-dots and bold florals - all designed by the Finnish company, Merimekko. What a wonderful way to add a burst of color on a rainy, grey day. We were actually excited to use it! Is that weird?

So the moral of the story is to never leave your umbrella in a cab... unless you need a legit excuse to buy another one. Sport one of these with some boots and bring on the rain!

*Photos courtesy of Marimekko {if you're like us and love reading about the design process, here is some insight on Marrimekkos designers}

Champagne, champagne!

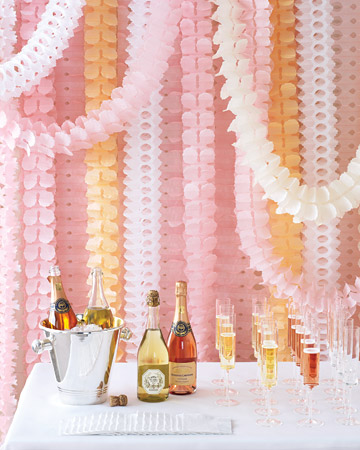
Celebrations call for champagne! Lets be honest, a little bit of bubbly is festive, fun and really gets the party started. With candy bars and dessert bars becoming commonplace at special events, we have a new "bar crush" on CHAMPAGNE COCKTAIL BARS! Even the name sounds fluffy and delicious!!
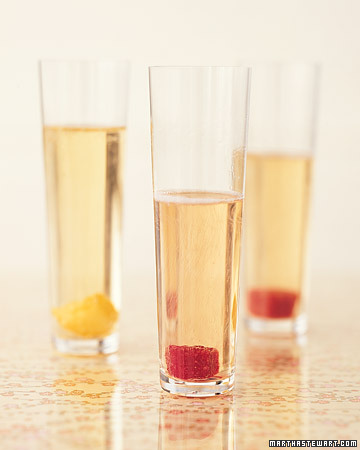
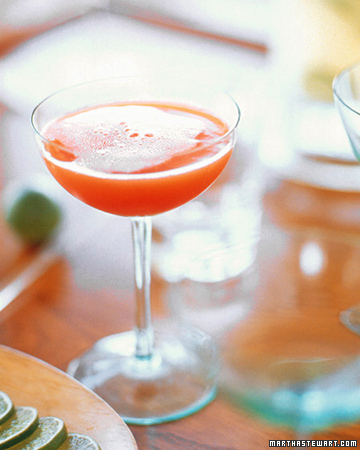
Lifestyle and entertainment expert, Kelley Moore takes the complication out of putting one together when she unveils chic options for stemware, delicious types of champagne {not being a champagne connoisseur, this section is ever - so - helpful} and last, some tasty concoctions that will excite those taste buds! As for how to display the table, treat it like any other buffet, varying heights, sizes and colors. Pop over to Kelley Moore's website to get the full scoop on how to do it like a pro.

If you're looking for a quick way to add flair, consider one of these ideas from Martha:

{By soaking sugar cubes in fruit puree or concentrate, removing and letting them dry over night, you'll have instant bursts of flavor to pop in the glasses}

{Swap out your standard orange juice with blood orange juice for a unique twist}

Whether you're celebrating a shower, birthday soiree or a wedding... it's better with a little bubbly! Enjoy!

*Photo courtesy of Martha Stewart Living

Evolution of an invitation

Anything custom requires more time and attention than something mass-produced. In fashion-speak, it's the "haute couture" of stationery, while pre-made designs are equivalent to the ready-to-wear. Paper Moss has been custom since its first breath. There is something so satisfying about working with clients to make their vision a reality. The design process goes through many "renovations" to finally achieve the look that our brides and grooms are dreaming of. When we first sat down with {bride to be} Mary Jo, she mentioned her love of Paris and the time she spent abroad. As the conversation evolved and we learned more about her and her honey, it only seemed natural to aim for a "Vintage Parisian" look for their invitation suite... without being cliche. Since we all needed a little inspiration, she sent these photos to inspire designs:

After identifying their color palette, discussing fonts, deciding on the type and weight of paper and getting a general idea of what they wanted, designs for Mary Jo and Paul began. In the first round, we included several options that the bride and groom evaluate and give feedback on. We pulled characteristics from one and add them to another, flip things around, make one design smaller or another less detailed... the list goes on! Here are some of their initial designs:

Sparing the details of the back and forth, the questions, the answers, the tweaking, the perfecting, the printing and yadda yadda, you get the point... their final product fit the bill! PUN intended! Our bride and groom both adored their invitation suite and we were gladly able to accommodate the budget they were working with.

And here is their final "Vintage Parisian" wedding invitation...

And that friends, is how a custom invitation evolves!

*Invite photos courtesy of Laura Ashbrook Photography

Head gear

What comes first: the dress or the accessories? We would have laughed at the question... prior to setting our eyes on this femme & chic trend of wedding day hair decor. What a fun way to add some pizazz if you decide to forgo a vail or even to spice things up post ceremony! A few months ago, Untamed Petals was gracious enough to let us {well, a model actually} play dress up for our Style Me Pretty inspiration - to - reality shoot. Here are some more of their precious pieces:

*Photos courtesy of Untamed Petals

These two love birds

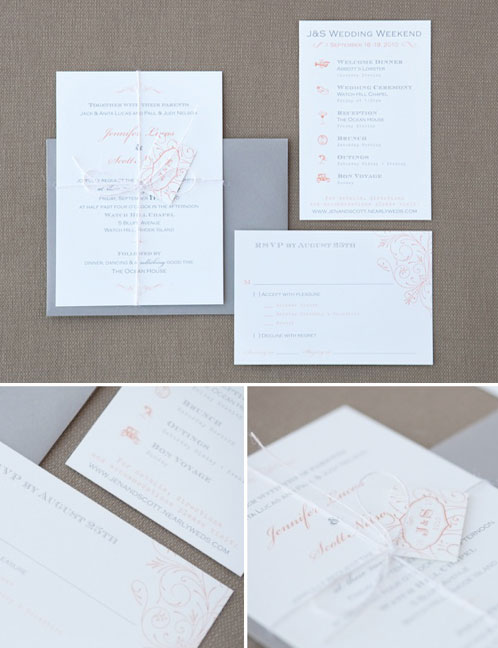
Jen and Scott, who are off honeymooning as we type {as you read}, were married this past weekend at the Ocean House in Watch Hill, RI. This happens to be one of our favorite New England venues {have you SEEN IT?!} This sweet couple shared our passionate obsession with the Ocean House and were so determined to have their wedding there that they booked it while still under construction for it's renovation... they even had to wear hard hats at the site visit!

With such a gorgeous destination, Jen and Scott decided to make a weekend out of it. Take a peek at the agenda that was sent out with their invitations:

The hand-drawn icons were a hit! We heart these little icons and will certainly share more in the future. Going for a vintage and romantic feel, we thought that peach, ivory and grey was the perfect color scheme for a end of summer wedding. While the natural twine is a fun touch and adds texture, it also served its purpose and held all cards together, complete with a personalized tag. 

Congratulations to the happy couple! We hope the wedding weekend extravaganza was magical!

*Photos courtesy of Laura Ashbrook Photography