{Milk} Shake it up

Now that daylight savings officially happened, we are mentally heading into Spring & Summer full force! Events on warm days are some of our favorites- sundresses, warm nights, ice cream- an irresistible combination! Ami from Elizabeth Anne Designs shared this precious, flirty, ice cream sundae bar idea that is just delicious. What a fun element to add to a wedding, shower, birthday party... or even a family reunion. As shown in the photos below, there are plenty of opportunities to customize a station like this to perfectly complement a color scheme or party theme.  

Love and LOVE.

Oh, and how stinkin' cute is this couple?!?

*Photos courtesy of Kellie Kano Photography

Pop Rocks turned Classy

Remember Pop Rocks?! We used to love those little candies - especially when we learned how to shoot them/pop them at our siblings. Oh the memories! While checking out one of our blog crushes, Birthday Girl, we saw this fabulous recipe for Pop Rocks Chocolate Cake {original recipe via Chubby Hubby} and couldn't resist sharing. What a fun, unique treat to have at a birthday party or shower!
undefined
{before}
Pop Rocks Chocolate Cake
For the popping-candy base
85g whole hazelnuts
40g milk chocolate
2 tsp mixed spice
100g popping candy
For the chocolate mousse
350g dark chocolate
400ml double cream
Pinch of salt
For the chocolate glaze
20g chocolate (same type as for the mousse)
120ml water
8 whole coffee beans
Couple of pinches of salt
30g cocoa powder
70g unrefined golden caster sugar
Directions
To make the base, preheat the oven to 180C/ 350F and roast the hazelnuts for about 10 minutes until lightly coloured. Blend to a paste in a food processor, then set aside. Melt the milk chocolate in a bain-marie (a large basin over a saucepan of simmering shallow water — take care that the water does not touch the basin) and stir in the ginger spice and popping candy. Next, fold in the hazelnut purée. Place the 12 cm ring mould on a serving dish and gently press in the base mixture to a depth of about 1cm. Refrigerate for at least 2 hours, until hard.
To make the mousse, chop the chocolate into small pieces and place in a metal bowl. Bring 150ml of the cream to the boil in a small saucepan. Pour it over the chopped chocolate and stir extremely gently until all the chocolate has melted, watching carefully to ensure it doesn’t take on a granular texture. Add the salt to taste. Once the chocolate cream has cooled to room temperature, lightly whip the remaining 250ml cream to soft peaks, but do not over whip. Fold into the chocolate mix. Pour over the base in the ring mould and place in the fridge to set for two hours.
To make the glaze, chop up the chocolate and set aside. Place the water, coffee beans and salt in a pan, whisk in the cocoa powder, then set over a medium heat and simmer for about 3 minutes. Meanwhile, put the sugar in a small pan and melt over a medium heat. Unrefined sugar will caramelise quickly, so keep an eye on it; when it does, pour over the coffee and cocoa mix — stand back, as it will bubble and spit. Beat in the chopped chocolate and, when melted, pass through a fine sieve. When cool, but still liquid, pour over the mousse to your preferred depth and return the cake to the fridge to set.
To serve, run a hot knife around the inside of the ring before removing the cake. When slicing it, again make sure the blade of the knife is nice and hot.
undefined
{after... oh sweet heavens}
Yes please!
*Photos courtesy of Chubby Hubby

Eyes on the Pies

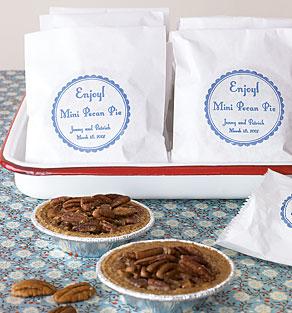
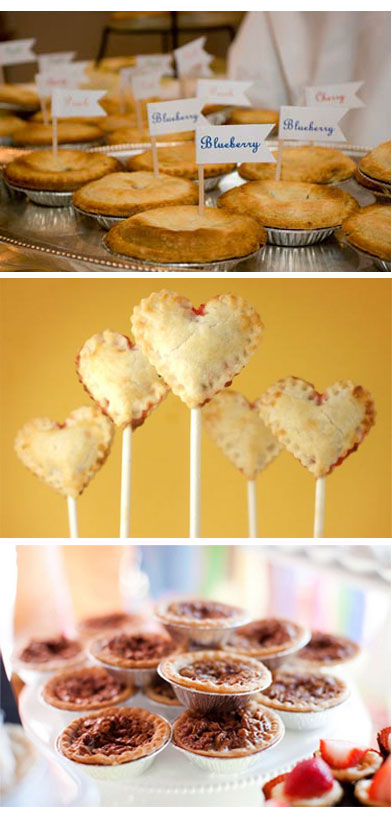
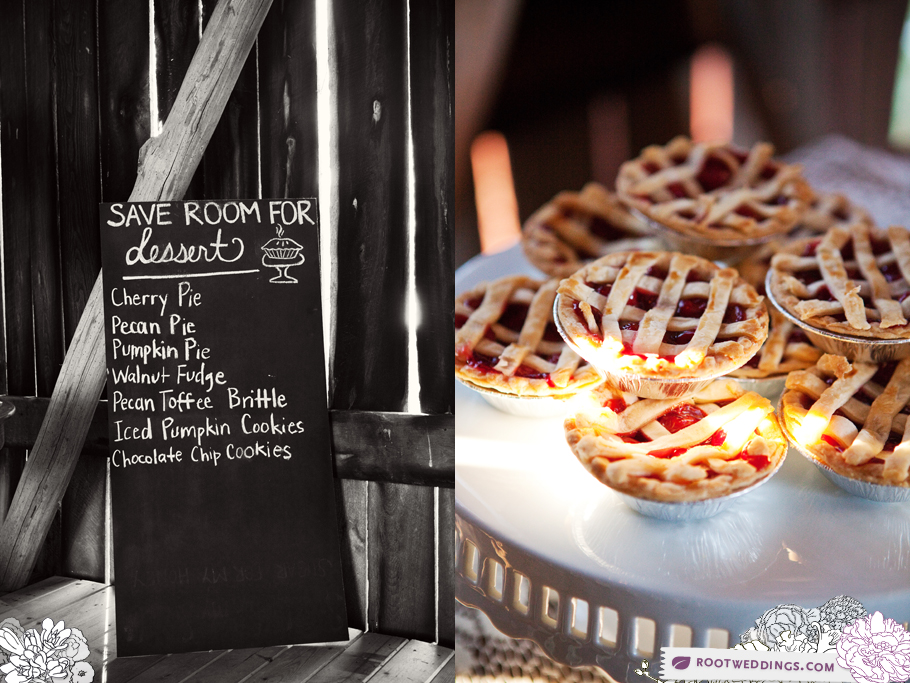
Dessert is one of our favorite things to think about. Seriously. When it comes to weddings, people automatically think: wedding cake! While wedding cake is delicious and traditional, so many future brides are thinking outside of the box for their wedding sweets these days. We love this idea of mini pies- whether it be for a dessert display, tray passed goodies or takeaways for your guests, we've got our eyes on the pies! Mmmmm :)  

{Oh how we adore these custom labels!}

{So cute and what a great idea to offer a variety of flavors! Maybe incorporate a special family recipe?}


*Photos courtesy of Martha Stewart,  Sweetwater Portraits,  BakerellaChicago Now, Root Weddings

Float away

Back in the day balloons were a permanent fixture in all party decor. A party wasn't a party without balloons, right? And there's always the token attendee who squeakily shouts toasts after sucking down some helium. Well, honestly, we're kind of crushing on them again... and this is why:

{via}

{via}

{via}

Sharing in our obsession yet??

{via}

{via}

{via}

Okay, now lets all go to Paris and play with balloons, shall we?

Happy FRIDAY!!

*Photos courtesy of respective sites

Pure Bliss

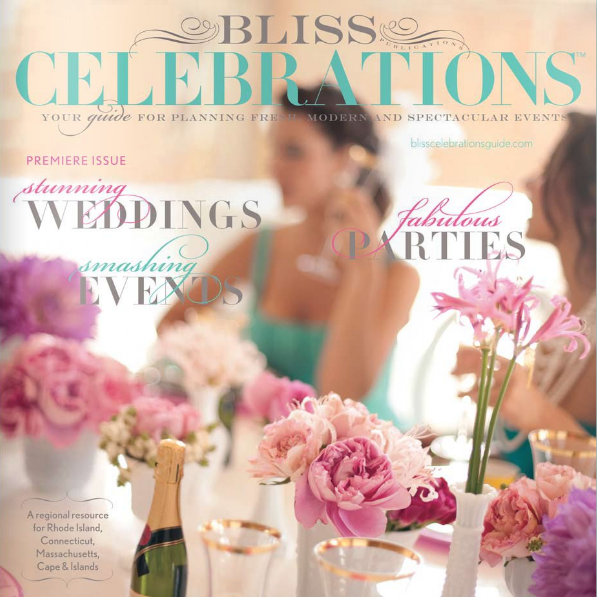
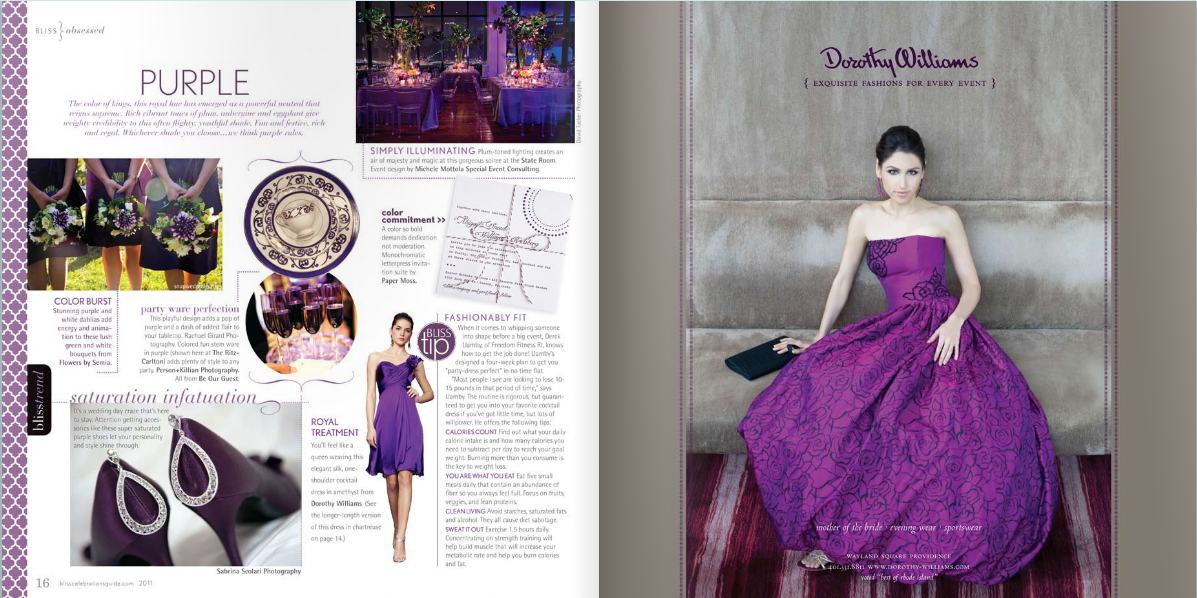
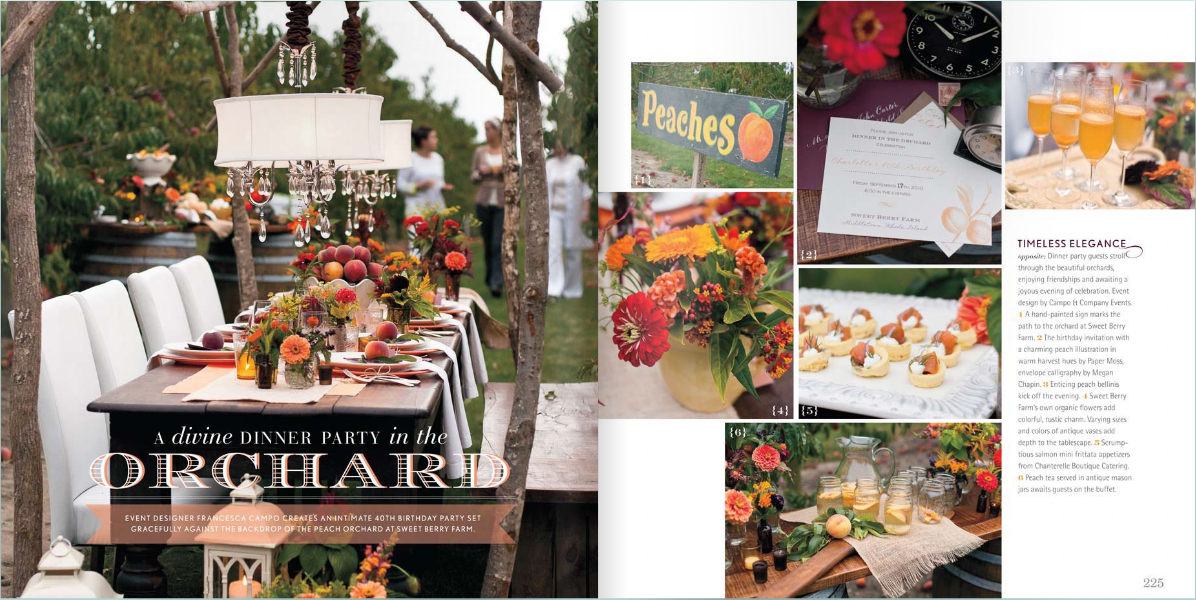
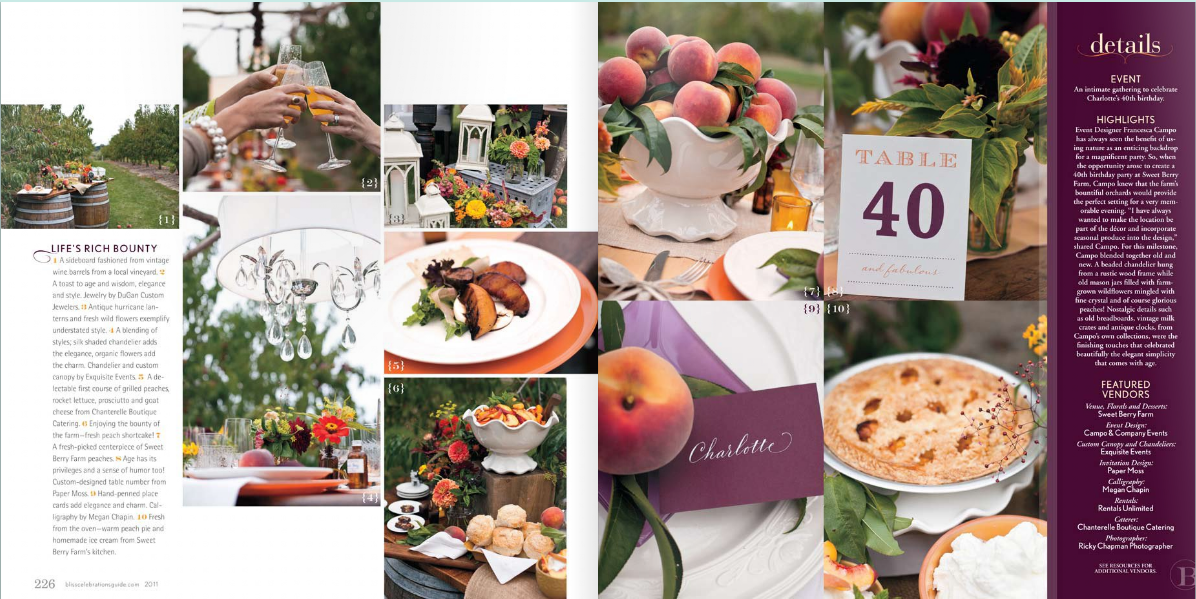
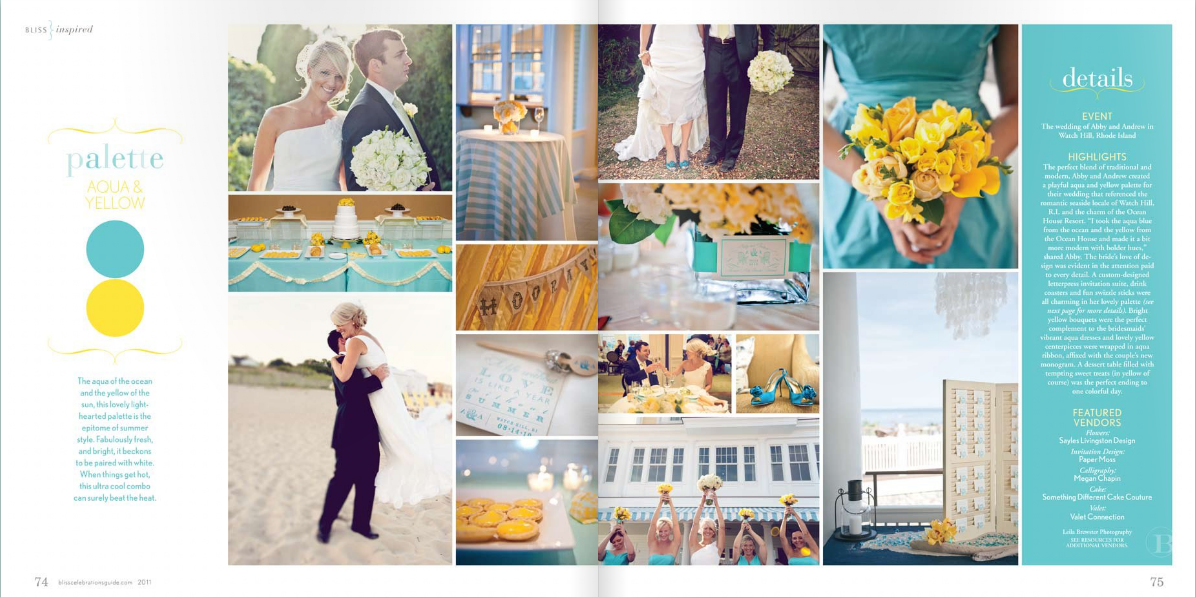
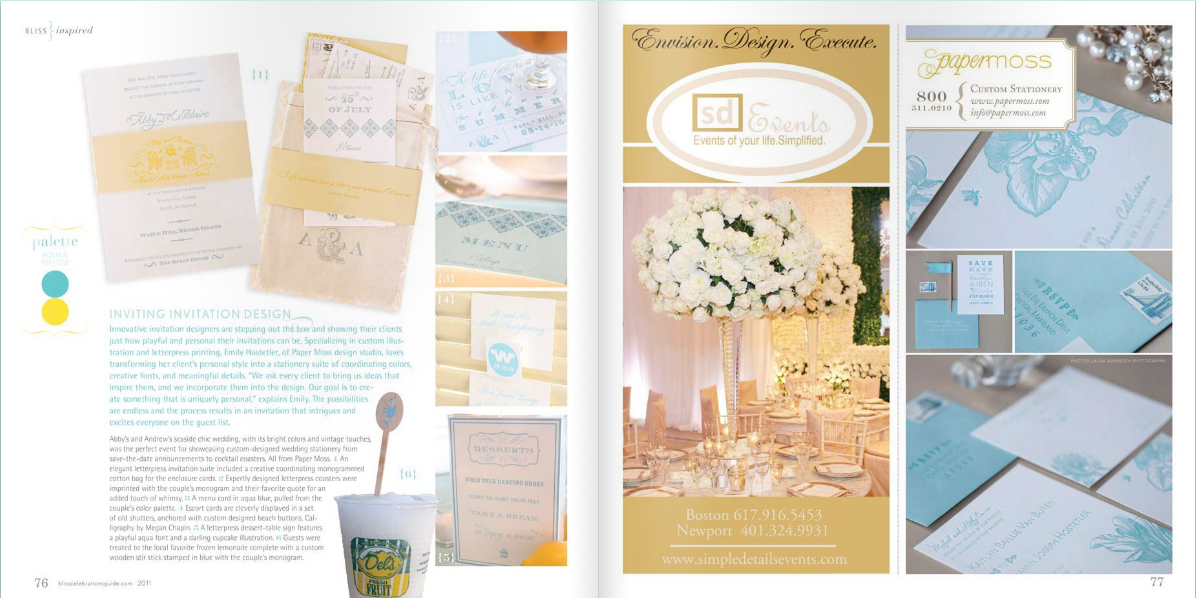
Wednesday night, we had the pleasure of partying down at the launch of the new magazine Celebrations. With so many beautifully creative minds behind these pages, we knew it couldn't be anything less than perfect, but we had NO idea just how perfect it would be! Now that we have your attention, here are a few of the reasons why we are obsessing:

1. Abby & Will's letterpress invite was a perfect fit for one of their Color Board Features, all that which provide endless inspiration. {Did we mention the advertisements from vendors happen to adorably match each feature?} Love those details!

2. Inspiration shoots like THIS! Industry professionals collaborate to create breathtaking scenes filled with details that raise the bar. Whether it's a mitzvah, dinner party or wedding, there are stunning ideas flowing from page to page to page. We were thrilled to participate in this particular photo shoot at Sweet Berry Farm, alongside one of our favorite photographers Ricky from Public Image Photography.

3. REAL events + color combinations that are to die for! Abby and Andrew's feature is just one of the many that we've been drooling over. ABSOLUTELY AMAZING. We continue to ooh & ahh over her TRUE Event details & flowers by Sayles Livingston, all captured by the lovely Leila Brewster Photography.

*Photos courtesy of Celebrations

Ruffled wedding trends

Ruffles and weddings were made to go together - much like cake and frosting. While there are a plethora of wedding dresses adorned with ruffles and chic ruching, we must not forget the details! Here are some ruffle-related trends that turned our heads. So, if you're a bride to be, don't be afraid to add a feminine punch {and some fabulous texture} to your special day...

Photos clockwise from top: Cake via NoBloPoMo, garter via A Alicia Handmade, bridesmaids dresses via Cherry Blossom Girl, Flower bouquet via Emici Bridal, Ruffle ribbon ball chandelier via Martha Stewart Weddings, Wedding Dress via Style Me Pretty, White rosettes via Making it Fun.

Our Monday obsession.

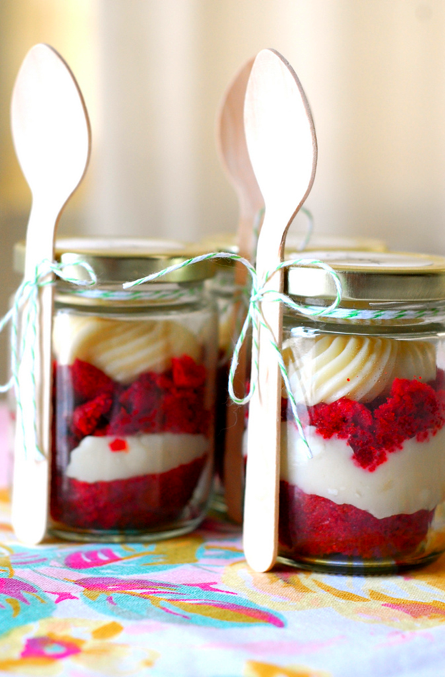
Cupcakes are pretty close to being perfect on their own, but putting them in adorable containers that allow for fabulous party favors to-go makes us speechless. You see, some of us at Paper Moss (who shall remain nameless) don't have that 'special touch' when it comes to baking. Oh they taste good, but their appearance wouldn't make you think so. In other words, this DIY might be the perfect fit for those of us that need some help in the presentation department. Gotta love projects like that! Now for those of you who don't share our little problem... well, this should be a cake-walk.

{red velvet cake & cream cheese frosting, oh my}

Get the directions on the Cakies blog.

Thank you Cakies, for being so cute and brilliant!!

*Photo courtesy of Cakies

When all else fails...

...music is our inspiration. Come to think of it, even when nothing fails, music is still our inspiration. Whether you find yourself humming a tune while working away or rocking out to your favorite album while cleaning, music is the energy and the motivation behind so many incredible things. For those brides {and grooms} who love music, how about this cute idea to incorporate a shared passion into your special day?

Of all the art mediums that we share on Pearls for Paper, we always seem to leave out music. Why??? Well, there is no good answer. So on this lovely friday, we ask you this: What is your favorite music to work to? What song, band or album awakens your creativity?

Here are just a few of our current faves:

Band of Horses

Elizabeth & the Catapult

Andrew Belle

Joni Mitchell

Radiohead

*Photo courtesy of The Wedding Ideas Blog

Favorite posts from 2010: No. 4

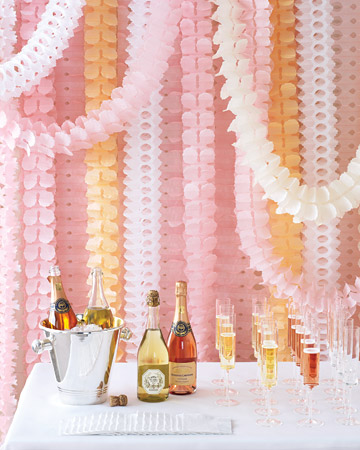
In honor of ringing in 2011, here are a couple of our favorite party related posts to inspire... Celebrations call for champagne! Lets be honest, a little bit of bubbly is festive, fun and really gets the party started. With candy bars and dessert bars becoming commonplace at special events, we have a new "bar crush" on CHAMPAGNE COCKTAIL BARS! Even the name sounds fluffy and delicious!!

Lifestyle and entertainment expert, Kelley Moore takes the complication out of putting one together when she unveils chic options for stemware, delicious types of champagne {not being a champagne connoisseur, this section is ever - so - helpful} and last, some tasty concoctions that will excite those taste buds! As for how to display the table, treat it like any other buffet, varying heights, sizes and colors. Pop over to Kelley Moore's website to get the full scoop on how to do it like a pro.

If you're looking for a quick way to add flair, consider one of these ideas from Martha:

{By soaking sugar cubes in fruit puree or concentrate, removing and letting them dry over night, you'll have instant bursts of flavor to pop in the glasses}

{Swap out your standard orange juice with blood orange juice for a unique twist}

Whether you're celebrating a shower, birthday soiree or a wedding... it's better with a little bubbly!

... And a party wouldn't be complete without the perfect party dress!

How glorious it would be to wear one of these? We are loving Ouma's shop on Etsy... so many gorgeous gowns that are perfect for parties, bridesmaids or even as a wedding gown! Enjoy!

*Photos courtesy of Ouma

*Photo courtesy of Martha Stewart Living

Favorite posts from 2010

2010 has been quite the year for Paper Moss! We are giddy about all that has happened and want to wrap this year up just right. In honor of the last week of the year, we thought it was only appropriate to do a throwback of our {personal} favorite posts.

Throwback #1: Monograms Galore

Needless to say, life wouldn't be nearly as pretty without monograms. That being said, take a peek at some that were designed for Paper Moss clients for their invite suite and beyond!

Here are a few favorites... some have stories behind them, and others are just pretty stinkin' cool looking if we do say so.

Enjoy!

Louisa and Frank are nature lovers who got married on a farm in lush Georgia. The bird on the left is meant to represent her and the trout on the right (both are avid fly fishers) for him.

The inspiration for this monogram came from the engagement ring. Adam had a custom band designed to have the Texas star on the side since his bride, Stacy, was originally from Waco...!

Rachel and Adam got married in beautiful San Diego, CA. The little 'beach shack' seen in this monogram is an actual representation of a famous one on the beaches in San Diego. The groom loved to surf so we had to squeeze a surf board in there...

A Bahama Beach monogram is not complete without a palm tree and the bride's favorite shells!

How can you not fall in love with this little bird? Holly and Greg's style was perfect to incorporate a bird and swirls.

Paisley. Classic. Unique. Formal. Kristen and Brian's monogram was a detailed version of a paisley pattern that the bride loved.

You simply can't go wrong with a custom monogram... and best, you don't have to wait for a wedding to create one! Perhaps a special anniversary or a big birthday calls for some monogrammed stationery, towels, totes or dishes. The possibilities are endless!

Christmas Cake!

Leave it up to Williams Sonoma to have the perfect solution for a holiday treat. We think this cranberry upside-down cake would hit the spot with coffee for brunch or an afternoon snack. If you're feeling ambitious on this day of Christmas eve, try your hand at this little creation. This festive holiday cake is inspired by a recipe from Lindsey Shere, former longtime pastry chef at Chez Panisse restaurant in Berkeley, California. Fresh cranberries are abundant in winter, although frozen ones will also work fine.

Ingredients:

For the topping:

  • 4 Tbs. (1/2 stick) unsalted butter
  • 3/4 cup firmly packed brown sugar
  • 3/4 lb. cranberries

For the cake:

  • 1 1/2 cups all-purpose flour
  • 2 tsp. baking powder
  • 1/4 tsp. salt
  • 8 Tbs. (1 stick) unsalted butter
  • 1 cup granulated sugar
  • 2 eggs, separated
  • 1 tsp. vanilla extract
  • 1/2 cup milk
  • 1/8 tsp. cream of tartar

For the whipped cream:

  • 1 cup heavy cream
  • 1/4 tsp. vanilla extract
  • 1 Tbs. confectioners’ sugar

For baking directions, check out this page on the site.

Happy holiday eating to all!!

*Photo courtesy of Williams Sonoma

Holiday Arrangements

Tis the season for dinner parties and get togethers! In light of Christmas being around the corner, we wanted to share {via Studio 539 Flowers} some festive floral arrangement ideas that are fitting for table centerpieces, decor or hostess gifts. We snapped a few iPhone photos {below} of some new arrangements, and you can see the cooler is packed full of red and greens... these folks are ready to take on the holiday madness! Arrangements begin as low as $40, and they can deliver to Providence and the surrounding areas. p.401.454.4400

We had the pleasure of getting together with Azure Photography to shoot some more of our favorites. Tell us yours! Christina suggests adding some SPARKLE for a chic, classy look or PINE CONES for a classic, rustic look.

If you're reading from afar, fear not, because these designs can still inspire you to create something beautiful! Be sure to check out their blog for more and follow them on facebook, too!

Winter Inspirations

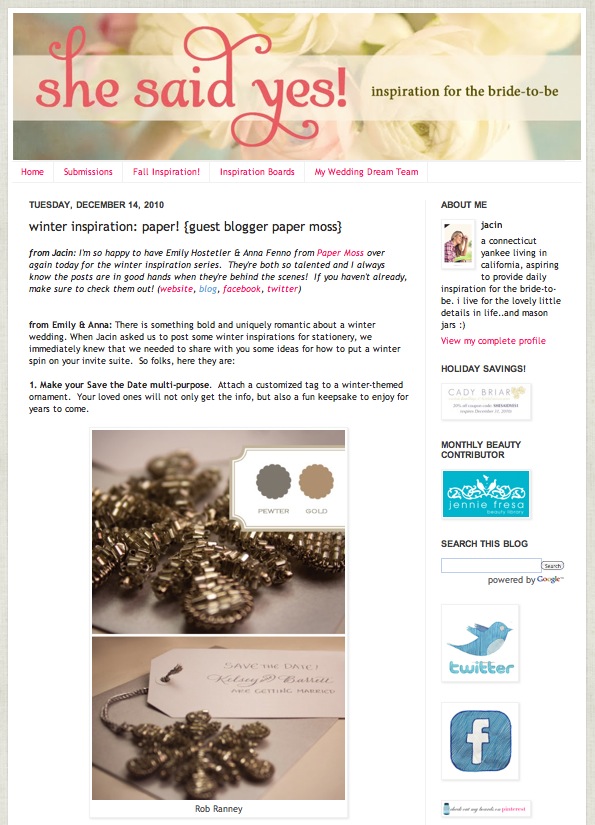
A few weeks ago we contributed to the Fall Inspiration series on She Said Yes. Well, it was so  much fun that we were thrilled when Jacin asked us to put together a little something for the paper portion of her Winter Inspiration series. So grab your hot bevie and take a peek at our suggestions for how to "winterize" an invitation suite - just click on the teaser photo below for more! Oh, and let us know what you think. ;)

Be sure to check back throughout the week as others in the industry guest post more winter inspiration!

Holiday Entertaining Etiquette

With Thanksgiving behind us, our minds are fully set on holiday parties, more family dinners and all the fun Hanukkah & Christmas festivities. To make sure they run as smoothly as possible, here is a mini guide to help you prevent some common holiday faux pas. While they are just suggestions, these are nuggets of insight from etiquette expert, Peggy Post - this sister knows what she's talking about. Read on to insure a classy holiday season.

***

1. If you're creating a holiday "newsletter" to send with cards, keep your readers in mind. Newsletters should be short (a page or less) and sweet. Keep them upbeat — most people don't want to hear about your dental surgery. On the other hand, avoid turning your letter into a brag sheet. Saying, "Sam and I were lucky enough to visit Europe — at long last!" is low-key and friendly. But "Sam and I spent a week at a deluxe French spa and were utterly pampered" screams "Don't you wish you were us?" Personalize each copy with a handwritten salutation and always sign your name. Also, be sure you're sending the newsletter only to people who are genuinely interested in your family news.

2. When you receive a holiday card from someone you didn't send one to, reciprocation is optional. Send if you wish. But beware of turning the exchange of holiday cards into a table tennis match. Say a card arrives from your cousin Myron on the seventh day of Hanukkah, and oops, you'd accidentally forgotten him. Instead of thwacking a card back across the Web — which may seem perfunctory rather than sincere — wait a few weeks and write him a letter. Or, call Myron to thank him for such a thoughtful note.

3. When Aunt Irma, feeling inventive, brings her cucumber-banana gelatin mold to Christmas dinner, accept graciously (no eye rolling, please). A good host responds to an unexpected — and perhaps unwelcome — contribution with aplomb. Thank your aunt and serve her creation with your spread. You might think cucumber and banana is a disgusting combination — but now's not the time to tell her so, and you'd hurt her feelings if you failed to offer it to your guests.

4. If gift giving with your relatives is getting too expensive, it's okay to scale back — as long as you discuss it with them well in advance. Ending gift escalation is not as hard as you think, if you're willing to be frank. Months before the holidays, bring up the idea of alternative giving schemes. Some options: drawing names, limiting presents to a specific dollar amount, giving gifts only to kids and not to adults. Others will probably be grateful that you were brave enough to start the discussion.

5. When you receive horrible, wrong-size or duplicate gifts, smile, say something polite, extend a thank-you...and then run for the returns line. A collector's plate featuring Yosemite Falls? Really, what was your mother-in-law thinking? Still, you can probably come up with something appreciative to say: "This is so thoughtful! You know how much I love the outdoors." But being gracious about a gift doesn't mean you always have to keep it. Yes, if the item is one of a kind or homemade — like a painting or a knitted scarf — you're stuck with it. Otherwise, you can take the item back to the store and exchange it for something else. And when your friend asks how you like your new hand blender? Don't lie. Say, "I love those so much, I already owned one — so I didn't think you'd mind if I exchanged it for a food mill. Thanks for making my life in the kitchen so much easier!"

6. Regift rarely...if ever. You have a surplus of "stuff," and it seems like the best way to downsize is to pass things on to other people. Makes sense. Problem is, if the truth emerges, two loved ones will feel hurt — the original giver (because you obviously didn't value her choice) and the recipient (who thought you'd take the time to find something special just for her). The basic guidelines for regifting: First, you must be positive that the gift is something the recipient would love. Second, the item must be brand new and in its original package. And third, it shouldn't be something the original giver took great care to select just for you. An example: Regifting a nice bottle of Pinot Noir to a wine lover is okay. Regifting a crystal vase your mother brought you from Bermuda is not.
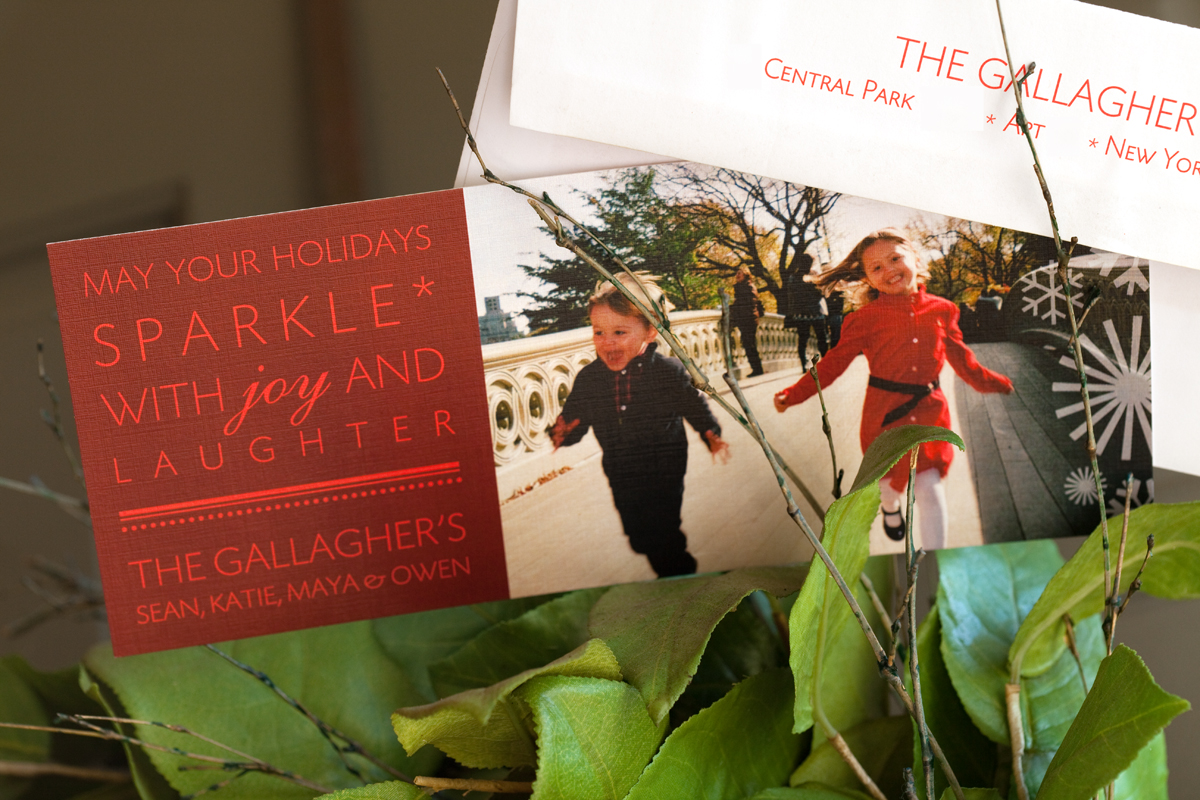
For the complete holiday etiquette guide, click here!

She Said Yes!

The lovely Jacin from She Said Yes {one of our blog-friends} asked us to guest blog for her Fall Inspiration series. The entire series has been fantastic so far- she covers all bases from decor to favors to festive drinks and fall cakes. Check it out, even if you're not planning an Autumn wedding... you'll find fun, unique ideas that might lend an excuse to host an impromptu party!

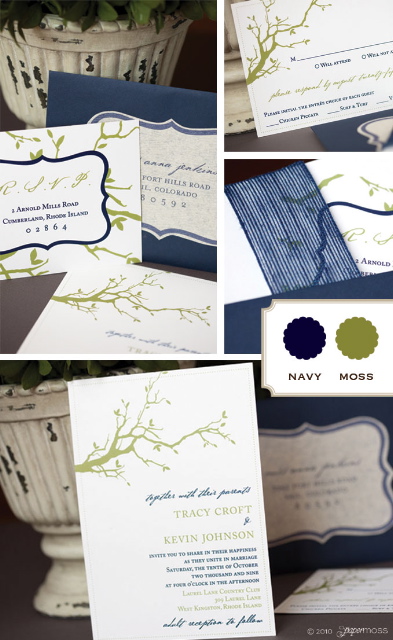
Paper Moss decided to share some ideas to gracefully side - step the stereotypical fall wedding invitation. There are countless ways to create a seasonally appropriate motif without being confined to a fall color palate or standard fall designs {pumpkins, leaves or scarecrows}. Tracy and Kevin's invitation suite is just one of our examples that we share for our part in the Fall Inspiration series.

See the rest and learn how we arrived at each of the final designs. For the full effect, check out our guest post. Thanks She Said Yes, for letting us share our love for paper and design. Blog to you soon! {hahahah, bad joke?}

*Photos courtesy of Laura Ashbrook Photography

A New Art Form

For some people, like our friends at Totally Tabletops {in Seattle, WA}, setting the table is an art. When the holidays roll around, it's easy to focus on perfecting the timing of the cooking, getting the sweet potatoes just right, seasoning that stuffing to perfection and all the other good stuff, but we must not forget about the table! While the holiday is focused around giving thanks, football, food & guests, adding a special touch to the table can add a spark of extravagance. First and foremost, make sure you're setting the table correctly and THEN... be inspired to try your hands at this art form!

{via Totally Tabletops}

{via Christiane Lemieux of Dwell Studio}

{via Martha Stewart}

If you're looking for centerpiece ideas, here are some simple ways that you can spice up candles.

{via BHGGood Housekeeping}

{via Napa Style}

Have fun decorating that table! Happy hosting, folks.

Cookies! {and some Press}

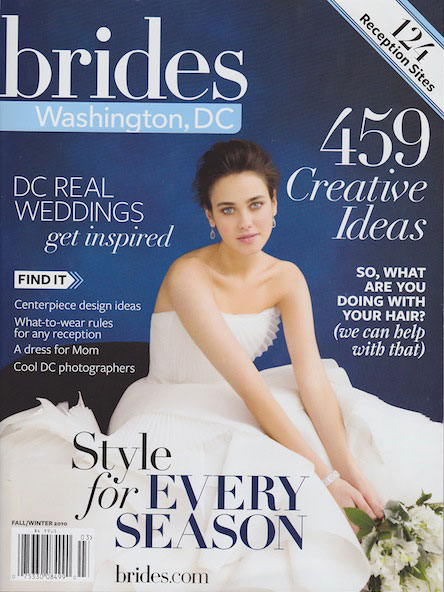
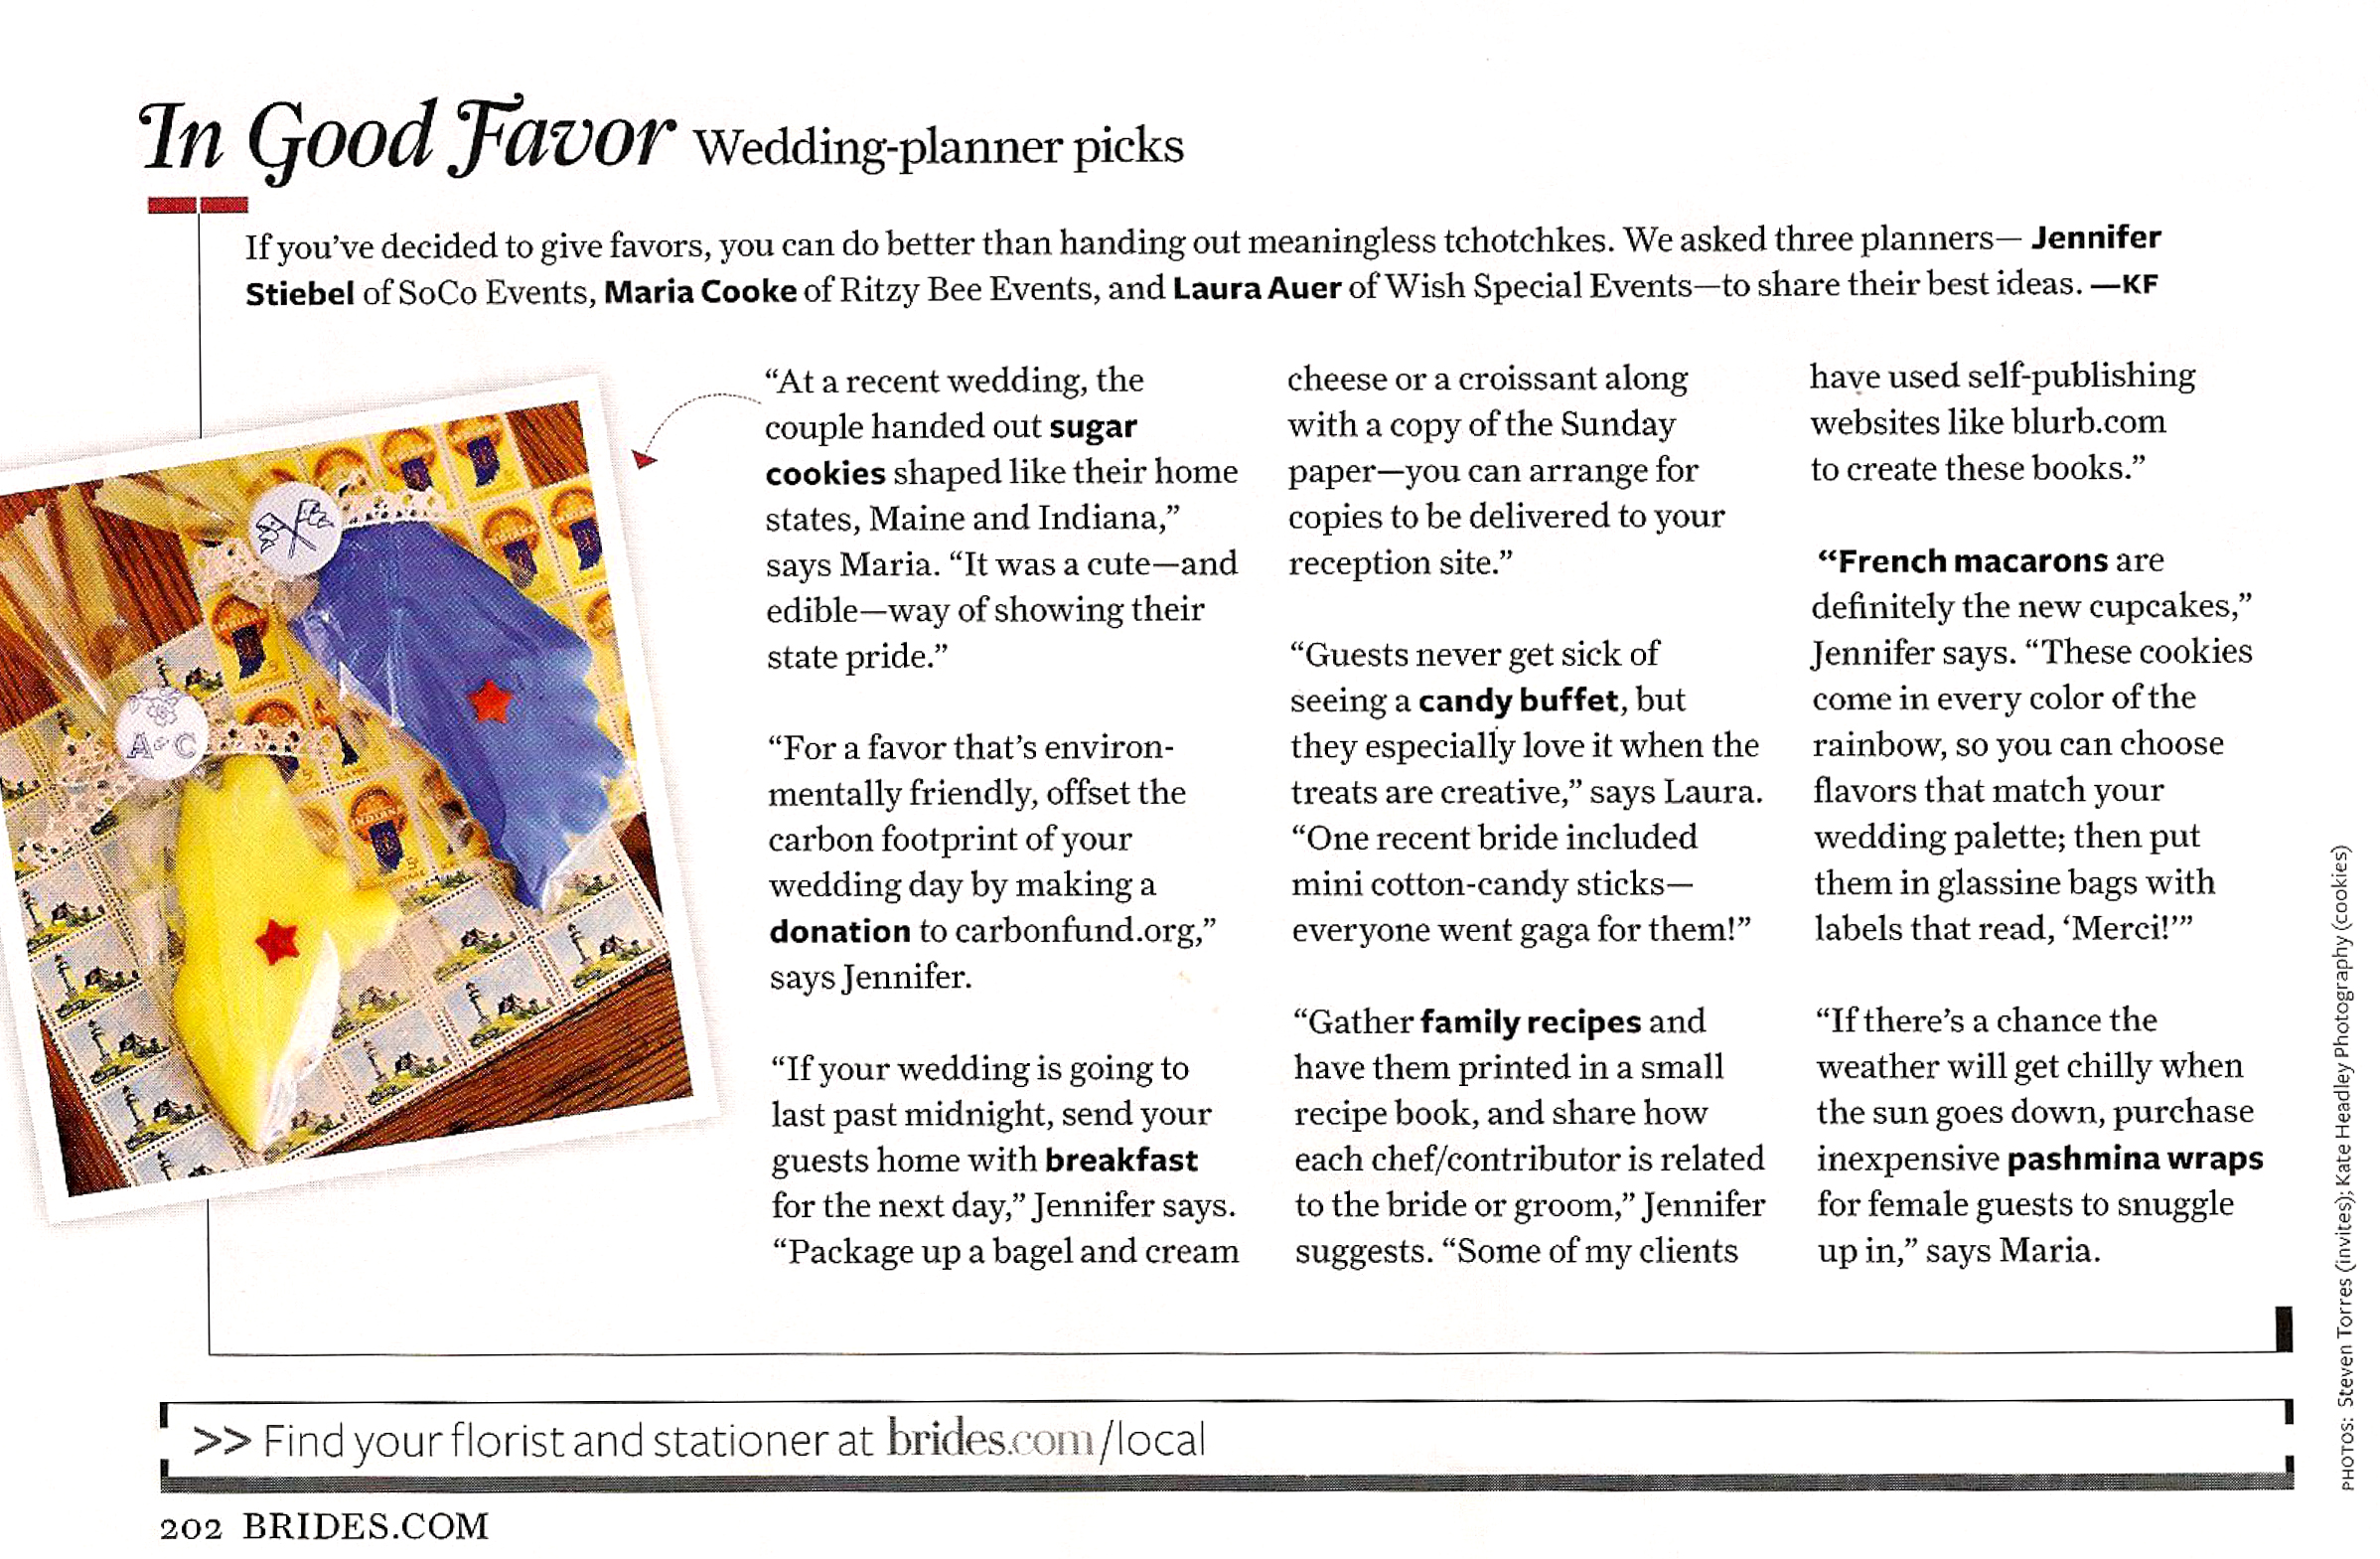
A few weeks back we shared invites and details from a "Vintage Collegiate" wedding. Apparently the buttons we made were popular and Brides Magazine from Washington DC agreed! The bride and groom sent their guests away with cookies in the shapes of the states that they each grew up in. As if the bright, delicious cookies were not cute enough on their own, each bag was fastened with lace and adorned with one of our adorable mini-buttons.

new-BRIDES-dc.jpg

We are so happy that Brides Magazine liked these cute favors and we hope that you do too!

buttons1.jpg
15_Allison_and_Chris.jpeg

Be sure and contact us if you are looking for buttons for your next event!

*Bottom Photo courtesy of Laura Ashbrook Photography

Champagne, champagne!

Celebrations call for champagne! Lets be honest, a little bit of bubbly is festive, fun and really gets the party started. With candy bars and dessert bars becoming commonplace at special events, we have a new "bar crush" on CHAMPAGNE COCKTAIL BARS! Even the name sounds fluffy and delicious!!
Lifestyle and entertainment expert, Kelley Moore takes the complication out of putting one together when she unveils chic options for stemware, delicious types of champagne {not being a champagne connoisseur, this section is ever - so - helpful} and last, some tasty concoctions that will excite those taste buds! As for how to display the table, treat it like any other buffet, varying heights, sizes and colors. Pop over to Kelley Moore's website to get the full scoop on how to do it like a pro.

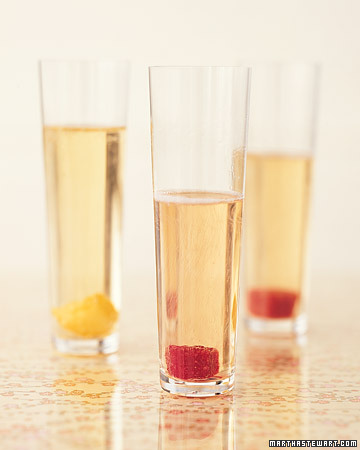
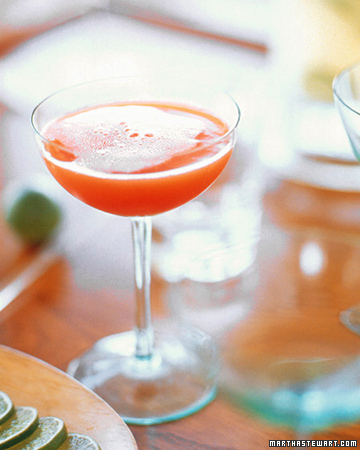
If you're looking for a quick way to add flair, consider one of these ideas from Martha:

{By soaking sugar cubes in fruit puree or concentrate, removing and letting them dry over night, you'll have instant bursts of flavor to pop in the glasses}

{Swap out your standard orange juice with blood orange juice for a unique twist}

Whether you're celebrating a shower, birthday soiree or a wedding... it's better with a little bubbly! Enjoy!

*Photo courtesy of Martha Stewart Living

Put it on a pedestal

Happy Monday!! We hope your weekend was a little rowdy and a lot relaxing. Regardless of the level of sleep deprivation the last few days caused, the start of a new work week is always a chore. So, with coffee in hand, we hope you enjoy and feel inspired by this little gem we found while visiting Bee in our Bonnet. We were so impressed by this D.I.Y. and couldn't resist sharing!! Visit their blog for the step - by - step instructions and to read the sweet story that inspired this project. There's definitely a project in our future... how cute would it be to display pretty cards & stationery on these pedestals in a store front? Hmmm, if only Paper Moss had a retail line... {wink wink}

*photo courtesy of Shandi Marie Photography