Pretty Paper: Stephanie & Marcos

Today we're super pumped to share some details of a modern invitation suite that we just adore. A few weeks ago we were squealing with joy when Stephanie & Marcos' wedding was featured on Style Me Pretty. This wedding, coordinated by the über talented Sarah True of TRUE Event, was phenomenal! Really, truly, if you haven't seen the post yet, hop on over and check it out. Anyway, to give guests a taste of what to expect on their big day, we paired a soft grey letterpress pattern with it contrasting in white foil print on the outer envelope. Through the RSVP envelope and bakers twine, we incorporated pops of lemon yellow which added a punch to the whole suite. And last but not least, we topped it all off with custom postage stamps to tie it all together!! Oh how we LOVE custom postage! :)

We couldn't be more thrilled with how this suite came together and tying the designs into their day of accessories was so much fun! Here are a few little shots that we couldn't resist sharing. :)

*Invitation photos courtesy of Laura Ashbrook Photography; Accessory photos courtesy of Anna Sawin Photography

Invitation stuffing

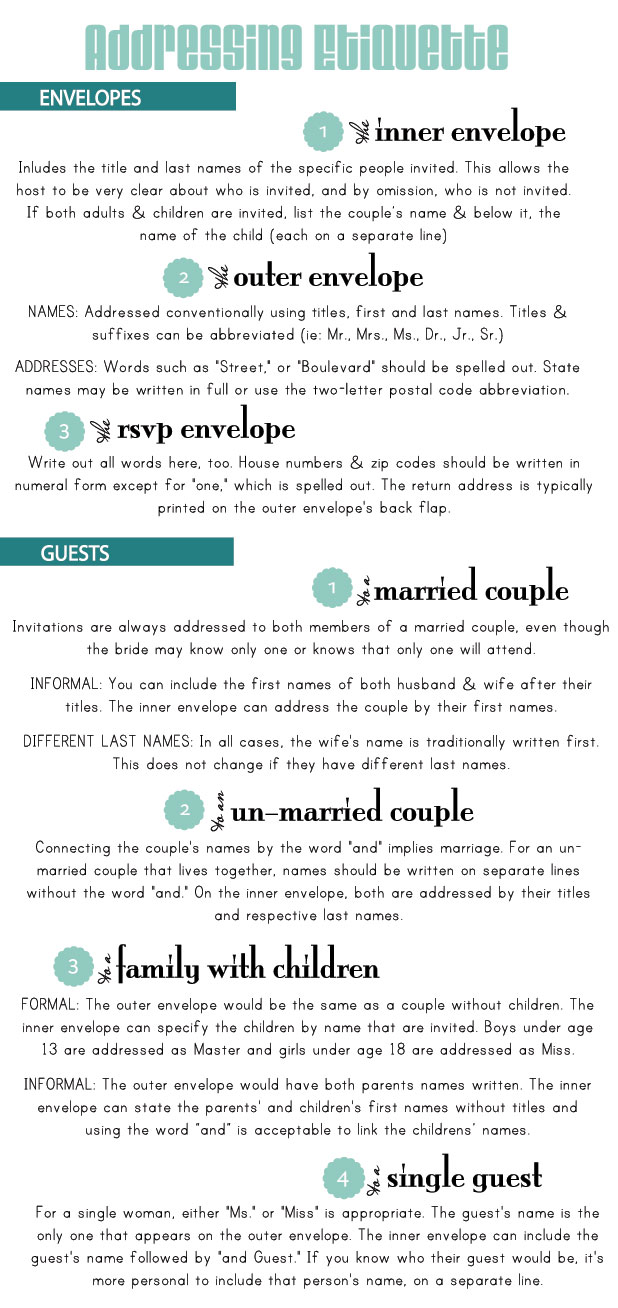
The wedding planning is in full swing and your invitations are en route. After the brainstorming, the custom design rounds, choosing fonts, choosing paper, selecting stamps & arranging for addressing, the time to stuff & send is finally here! Well we figured that rather than making you figure out how to stuff your invites on your own, we'd lend a hand and try to simplify the process. No, it doesn't take a rocket scientist, but there indeed is etiquette involved and that cannot be messed with. Soooo, that being said, here's the scoop:

For more insights and specifications on stuffing, visit Emily Post! Oh, we should also add that once everything has been addressed, assembled and sealed (suggested in that order) we advise that you take back to the post office and drop off by hand to avoid any error. We do not suggest dropping them off in the blue postal bins. One can never be too safe with such pretty paper!!

Addressing those Invitations

We often get questions about the proper etiquette for addressing invitations. If you've decided to hire a calligrapher {we LOVE calligraphy!!}, they are usually knowledgeable in the area and can help guide you through the process. If you've chosen to address them on your own however, these tips from some of our favorite etiquette divas {Emily Post & Martha Stewart} can help nudge you in the right direction. They are both great resources for etiquette in all areas of wedding planning, so if there's something not listed here, don't hesitate to do some research of your own on one of their sites!!

Happy Mailing!!!

Pretty Paper: Kelly & Chris

Today I'm super excited to share one of my {Anna's} favorite invitation suites with you! Last year when we started working with Kelly & Chris, we had no idea the directions their invitation suite designs would take. After drafting a few ideas, nothing quite came to life... until we introduced the sheep. This little icon, reminiscent of the sheep that wander the hills surrounding their wedding venue, was prevalent in their invitations and all of their day-of accessories- we even incorporated sheep confetti in their programs! But truly, I'm most obsessed with their RSVP card that was in the format of a Mad Libs! It must have been so fun to get each of the responses back! Who would have thought that a sheep theme would be so darn cute?!

*All photos courtesy of Laura Ashbrook Photography

Pretty Paper: Metallic orchid & soft white

Somehow our beloved clients, Sarah & Zack managed to dream up the perfect balance of whimsy & modern flair for their big day. If you haven't seen their wedding feature on Style Me Pretty Massachusetts, you must take a peek! We're still swooning over their gorgeous letterpress invitation suite that set the tone for this glamorous event- perfectly combining a geometric pattern, their quirky monogram and a silhouette of the Newport bridge since their wedding was at Belle Mer. Working with this couple was just so much fun and we are beyond excited with the custom stationery we created together. Oh, and those custom stamps... they were that juicy little cherry on top!!

*Photos courtesy of Paper Moss via Laura Ashbrook Photography

Pretty paper wedding bouquets

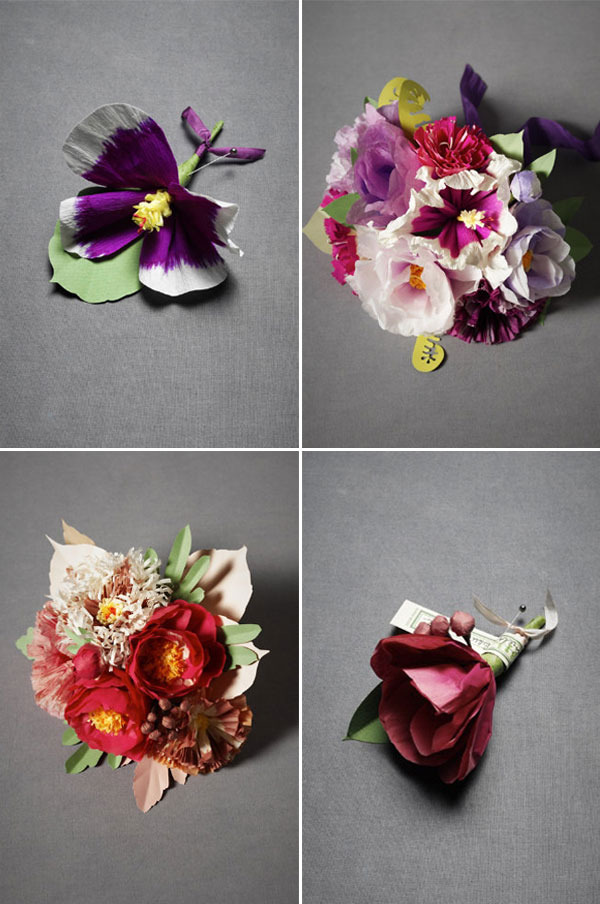
There's no denying that there's something special & sweet about having a bouquet of fresh blooms to accompany you down the aisle, but sadly when allergies get in the way, options are limited. I've talked with several brides who are facing the dilemma of finding a chic alternative either for a bridesmaid, their groom or for their own bouquet. We stumbled upon these gorgeous handmade bouquets from BHLDN and are in love with this alternative idea!  Who would have thought that colored tissue and crepe paper, card stock, floral tape and wire could make such beautiful florals?!

{clockwise from top right: Papered Hibiscus PinPapered Poppy Bouquet;

Papered Camelia PinPapered Peony Bouquet}

*All photos courtesy of BHLDN

Pretty Inviting: Becca & Dan

Today we're so excited to share Becca & Dan's invitation suite that is best defined as 'preppy elegance'. It also happens to involve one of our favorite color combinations right now: navy and fairway green. OH HEAVENS! Just the other day I met with a bride who has some amazing plans up her sleeve with this pantone pair and hearing of her sweet, nautical details just made me giddy!

I digress. Designing this suite with Becca and Dan was such a fun process! The combination of fonts and mix of patterns added just enough variation to keep things formal but still playful. Oh and can I just say, we're still swooning over the green linen paper backing on the invite?! The perfect 'cherry on top'!

*Photos courtesy of Laura Ashbrook Photography

Pretty Inviting: Emily & Justin

We wanted to take this Wedding Wednesday opportunity to share a recent invitation suite that we created for a sweet couple, Emily and Justin. Working with these two was just a blast... in Emily we found a bride to be who loved paper & design every bit as much as we do! Every stage of the custom process was so much fun- from the start of their letterpress invitation suite design, to designing the coordinating accessories and finally, the keepsakes for their wedding. This invitation suite perfectly captured the elegance of their vineyard wedding that would take place at Saltwater Farm Vineyard, in Stonington, CT. Emily's color palette of purplish-blue and silver beautifully complimented the vineyard inspired designs on this double thick, double letterpressed invitation suite. We're still just giddy over how these turned out... and they perfectly set the tone for a wedding was nothing short of breathtaking! Click on the photo below to see the entire wedding featured on Style Me Pretty!


*Photos courtesy of Laura Ashbrook Photography

Weekend Inspiration: V-Day

Hey loves, happy Friday! What sort of fun plans do you have up your sleeves for the weekend? Any adventures in store? We're sticking around the city and have many errands, meetings and catch ups planned... and by "catch ups" I mean sleeping and watching movies that were missed in the theater. SO. EXCITED. With Valentine's Day coming up on Tuesday, some crafting will inevitably be taking place too. Growing up, making valentines was my {Anna's} favorite part about the holiday. I love these fun ideas for cards and other treats to make V-Day a bit more special...

{via}

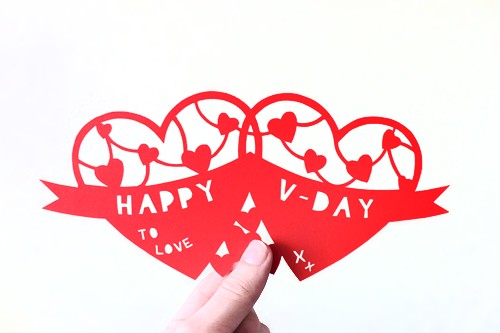
At first glance this card looks way too complicated or fancy to be a DIY, but thanks to Kind Over Matter, we have the step-by-step directions to ensure perfection. Maybe not the best option if you have a long list of valentines to make, but aren't they just amazing?

{via}

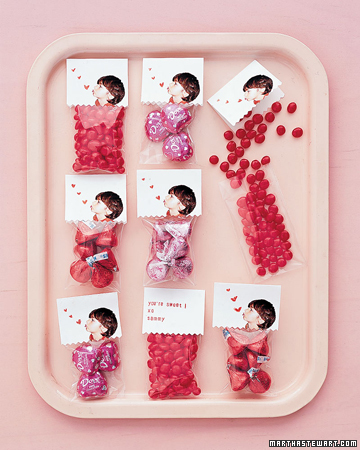
Leave it up to Martha to think of the coolest way to deliver pink and red candy yet still make sure the packaging is personalized. I LOVE these bags and they aren't too labor intensive once you get the photo scanned and printed!

{via}

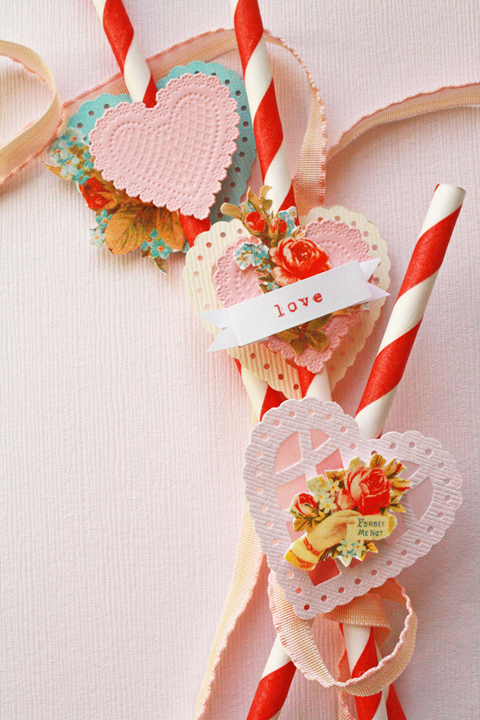
Valentine's Day straws?! I'm a sucker for striped straws {pun intended} and these straw ornaments are so cute! Whether you're making them for a small soiree or your kiddos class, these are definitely one V-day gift that will make an impression. Get the how to here!

{via}

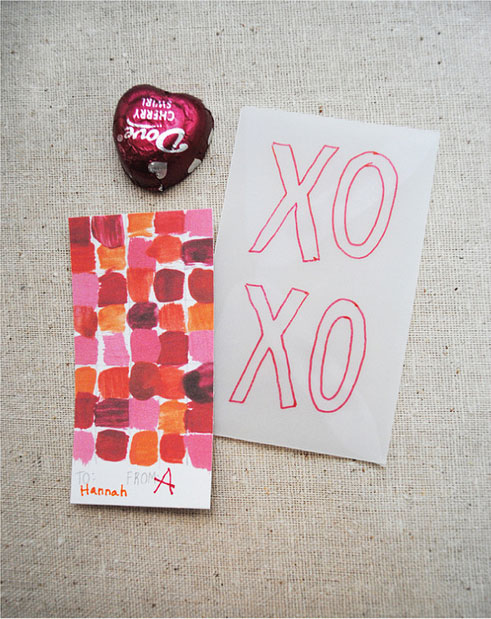
A fancy little fact about these cute cards: this DIY was intended for kids, but they're cute enough for grown ups!!! The mini-vellum envelopes add the perfect touch too, with those bright squares shining through!

So tell me, are you making Valentine's Day cards this year? Yes, it may be a tradition for kiddos, but I don't believe that's a good reason to hold back. :) Call me crazy... but I'm about to get crafting!

Have a fabulous weekend!

Pretty Inviting

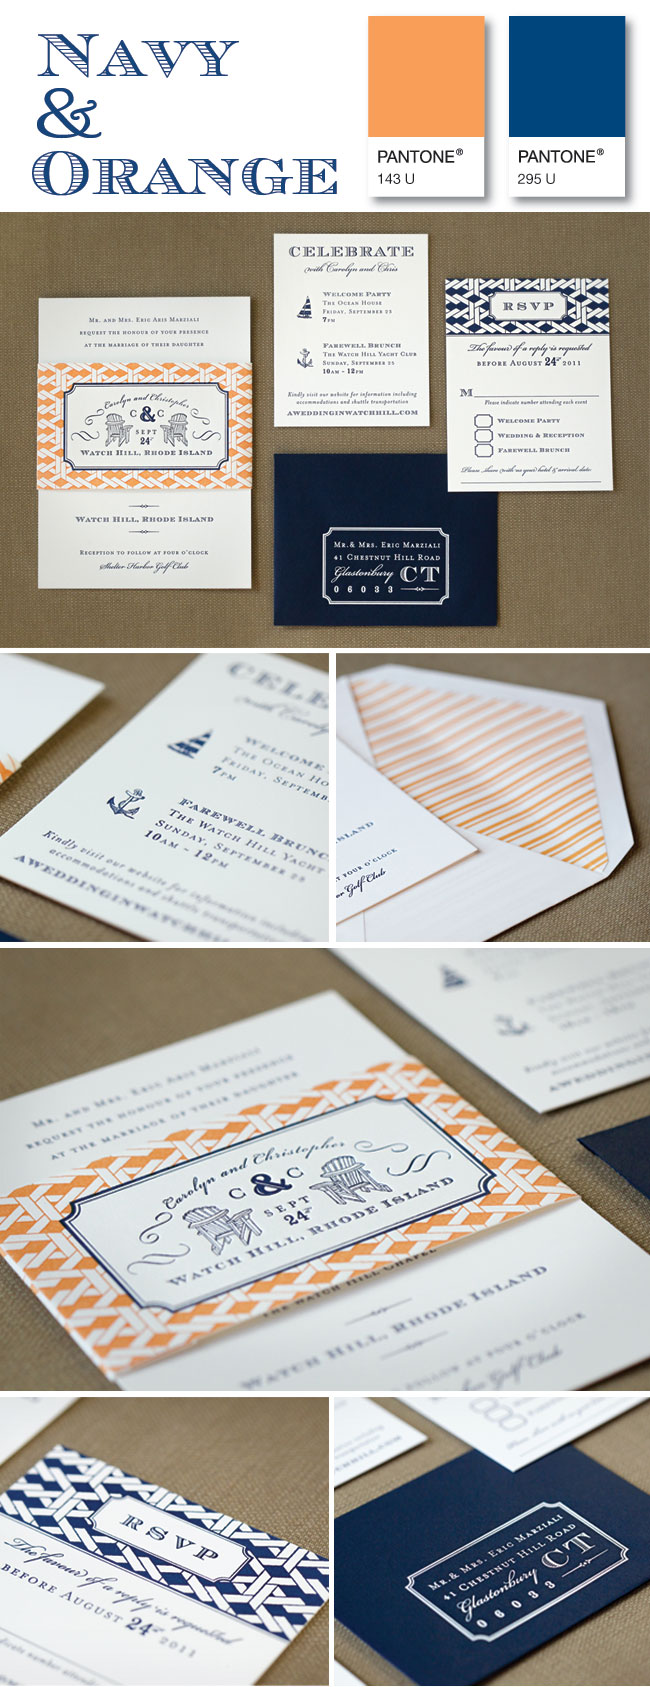
It's Wedding Wednesday {YAY!!!} and we wanted to take this opportunity to share another pattern laden creation... this time however, it was created by us! It was so much fun working with Carolyn and Chris to create their Tory Burch inspired letterpress invitation suite. We sprinkled in some nautical touches to highlight the gorgeous venue they were to be wed at... the Ocean House in Watch Hill, RI. Everything about this suite is screaming of an elegant preppy beach soiree- which is exactly what the wedding was... every last perfect detail. *Photos courtesy of Laura Ashbrook Photography

Happy New Year!

Happy 2012!!! We hope to heavens that you had a magical holiday season and are filled with hope and anticipation for what 2012 has in store. New Years is one of my favorite times to reflect and celebrate the happenings of the past year {both good and bad} and get geared up to tackle those goals for the year to come. Did you make any exciting resolutions this year?! We all know that the first 2 weeks in January are nearly effortless to kick off those resolutions... but after that, the challenge sets in. Speaking from experience, we're determined that this year will be different, and this goal tracker will help with some accountability.

{via}

Brilliant, right? And only $15!

Do you guys have any other ideas to help with keeping those resolutions?

All those old books

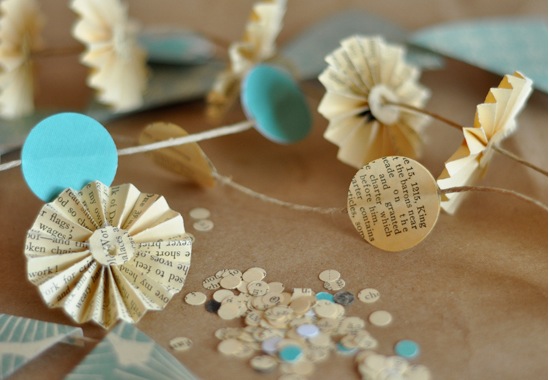
Hello and happy Monday! How was everyone's weekend? While blog hopping over the weekend, we stumbled upon this ADORABLE paper garland from Project Wedding... in fact, it kind of reminds us of the D.I.Y. Envelope Liner that we featured a few weeks ago! Anyway, wouldn't this be a perfect decoration for a rustic chic wedding or event?! It's so stinkin' cute AND {not to mention} made of pretty paper that's covered in stories- call us crazy, but there's something romantic about that. :)

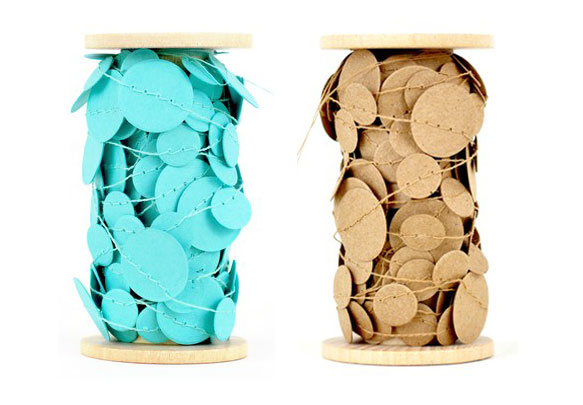
Plus, what a great way of getting rid of old books or sheet music that isn't donation worthy. Visit Project Wedding for the full tutorial. If it seems a bit daunting to make a lot of these little garlands, you can always mix them with solid ones that can be found on Etsy, such as these from Kristina Marie.

* Photos courtesy of Katherine Chong via Project WeddingKristina Marie

DIY: {to die for} Envelope liners!

You are in for an adventure today, my pretties! The sweet & incredibly talented Michelle Peterson is our guest today to share this adorable and easy D.I.Y!! I don't know about you, but envelope liners make my heart skip a beat!! We couldn't be more excited, so here it is from the woman herself: Michelle: As an avid follower of Pearls for Paper, I love all things paper, ribbon, and hand-written. Living in Wisconsin, we were too far away to attend and celebrate our dear friend's son's very special first birthday in Washington. So, when she asked me if I would help with the party planning and make his invitations, I jumped at the chance! We decided on a Mustache Bash.  How silly and adorable for a one year old, right? After several failed attempts at getting just the right pattern to print for the background, I bagged it and grabbed what I had around - an old fairy tale book.

I used these delightful book pages as the background for the invite, and then went one step further to line the envelopes to match. Want to try it?

Here's what you'll need:

- Book pages

- Double sided tape and/or glue

- Paper trimmer

- Envelopes

- A pen

Here are the steps:

1. Tear some book pages.

I used an old damaged copy of Hans Christian Anderson Fairy Tales. You can find some great old books at thrift stores.

2. Measure the book page to your envelope.

I look to make sure the page will be tucked behind the sides of the envelope, but not as wide as the envelope itself.

3. Trim your book page.

Think about cutting off the outside margin, as well as trimming down to the right width. Don't worry about trimming the torn edge, since you'll be tucking that into the envelope. It makes for a cute hand-made surprise if someone looks into the envelope.

undefined

4. Insert the page into the envelope.

Make sure the top ends up just below the glue line and eyeball it to be centered between the two sides.

5. Fold the page with the crease of the envelope.

6. Open the envelope to see the top side of your book page. Apply double stick tape and/or glue.

7. Press and done!

These are soooo cute, right? Thank you, Michelle for being a guest on Pearls for Paper and inspiring our weekend project!

*Photos courtesy of Michelle Peterson

Stamposaurus!

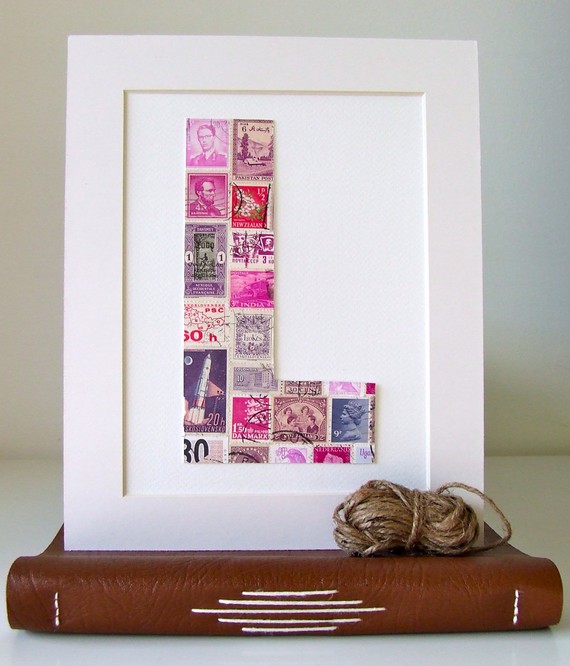
There is something extraordinary about vintage pieces. Knowing something is from an era that is foreign to us and that it has a story behind it is kind of romantic, right? Knowing our love for vintage stamps in particular, a friend of Paper Moss brought these adorable pictures from Stamposaurus to our attention. It was love at first sight! AND if you buy one now, they're still offering 20% off in celebration of the Royal Wedding!!

How can so many fabulous things come out of the UK! :)

*Photo courtesy of Stamposaurus

A new kind of flower power

Plastic flowers are near the top of my hate list. Well, not that a "hate list" actually exists, but if it did, we know where fake flowers stand. Perhaps it was an overindulgence in the 80s and early 90s? Bleh! Well, when a friend mentioned that she was in search of alternatives to fresh flowers for her wedding {due to severe allergies of a bridesmaid} I was excited to come across this idea from A Field Journal. These are pretty stinkin' cute for D.I.Y Flowers! And you know how much we LOVE paper...

For the full scoop on how to make these, visit The Brides Cafe. Loving this as a plastic flower alternative!!

*Photos courtesy of A Field Journal

Color Crush: Black, White & Beige

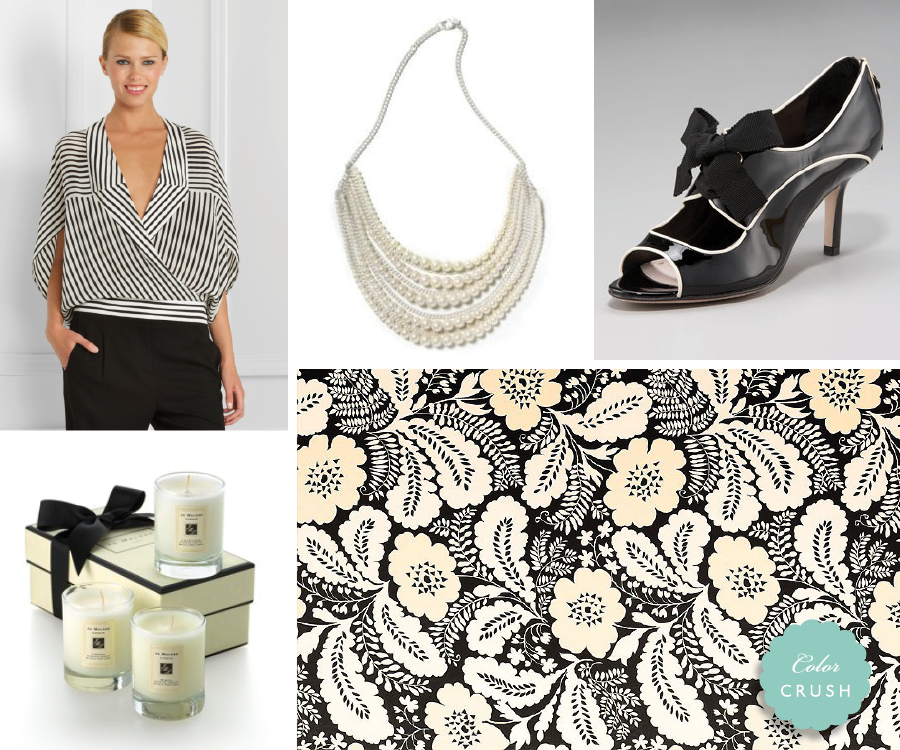
Black and white color combo has always and will always be classic, but add a little beige and we. are. in. love. You just can't go wrong. Below is one of our favorite invite suites - so simple & chic with gorgeous hand calligraphy by Larry Orlando.
Color Crush collage: clockwise from upper left: 1 / 2 / 3 / 4 / 5

*Photos courtesy of corresponding websites

*Invite photos by Laura Ashbrook Photography

DIY: old books = new art

Considering how much we love paper, it shouldn't come as a surprise that we were, well, attracted to this DIY we saw on the Jones Design Company blog. How can you resist? We are dying to get our hands on some old books of poetry and music sheets to compile a collage for our own walls. To see the step - by - step directions for how to transform this:

To this: Visit the Jones Design Blog... and plan to get distracted :)

Write those Resolutions

Happy New Year, everyone!! We are so excited to finally welcome 2011- some beautiful things are on the agenda for this year. We found this cute book and think it’s a great way to keep track of each year’s happenings. Perhaps this could be a new resolution - to track resolutions? Not a bad idea…

This little gem can be found at Paper Source. Feel free to share your resolutions with us so we can cheer you on!

*Photo courtesy of robayre.com

Favorite posts from 2010: No. 3

Here's a look back at another one of our faves...

The Evolution of an Invitation

Anything custom requires more time and attention than something mass-produced. In fashion-speak, it's the "haute couture" of stationery, while pre-made designs are equivalent to the ready-to-wear. Paper Moss has been custom since its first breath. There is something so satisfying about working with clients to make their vision a reality. The design process goes through many "renovations" to finally achieve the look that our brides and grooms are dreaming of.

When we first sat down with {bride to be} Mary Jo, she mentioned her love of Paris and the time she spent abroad. As the conversation evolved and we learned more about her and her honey, it only seemed natural to aim for a "Vintage Parisian" look for their invitation suite... without being cliche. Since we all needed a little inspiration, she sent these photos to inspire designs:

After identifying their color palette, discussing fonts, deciding on the type and weight of paper and getting a general idea of what they wanted, designs for Mary Jo and Paul began. In the first round, we included several options that the bride and groom evaluate and give feedback on. We pulled characteristics from one and add them to another, flip things around, make one design smaller or another less detailed... the list goes on! Here are some of their initial designs:

Sparing the details of the back and forth, the questions, the answers, the tweaking, the perfecting, the printing and yadda yadda, you get the point... their final product fit the bill! PUN intended! Our bride and groom both adored their invitation suite and we were gladly able to accommodate the budget they were working with.

And here is their final "Vintage Parisian" wedding invitation...

And that friends, is how a custom invitation evolves!

*Invite photos courtesy of Laura Ashbrook Photography

That's a Wrap!

If giving gifts is one of the greatest parts about this season, then wrapping gifts may be the second! It’s no secret that we’ve loved ribbons, bows and pretty paper since we were young, but only recently was it brought to our attention that we can be a little O.C.D about holiday wrapping. In our defense, we aren’t the only one’s who choose a color palate each year for giftwrap. Martha does it too.

Here are a few fun ideas to make the outside of your holiday gifts a little more special. It’s what’s on the inside that counts, but the outside should not be forgotten!

Add some mini ornaments or other funky, personalized goodies to enhance the bow.

{via Baraini Diva}

Add some texture with non-traditional ribbon such as yarn, raffia, fabric... the possibilities are endless!

{via Bugs and Fishes}

Or, spice things up by skipping a bow and creating a pattern and adding texture by weaving ribbon.

{via Martha Stewart}

Keeping with the concept of skipping a bow all together, how cute are these letter pressed buckles?!

{via d.Sharpe}

Lastly, check out some cute patterned containers or wrap a strip of ribbon or paper around a plain metal jar & treat it like a box! Don't you just love the toppers on this one?!

{via BHG}

Happy wrapping!!