DIY: {to die for} Envelope liners!

You are in for an adventure today, my pretties! The sweet & incredibly talented Michelle Peterson is our guest today to share this adorable and easy D.I.Y!! I don't know about you, but envelope liners make my heart skip a beat!! We couldn't be more excited, so here it is from the woman herself: Michelle: As an avid follower of Pearls for Paper, I love all things paper, ribbon, and hand-written. Living in Wisconsin, we were too far away to attend and celebrate our dear friend's son's very special first birthday in Washington. So, when she asked me if I would help with the party planning and make his invitations, I jumped at the chance! We decided on a Mustache Bash.  How silly and adorable for a one year old, right? After several failed attempts at getting just the right pattern to print for the background, I bagged it and grabbed what I had around - an old fairy tale book.

I used these delightful book pages as the background for the invite, and then went one step further to line the envelopes to match. Want to try it?

Here's what you'll need:

- Book pages

- Double sided tape and/or glue

- Paper trimmer

- Envelopes

- A pen

Here are the steps:

1. Tear some book pages.

I used an old damaged copy of Hans Christian Anderson Fairy Tales. You can find some great old books at thrift stores.

2. Measure the book page to your envelope.

I look to make sure the page will be tucked behind the sides of the envelope, but not as wide as the envelope itself.

3. Trim your book page.

Think about cutting off the outside margin, as well as trimming down to the right width. Don't worry about trimming the torn edge, since you'll be tucking that into the envelope. It makes for a cute hand-made surprise if someone looks into the envelope.

undefined

4. Insert the page into the envelope.

Make sure the top ends up just below the glue line and eyeball it to be centered between the two sides.

5. Fold the page with the crease of the envelope.

6. Open the envelope to see the top side of your book page. Apply double stick tape and/or glue.

7. Press and done!

These are soooo cute, right? Thank you, Michelle for being a guest on Pearls for Paper and inspiring our weekend project!

*Photos courtesy of Michelle Peterson
Hello, Evangeline

Several months ago, a dear friend of ours {on a whim} impulsively bought the Metallic Evangeline- quite possibly the best purchase of her life to date. It's a bronzy-gold shade of perfection and frankly: jaws drop, strangers stare and hearts sing when Evangeline is out. Yes, it's that amazing. Imagine our joy when we saw this little lady {Burnside Avenue Metallic Evangeline} that Kate introduced this summer. We're adding this little lady to the loooooong list of things we're lusting after from Kate Spade.

*Photo courtesy of Kate Spade

Baby got back

One trend that we've been adoring lately is backless wedding gowns. Seriously, it might just be the classiest way to show some skin and add variation in a way other than through the neckline or sleeves/straps. Whether you want a sleek, classic silhouette or full, romantic gathers of fabric, a backless {or low back} dress adds so much elegance! Don't you agree? Especially like this first one- covered in lace! Love! undefined

{via}

{via}

undefined

{via}

{via}

{via}

Just stop

Yes, it's sick to think about, but Fall will be here before we know it. As charming as the season can be in New England, it's so hard to welcome it with genuine excitement. So alas, we focus on the seasonally appropriate shoes. Meet these Peekaboo Slingbacks from Madewell- part of what is easing the idea that summer might be disappearing before it actually arrives. Cute, sassy & smart! They're unlike any shoes we own, but seriously, we love these!!

*Photo courtesy of Madewell

What makes a party?

Having people over to celebrate the 4th? Well, there are a few things that can transform a "get-together" into a PARTY! Without going over the top to rent dishes or have it catered, here are five easy ways to turn a festive 4th get-together into a party:

1. Invitations

It shouldn't come as a surprise to you that INVITATIONS might be first on our list. There are plenty of {non-custom} stationery companies that make adorable invites for occasions such as a BBQ. {Please note that Paper Moss is more than happy to design custom invitations for your upcoming BBQ, if needed :)}

{We like these from Jack & Ella Paper Press}

2. Signature cocktail

Do it. Go above, go beyond and think of a catchy little name for a signature cocktail! Your guests will LOVE it. If kids are coming, make a signature kid friendly drink for them too. We suggest the Patriotic Margarita or Berry Splash for the kiddos. Seriously- Check. These. Out. :)

{via}

3. Extra little touches

Adding little decorative things like center pieces, drink umbrellas or signs for the food can spice things up a lot. Hostess with the Mostess even offers free designs that you can print out at home. Check out their patriotic parasols and party signs like these:

{via}

So cute, free and super easy! You could even mount these signs on thick paper or laminate them to give a more polished look!

4. Party favors

Don't you remember diving in to goody bags at birthday parties as a child? Well it might not be quite as fun as when we were five, but still... guests will delight in party favors ESPECIALLY if they involve matches. Guaranteed. The folks over at Twig & Thistle were really on to something when they came up with the template for these sparkler holders:

{You can find the template here}

5. Games

For a 4th of July party, go with a classic yard game like bocce ball. If you don't already have a set, hop over to Pottery Barn and score this sassy one:

{via}


Whatever fun plans you have to celebrate independence day, we hope you have a fabulous {and safe} long weekend!

With "something blue" in hand

If those Louboutin's from Tuesday Shoesday aren't your cup of tea & you're still on the search for "something blue", maybe opting for one of these is a better bet? Can you believe the range of shades, textures & shapes clutches are coming in these days? What an adorable way to tie in those wedding colors... and you'd probably find yourself using one of these zesty little numbers quite often!

{Clockwise from top: Kara Ross; Menbur Apperleya; Kara Ross; Avance Belloto}

*Photos courtesy of Endless

Wedding inspiration: Soft blue & rich red

A red, white & blue wedding? Yes... it IS possible to embrace this color palette without feeling like Uncle Sam might pop out of the cake. :) Feast your eyes on this inspiration board- filled with a vintage flair & laced with touches of modern elegance. By taking a soft blue and rich red tones, we succeeded in dodging a patriotic feeling! What do you guys think about the combo? Would you ever have a red, white & blue wedding?

{Clockwise from top: Utah Bride Blog; Staircase; Martha Stewart; Lucida Photography}

{Clockwise from top: Paper Moss; Pen & Paper Flowers; Paper Moss; Erin Reynolds Photography}

And after a day full of patriotic flair, what better way to end than with a gigantic, loud & sparkly BOOM...?!

{via}

Something Sparkly

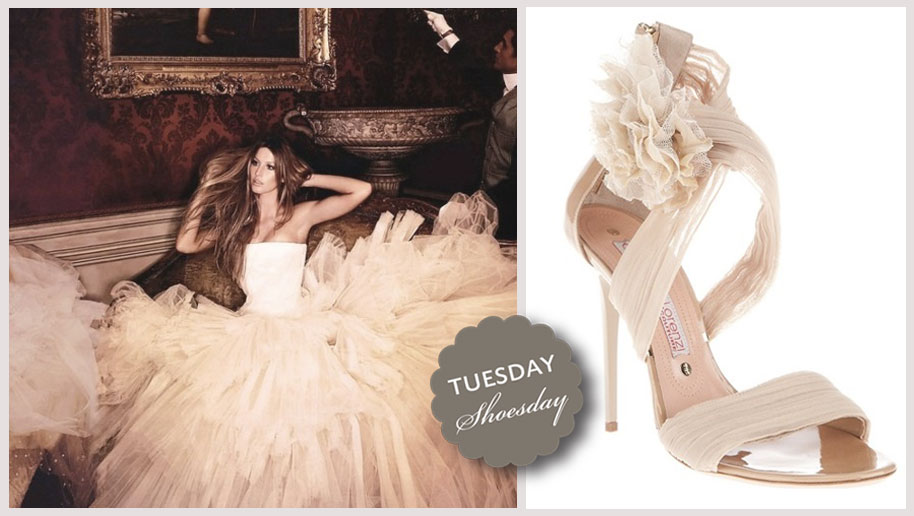
Obviously, every bride needs that "something blue". Are you on the hunt? While you're at it, you might as well use this opportunity to score a pair of Christian Louboutin's, right?? The good news is that these saucy heels are certianly classified as that "something blue", however the bad news is that the likelihood of being able to wear them again is pretty small. Unless, maybe they're perfect for a walk in the park? Going out for FroYo? A gala? Perhaps you don't need an occasion to wear these... maybe wearing them IS the occasion?

{via}

Plus, while we're gearing up to be patriotic next week, these kind of reminds us of fireworks...

{via}

A festive little refresher

Can you believe the 4th of July is a week from today?!  After checking out the weather report for this week, we're anticipating some much needed sunshine so naturally, we have barbecues, block parties and fireworks on the mind!! It's only appropriate to enjoy a refreshing beverage such as this Fruit Tea Cocktail, during a hot summer afternoon.

Ingredients:

1 1/2 parts green apple vodka 1 1/2 parts raspberry iced tea 1 1/2 parts ginger ale lemon wedges

They also suggested adding frozen raspberries, but we think adding more fruit for a "sangria influence" would be yummy :)

Directions:

In order, add vodka, iced tea, and ginger ale to glass over ice. Stir gently to combine. Squeeze lemon wedge over, and add to drink. If you decide to add more fruit, let it marinate for several hours prior to serving.

Having people over this week? If you want to get really festive, you could add a cute little drink stirrer like these mini-pinwheels we found on Joy Ever After, to get in the mood for Independence Day! This DIY is super easy and such a fun touch for your guests!

{D.I.Y.}

*Photos courtesy of Erin's Food Files & Joy Ever After

Classy cakes

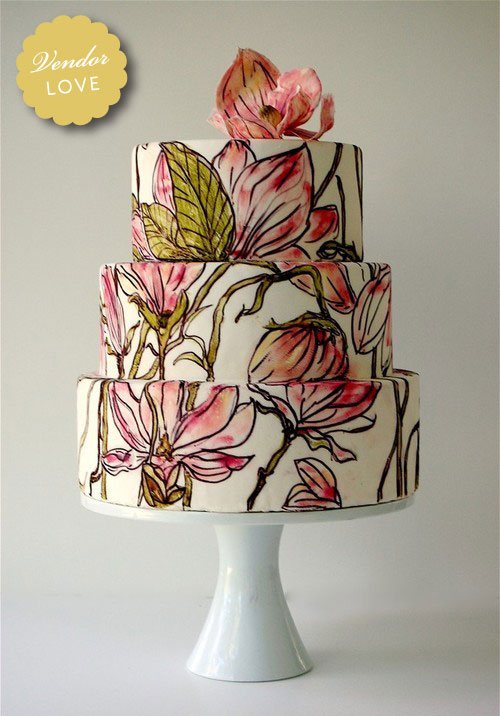
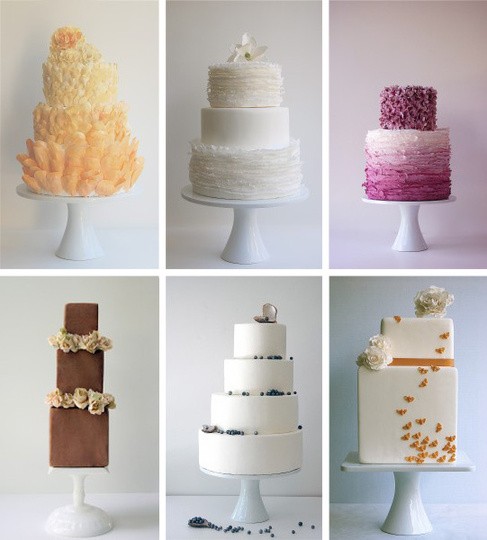
Have you ever come across something that is too beautiful to eat? Maybe it sounds silly, but we're serious! While perusing wedding mags & blog hopping these last few months, we have come across some of the most striking cakes by Washington DC based, Maggie Austin Cake. While we're all about appreciating different art forms, this one tugs at our heart strings just a little. We hear however, that they taste just as delectable as they look.

Never in our right mind did we imagine a time that looking at cake would be a fun as eating it. Which one would you choose??

undefined *Photos courtesy of Maggie Austin Cake via The Kitchen

Wave those banners!

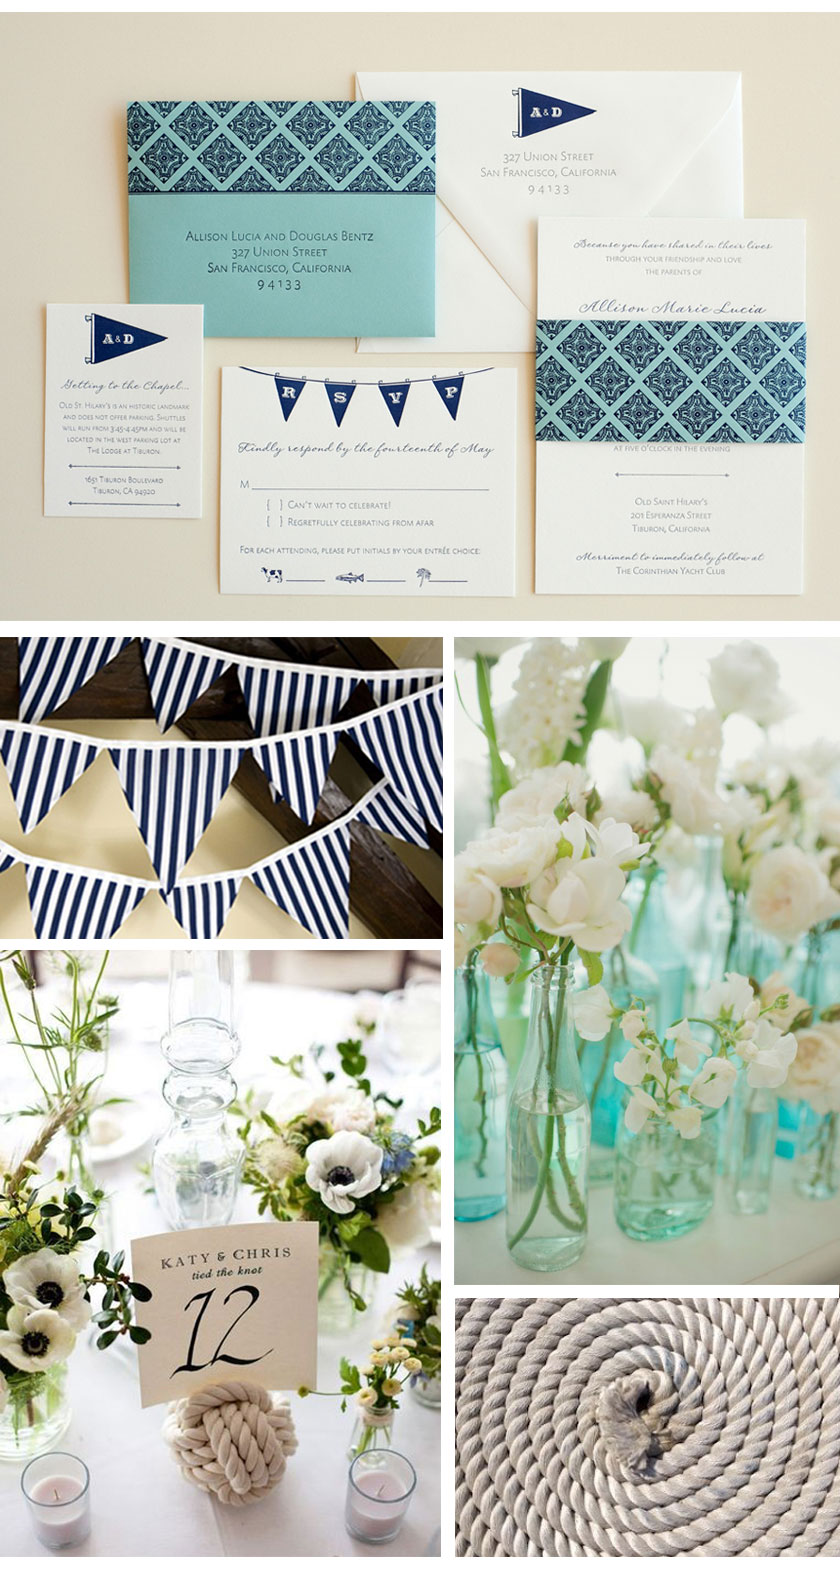
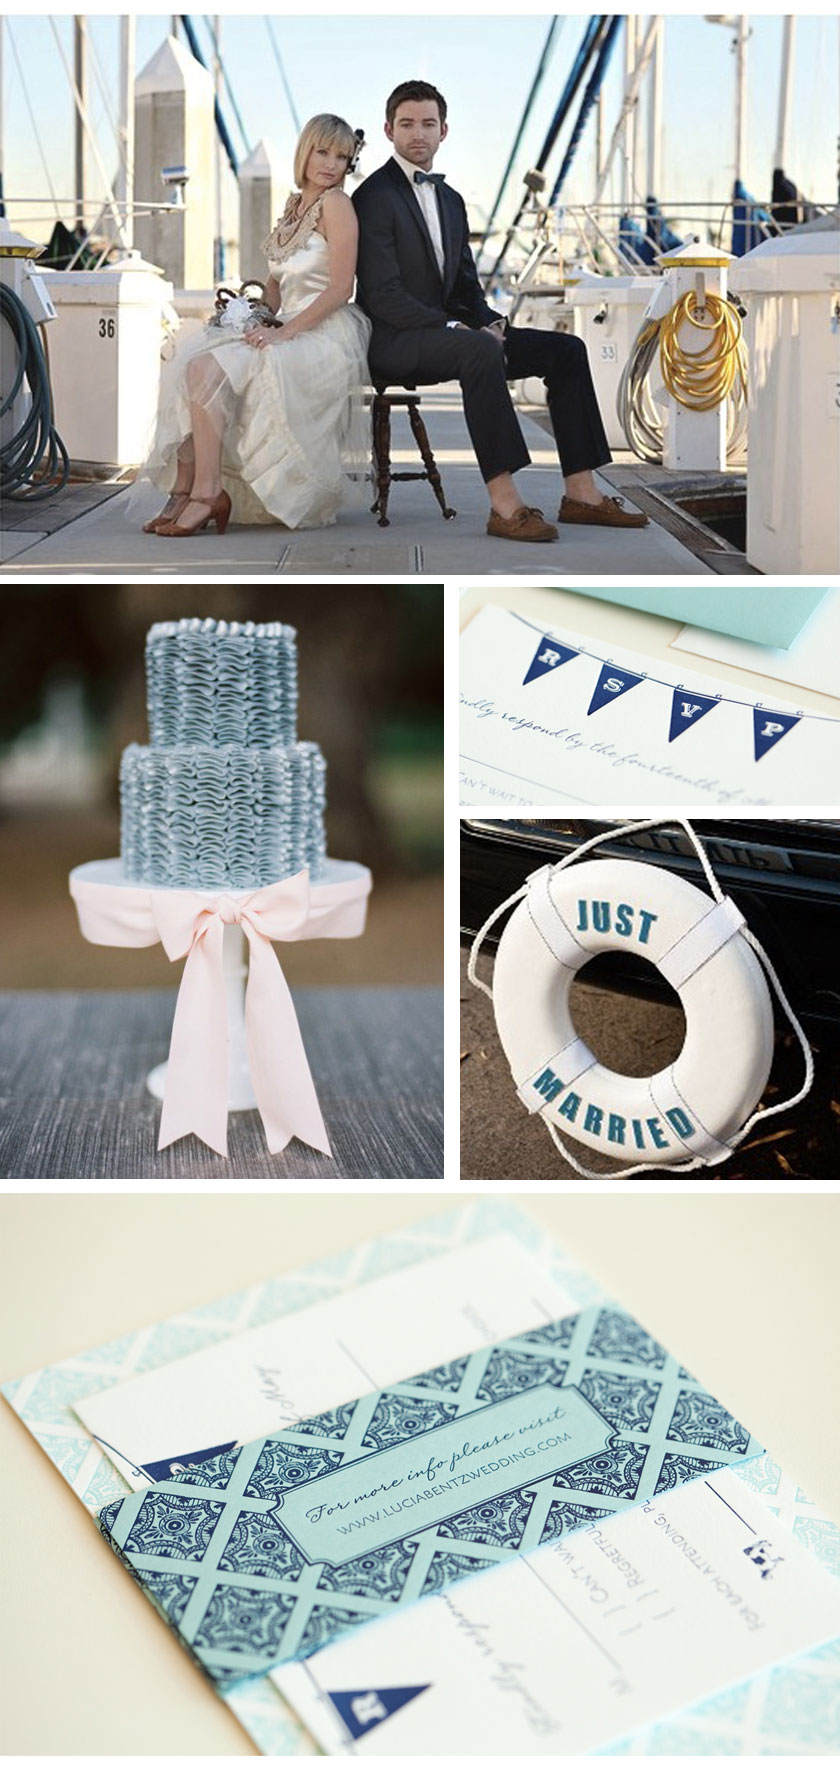
Letterpress, the color blue & all things nautical... these are a few of our favorite things. We were thrilled that while working with Allison and Doug, their custom design process led us to this crisp and classic invitation suite. Their wedding is actually this weekend and we couldn't resist putting together this little inspiration board in their honor!! undefined

{clockwise from top: Paper Moss; Style Me Pretty; Rope; Ritzy Bee; Betty and Barclay}undefined

{clockwise from top: Jasmine Star Photography; Paper Moss; Style Me Pretty; Paper MossWedding Whimsy}

A huge congratulations to the happy couple as their festivities begin!

*Paper Moss photos courtesy of Laura Ashbrook Photography

Monday, Monday!

How was your weekend?? We want to officially welcome you to Monday with some gentle words of wisdom that have been sitting with us for a while now. undefined

Yes, these words ring true especially on a Monday- the day of all days that is loaded with left over sleepies from the weekend, extra to-dos on the list and the nervous hope for a good week. If things get stressful this week, pause and remember that even the smallest things can make a huge difference.

undefined

Happy Monday, lovelies!!

xo


*Photos courtesy of Everything FabLily Lemontree

More chevron, please!

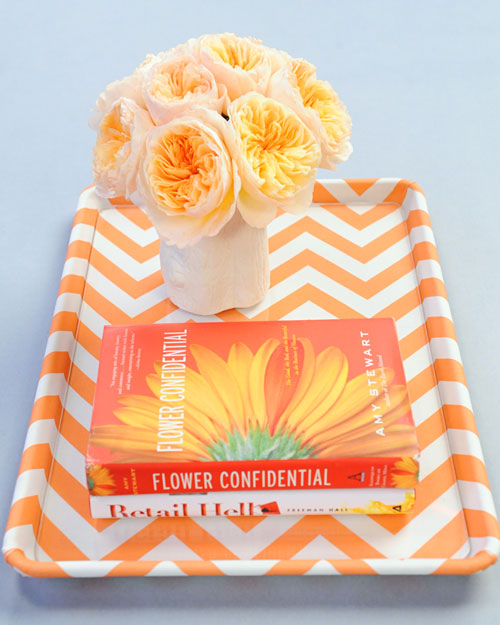
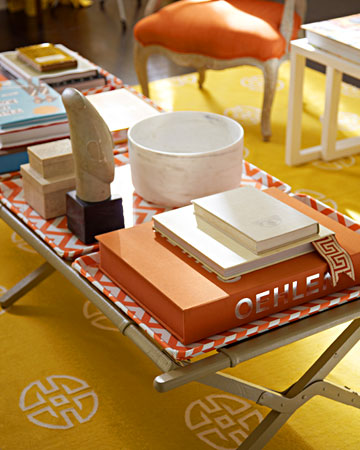
You may have caught on that we are obsessing over the Chevron pattern lately. Who'd have thought that after all those years of staring at the Chevron gas station sign, it would materialize into something so pretty?! In the spirit of spring cleaning, moving & getting organized, this saucy little chevron printed tray started calling our names...

So naturally, we must obey and attempt to D.I.O.S {Do It Our Self}... and if you'd like to D.I.Y, here is the how to:

You'll need:

1 yard decorative fabric

Aluminum rimmed baking sheet {yes, a COOKIE SHEET!}

Spray adhesive

Scissors

Fabric glue

Synthetic felt

1/4-inch-thick acrylic sheet cut to fit inside of tray, with corners rounded

{the hardest part might be choosing the fabric!}

"How to":

1. Cut fabric large enough to cover the front and wrap around the back of the baking tray. Cover the front of the tray with spray adhesive.

2. Place fabric on tray so pattern is aligned, leaving enough room to wrap fabric around all sides to the back. Smooth fabric onto tray, pressing out any bubbles.

3. Pull any extra material into corner and push around the edge. Turn tray over. Cover the back of the tray with spray adhesive.

4. Press the fabric over two edges of the tray first, then fold in on each remaining side, as if wrapping a gift. Trim any excess fabric with scissors. Use fabric glue to secure, if needed.

5. Cut a piece of felt to fit the back of the tray and conceal fabric edges. Smooth felt on the back the tray.

6. Place acrylic sheet in center of tray.

*Photos courtesy of Martha Stewart; Premier Fabrics

Going Vegan

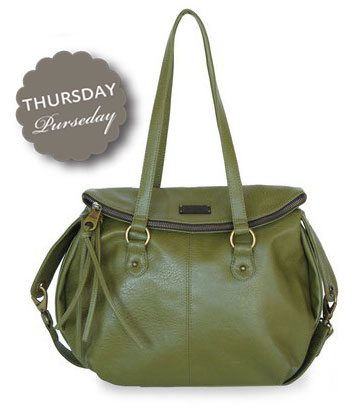
The one time we went to a Vegan restaurant, we were actually delightfully surprised. Things were not as bad as what had been imagined all those years. Even still, going Vegan is not a commitment we're about to make- in the food category, that is. We just can't give up meats, cheese or ice cream!!! Purses are a different story. Take this gem by Matt & Nat for instance... soft, beautiful and VEGAN!

{Nico}

*Photo courtesy of Matt & Nat

A little of this & s'more of that

A childhood classic... A sign of the times... A chocolatey crunchy combination with just the right amount of goo... yes, S'mores. Of all of the ideas for customizing food {or building an interactive display} at an event, we are head over heels in LOVE with the ideas of a literal S'mores Bar. Jennifer from Cookie Creatives came up with the most stellar of them all.

I mean seriously, flavored marshmallows? White chocolate? Toppings such as toasted coconut? OMG, let's try out some of these combos ASAP and have some people over!

Anyone planning a summer wedding or shower?? :)

*Photos courtesy of Cookie Creatives

Congrats Kit & Nate

Seems like yesterday Paper Moss clients Kit & Nate tied the knot! Designing their letterpress invitation suite was just so much fun-- and the color combo {one of the greatest for the season} paired with their designs was perfect! We think their invitations scream three words: happy, fun & classy... just like the couple :) Click on the photo below to view their beautiful wedding on, the one and only, Style Me Pretty!

Kit-and-Nate.jpg

Congrats to Kit & Nate! We hope that your big day was beautiful and we wish you both the best!!!

*Photos courtesy of Laura Ashbrook Photography